The Brightspace Group Tool enables you to divide the entire class into groups or to group only some of the students. You can group students for administrative purposes or to have them work on assignments together. You can group students manually, automatically divide students into groups or let them self-enroll in groups.
Tip: If you want to have self-enrollment groups with different sizes or if you want to have a waitlist, you can use the Group Self Enrollment Tool.
Creating groups
- Go to Course Admin and click on Groups, or simply click on Collaboration and select Groups in the navigation bar.
- Create a New Category, give it a Name and fill in a Description.
Be aware of the fact that after publishing the groups, the description is no longer visible to students.
- Choose the Enrollment type. The following options are available: groups with manual enrollment and groups with self enrollment.
The Restrict Enrollments To option allows instructors and course managers to restrict Group enrollment by groups. This option is used when creating subgroups. Please scroll down for more information in how to do this.
- Optionally define Advanced Properties.
These differ per enrollment type. You can find more information in the accordions about Groups with manual enrollment and Groups with self enrollment below. - Complete the fields provided and give the Group a name (prefix), for example ‘Workshop’.
Brightspace will then create groups called ‘Workshop 1’, ‘Workshop 2’, and ‘Workshop 3’. You can change these names to be something more specific, for example, ‘Monday Workshop’, or ‘Solar Energy Workshop’. - Decide if you want to make Lockers, Discussion areas and Assignment submission folders available.
This will depend on the purpose of the groups. - Click Save.
It is possible to create one or more subgroups within a specific group. Imagining an instructor needs to create 5 subgroups, with max. capacity of 2 students, within the Workshop Group 1.
- Start by creating a new group category as described above.
- Give it a title, for instance,”Workshop Group 1 Subgroups”.
- After defining the type of group, the number of students and capacity, as described above, it is important to restrict enrollment to the members of Workshop Group 1. This way, only the students that are enrolled in Workshop Group 1 will be able to find and enroll in the groups belonging to ”Workshop Group 1 Subgroups”. You will notice that it will possible to apply only one enrollment restriction and that once the group is selected, it will add the title of the selected group automatically to the Group Prefix field.

- Save and close when you are done with creating your group.
Once the groups are created you can modify their Names and add a Description to each. Next, you can Enroll students in the Group as per described below. If you wish to switch a student from one group to another, you can easily do this by following the instructions described in step 4.
- Go to Course Admin and click on Groups, or simply click on Collaboration and select Groups in the navigation bar.
- Click the Group name to find the options View Enrollment and Enroll Users

- Click on the Enroll Users button.
Here you will find the option to Filter the list of students according to those who are currently enrolled or not enrolled in a group. You can also come back to this field later to change the group members.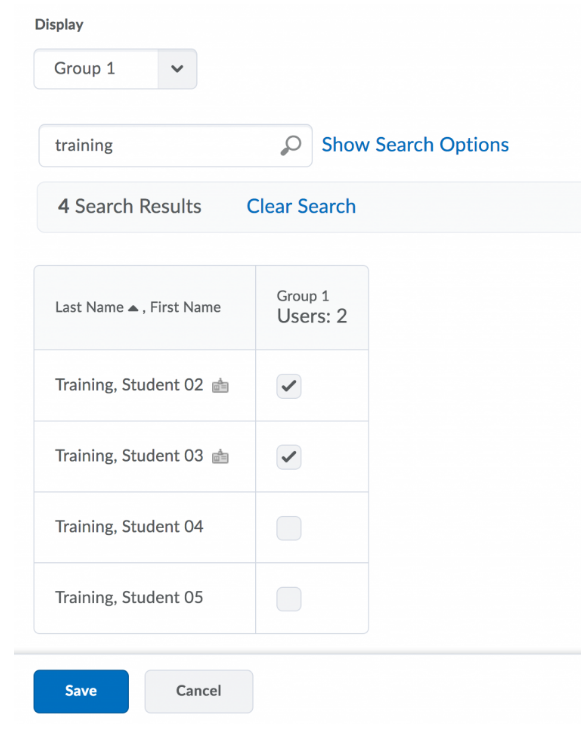
- In Groups, click the dropdown menu of the group category and select Enroll users. This will open a new page with all group Enrollments where you can easily change students from one group to another.
If you create large groups, the list of group members can be very long and may not show the entire class on one page. Simply click to go to the next page, for example, 2/3, 3/3 etc.
Enrollment types
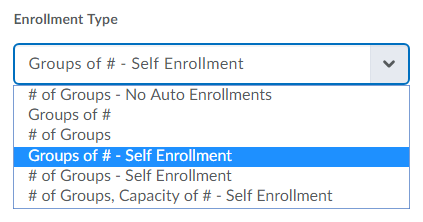
The Enrollment Type dropdown menu lists the existing types of group membership. The first three listed options are the ones where you as the instructor or teaching assistant manually assign students into the groups.

The Enrollment Type dropdown menu lists the existing types of group membership. The last three listed options are the ones where students can choose to enroll themselves in a group.
- If you select any of these options, students also have the ability to un-enroll from the group and re-enroll themselves in another. There is a start date and cut-off date and time by which they need to do so, you can set an expiry date until when students can choose to self-enroll.
- When you create a group with self-enrollment, you can set the start date and a deadline for students to decide which group they want to be in within the Advanced Properties. You can let the system enroll the remaining students once the deadline has been reached.

- The capacity of self-enrollment groups can be changed after they are created, and prior to the group sign-up expiry date. Decreasing a group size to an amount smaller than has already signed up for a group will not re-allocate users to other groups.
Sharing files in a group
- Select Groups from the navigation bar.
- Click on the dropdown next to the group’s category name, and then click on Edit Category.
- Scroll to the bottom of the page, and there you see Setup Lockers.
- Select the checkbox, and then click on Save.
 If you are setting groups from the very beginning, this option is available as part of the set up procedure.
Once you have set up the lockers, let’s try to access them now, as the instructor.
- Click on Groups, and then go to the category you wish to view.
- There you will see listed the names of all the groups, and you can access all their lockers individually, by clicking on the link to go into it.
For students, this will appear the same, but they will only see their own group, of course. Instructors see all the groups.
Group Communication
- Go to the Groups tool under the Collaboration tab.
- Find the group category and the group you wish to email.
- Check the box next to the group’s name and click on the Email icon, at the top of the menu.
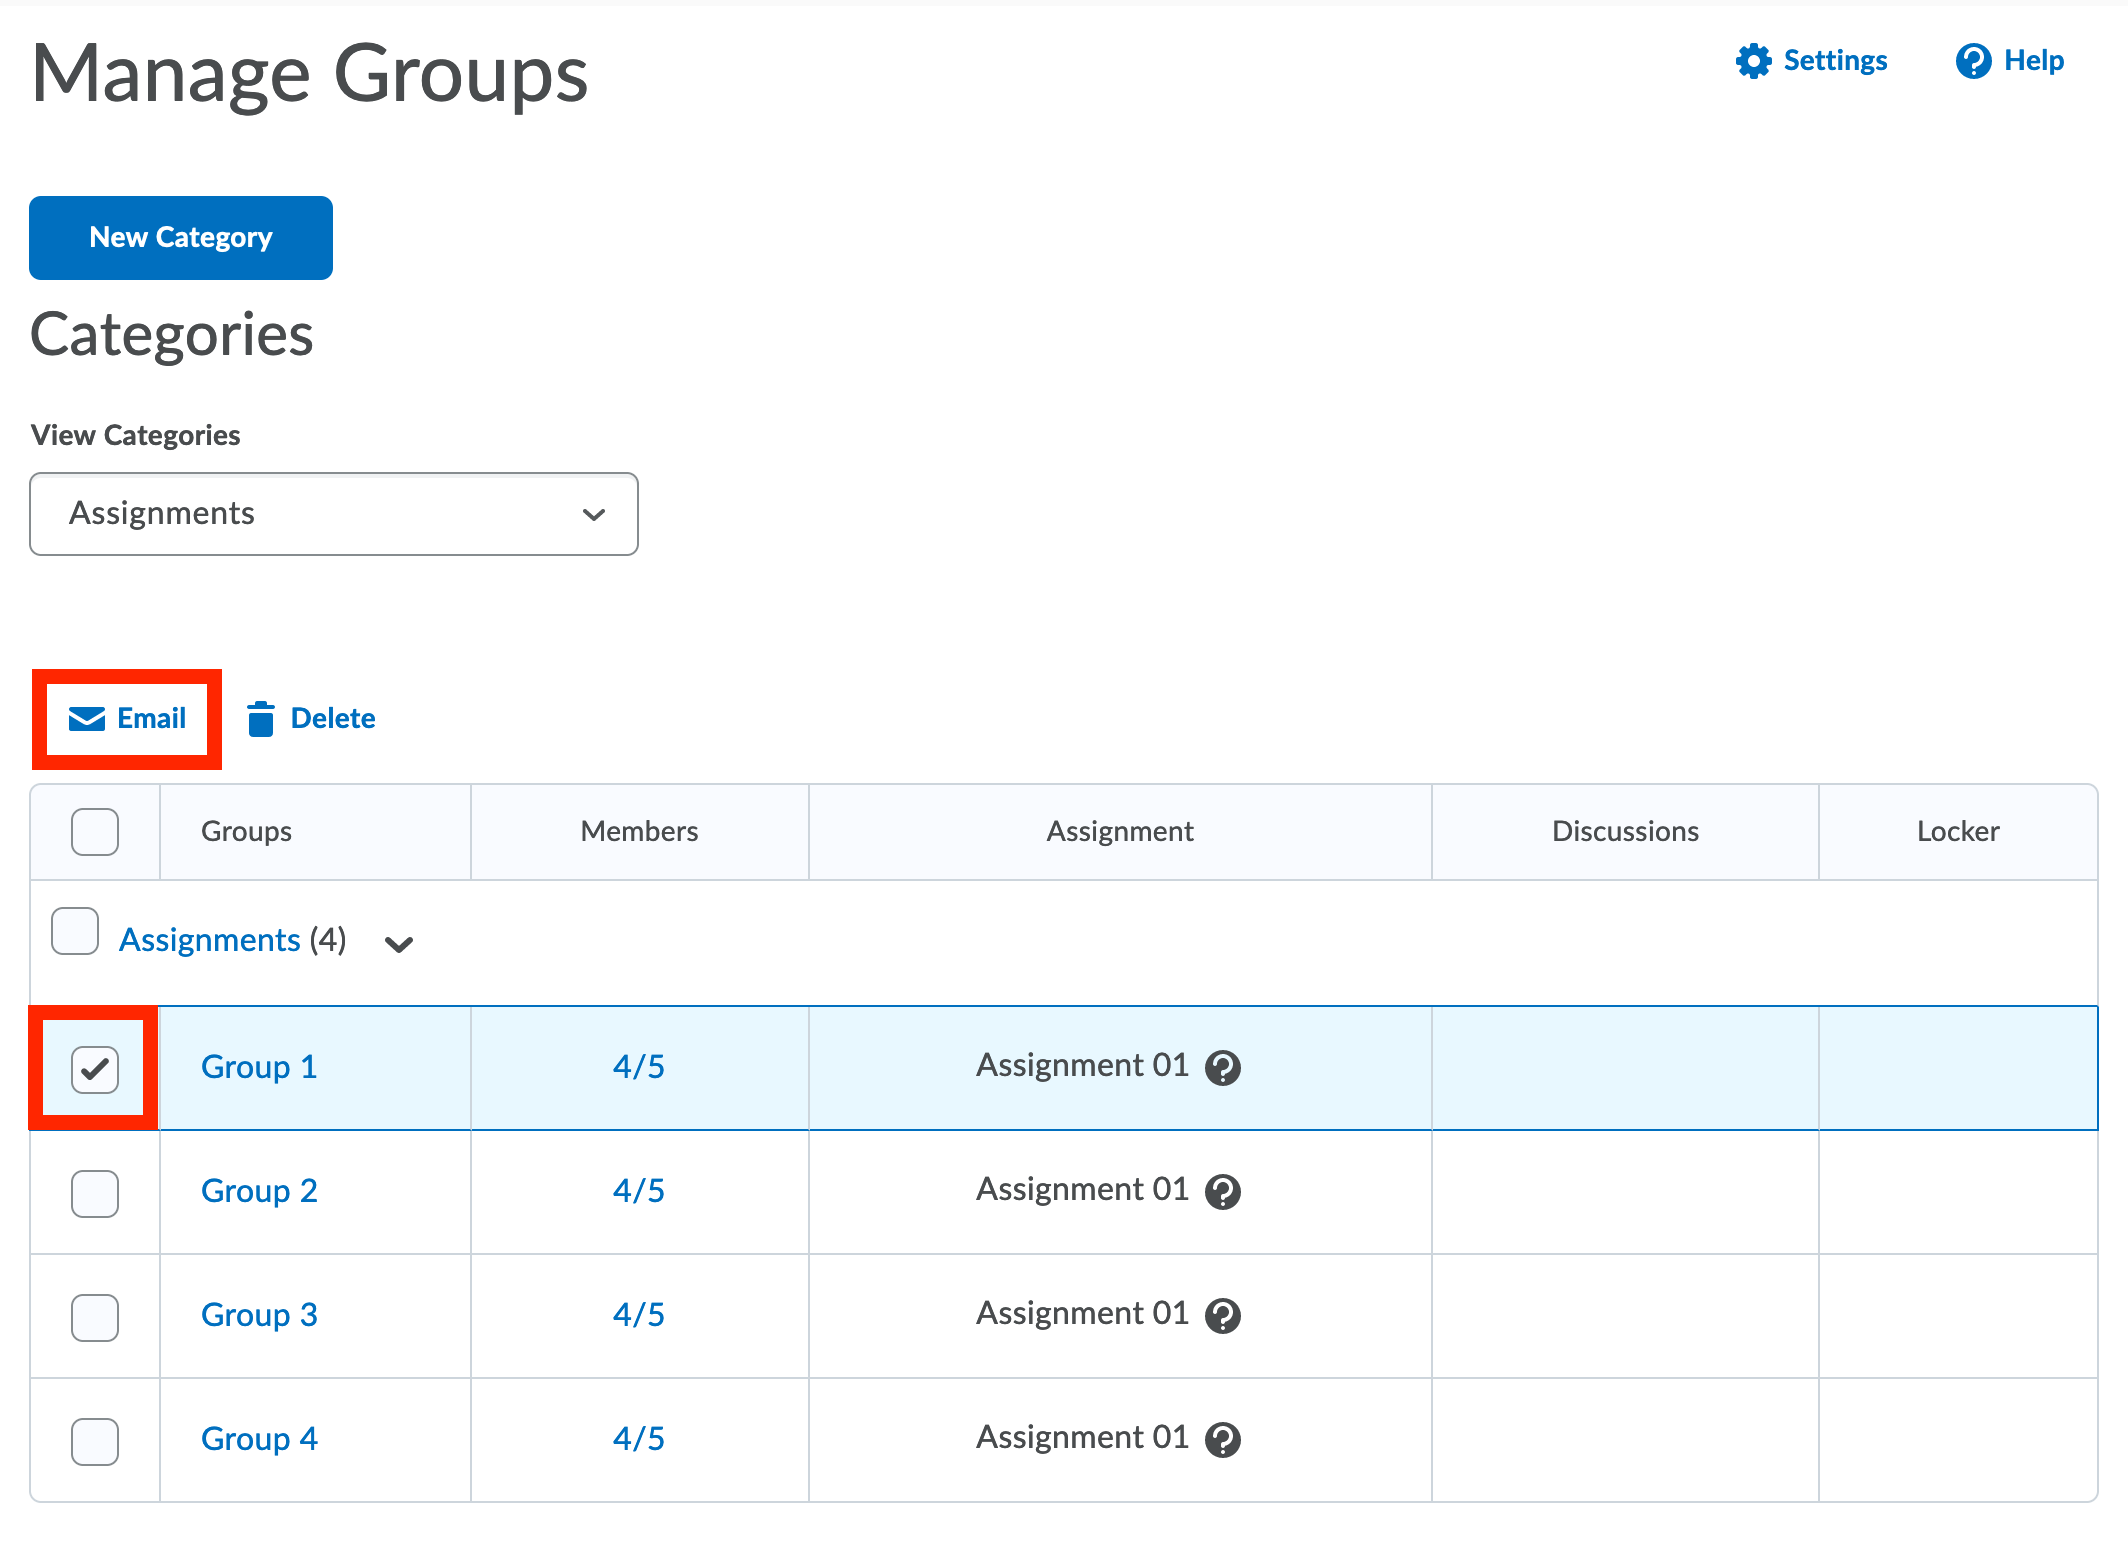
- A new window will open where you can compose your email.
Group lockers can be set up within groups to share files with students of a specific group, to allow the students to upload and share files with each other and can be used to email a group directly. More information on creating lockers can be found here.
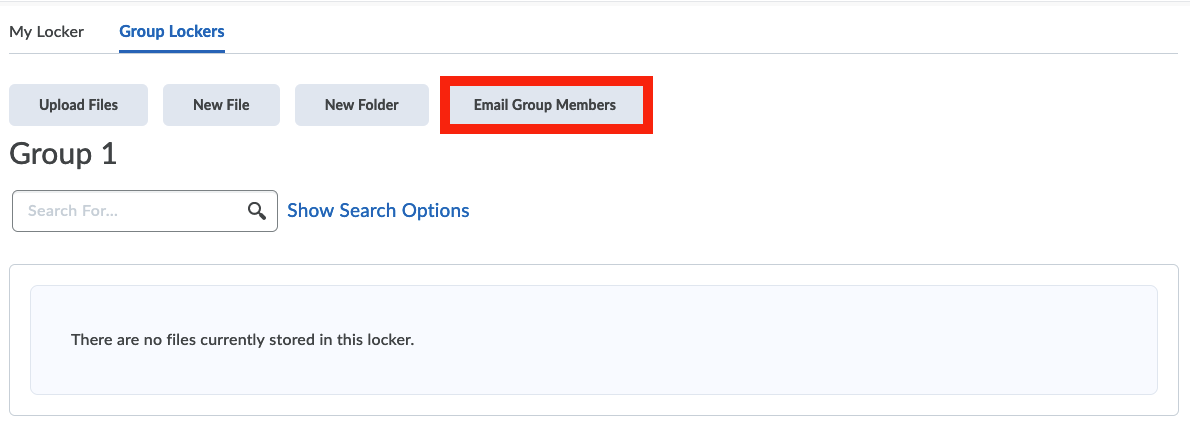
The locker function can also be used by both instructors and students, to e-mail the group members. To do so, go to Groups and click on Group Files to select the group for which you have previously set up lockers.
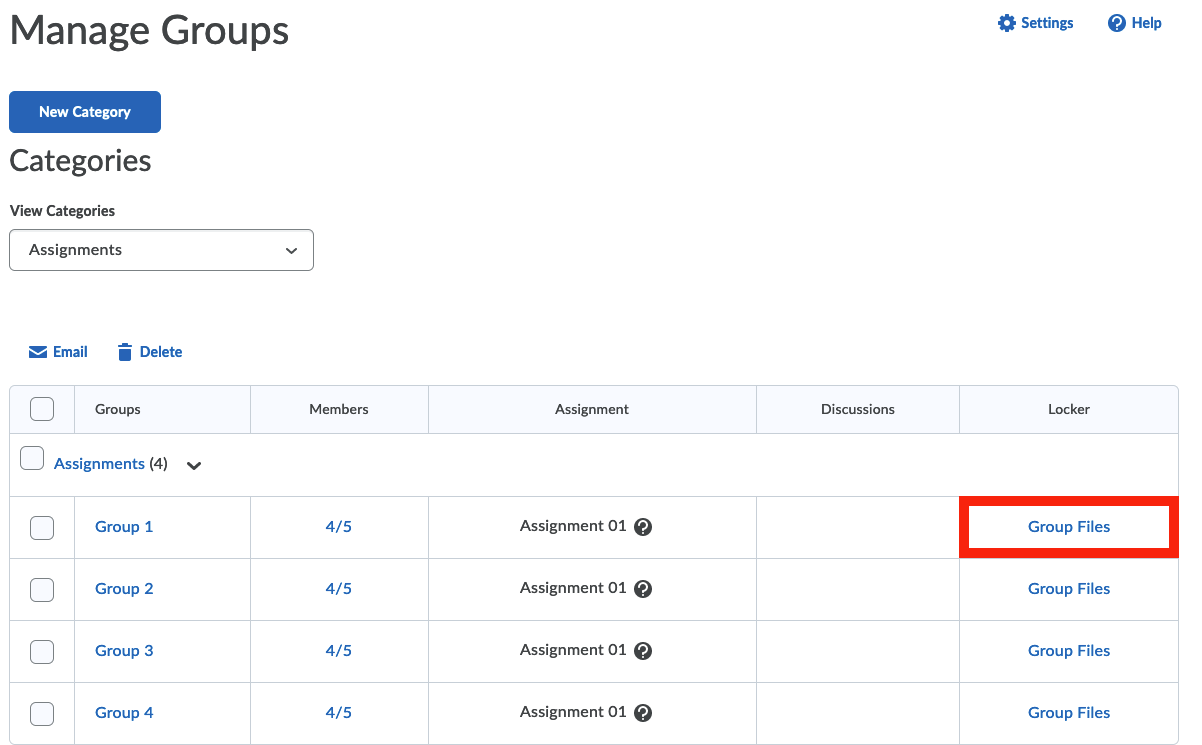
On the next page, click Email group members and then follow the same procedure as mentioned above.
Another option to communicate within groups is by using discussion boards. Both students within the group and instructors can contribute to the the discussion. See this page for more information on how to use discussion boards in your course. Adding discussion boards can be done by editing the group category or through the discussions section of the course.
Deleting Groups
When the course is complete and all the grades are submitted, then you might want to consider deleting the groups that were not used. Even then, please take note that you may need to keep some student work as evidence for accreditation or audits in the future. So do not remove these groups unless you’re absolutely certain you have a copy of the work.
A recommended strategy to avoid deleting groups is to simply rename the groups to something beginning with an underscore or a “z”, so that when they are sorted they appear at the very top or the very bottom and you can ignore them.
If you have just created groups and you realise you do not need them anymore, they are easy to delete.
- Go to Collaboration and then to Groups.
- Select the Category and the groups, all or some, you wish to delete by using the checkboxes.
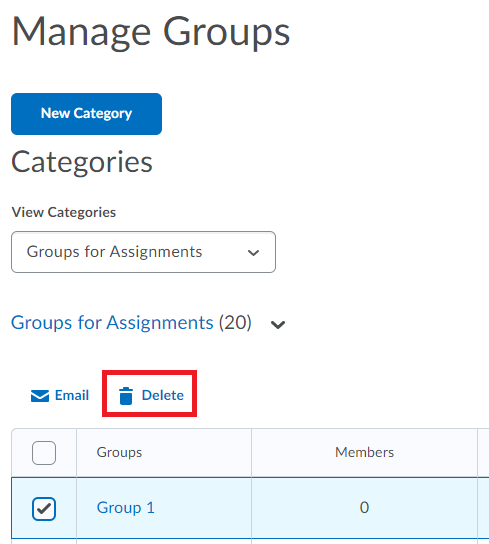
- Click Delete to erase the category or the groups (depending on the selection and option chosen). The prompt will show you how many assignments and discussions will be deleted as well. Click Delete Category or Delete Groups to confirm the deletion.