This page will show you how to create, edit and delete modules and sub-modules in your course. There are empty areas in your course which you will fill with content for your students, such as quizzes and files. Your modules and sub-modules appear in the Table of Contents, on the left-hand side of the screen. They help you to organize to your course.
To create a new module, follow the steps below.
- Go to your Course and to Content, and on the left side menu, you will see Table Of Contents.
- Click on Add a module.

- Name your module there, and press Enter.
You can now repeat this for creating more modules.
Added Module descriptions will also be visible to students using the Pulse app.
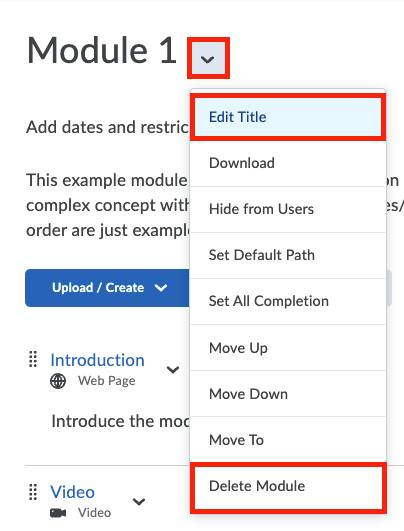
To edit or delete a module, these are the needed actions:
- Go to your course, and on the left side menu, you will see Table Of Contents.
- Click the module you wish to edit or delete.
- On the right side of the page, click the dropdown arrow next to the module title and select edit title or Delete Module.
To create a submodule, select the module to which you wish to add a submodule to and follow the steps below.
- Click module to which the submodule is related and on the right side of the page click Add a sub-module.
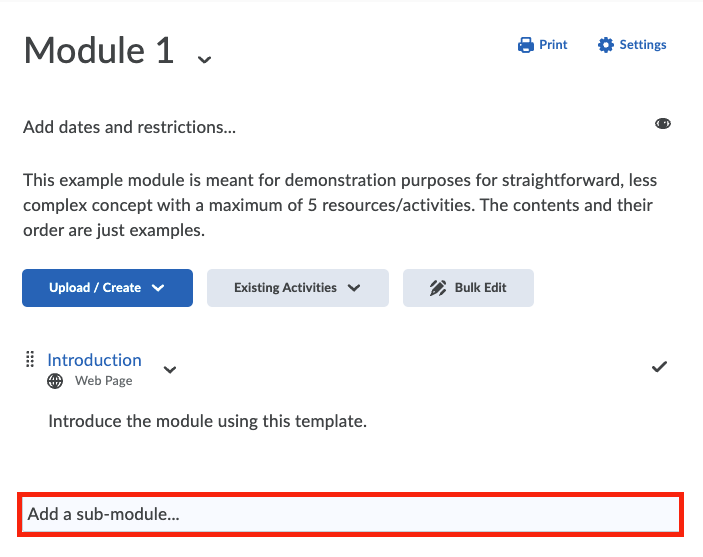
- Name your submodule and press Enter.
You can now repeat this for creating more sub-modules.
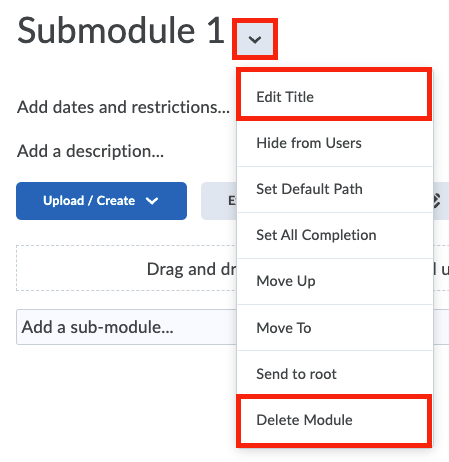
To edit or delete the submodule, follow these steps:
- Go back to the left side menu where Table of Content is located and click the Submodule you wish to edit or delete.
- On the right side of the page, click the dropdown arrow next to the sub-module title and chose edit or delete submodule.
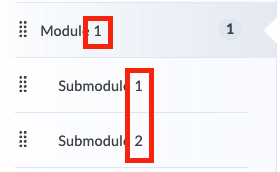
Once you have created your modules and sub-modules to your course site you might want to rearrange the order the modules, you can do this by simply dragging and dropping them.
You can also move content from one module to another module, or from one submodule to another submodule. This is done by clicking and holding the left mouse button on the icon with 8 little blocks in front of (sub)modules and content items. By holding down the mouse button and dragging the mouse you are able to move modules and content items. Your cursor will change to a 4-way arrow indicating the move functionality.

As you drag it onto the new sub-module, i.e. the target submodule, you will see that the colour changes. And when you release, then that piece of content has been moved to the target module, or sub-module.
 You can also move and rearrange modules and sub-modules around on the left-hand side.
Notice that as you drag a module up, you can either relocate it to there where the line is, or if you move it onto an existing module, the colour changes, and then when released, it has become a submodule now. An indent in the text gives a visual indication that it is a submodule.
 For courses with a very intricate, detailed structure, you might find it helpful to use some numbering. Think particularly of the case where students are accessing your content on a mobile device, and there is limited screen space. The numbering helps them find their location in the course.
How to use this to improve your course
- Drag and drop the modules and sub-modules to rearrange them. This way you can quickly reorder major blocks of content in your course, and arrange them exactly as you need them.
- Order your modules according to themes, type, date, or a combination of these.
- Note that the Course Information module is standardized throughout all courses, making it easy for students to find. Please add the relevant information to its sub-modules.