You can have your students communicate with each other through a discussion forum. This is especially useful for discussing topics in large classes where you want to give everyone a chance to contribute to the discussion. It is also recommended to use the discussion board to answer student questions in preparation for an assessment – this way, you can start with the questions asked most often and quickly work your way through the rest.
You can have the entire class use one discussion forum, or divide the students into groups and have each of the groups discuss their topic together.
- Click on Collaboration and then Discussions. Alternatively, you can also click on Course Admin and then select Discussions.
- You can have more than one forum listed in the discussions:
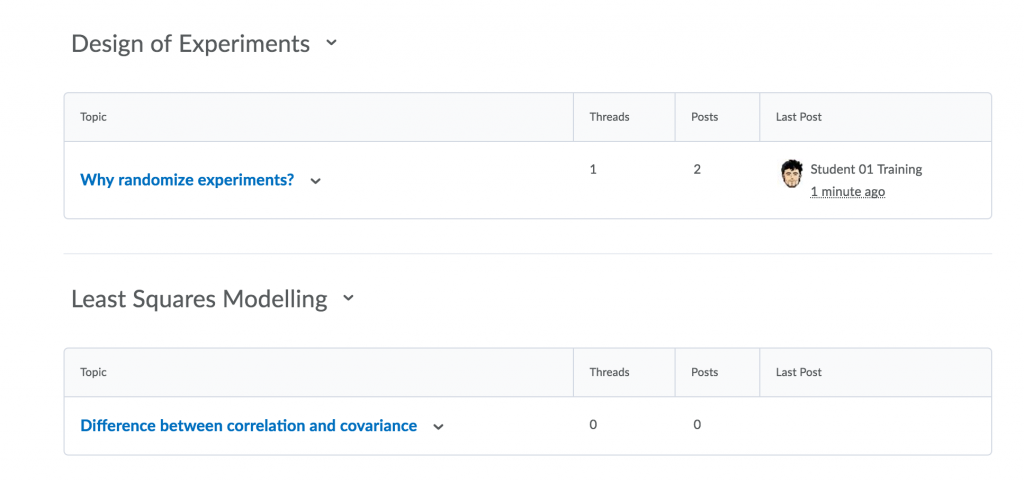
- Under each Forum you can create one or more Topics related to that general discussion area. The columns about threads, posts and last posts allow you to track, at a glance, what has been posted.
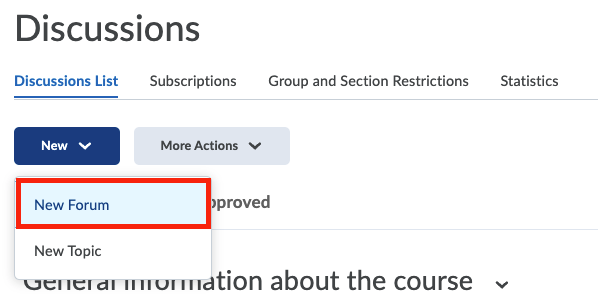
- To set up a new forum, click on New and then on New Forum.
 Fill in a title and (optionally) provide a description, there are also various other options below that. You can use the same menu to set up a new topic.
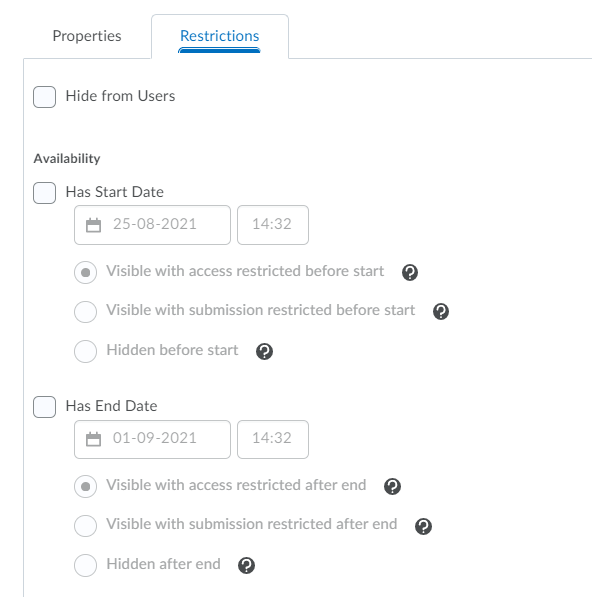
 - Student access to the forum can be changed by going to the Restrictions tab. The general start and end dates indicate the times between which students can post in the forum. There are multiple options to determine what happens with the forum before the start and after the end date:
- Visible with access restricted before/after: students will be able to see the forum, but they cannot click or open it. Information displayed to students about the activity is limited to title, dates, and restrictions.
- Visible with submission restricted before/after: only students who contributed to the discussion by making a submission will be able to view it. Students can access the description and evaluation requirements such as rubrics. The activity behaves the same as the previous ‘locked’ functionality.
- Hidden before/after: students will not be able to see the forum.
- Once you are done, click on Save and Close to save these settings.
- Now, click on the arrow next to the newly created forum and Add Topic.

- Click on the topic under which you want to start a thread and click start a new thread.
As an instructor or teaching assistant, we recommend you start the conversation yourself by posting the first thread.
You can add attachments. Once you are finished you can then pin a thread to keep it at the top of the list of threads, so that it is always visible to students. You can also subscribe to your own thread. That way you are notified of any posts made to it as a reply.
- Next to the forum title click on View Forum Statistics.
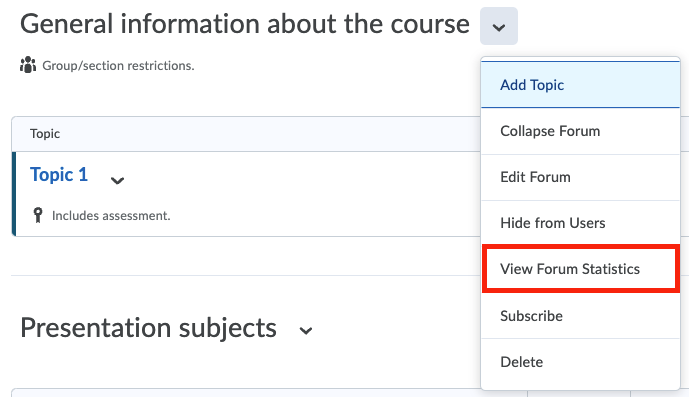 This allows you to track what has happened in the forum.
 - You can also export that information to a CSV file if you want your next group of students to look at previous discussions.
Students can rate each other’s posts. You can provide various rating systems, for example a five star rating scheme, an up vote/down vote rating scheme or upvote-only rating scheme. You can then use these ratings as part of students’ assessment and can be connect this automatically to the gradebook.
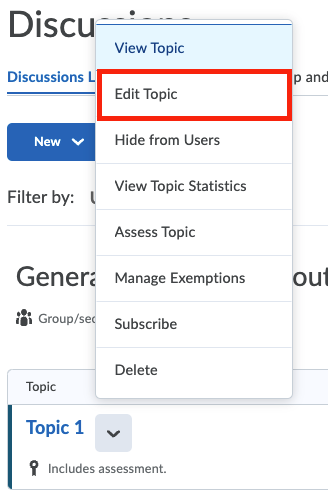
- To do so, Edit the Topic.
 5. Under settings select the Assessment tab and configure which grade item in the gradebook will receive the grades, as well as how that grade is calculated.
 6. To make sure students are notified when new messages are added to the discussion forum, please guide them through these instructions.
Although it is expected of your students to keep to the topic and to act cordially online, there is always the potential of someone diverging from the topic, or of a disagreement getting out of hand.
For this reason it is a good idea to give your students some guidelines (netiquette rules) when allowing them to post content that will be shared with your entire class. You also have the option to moderate discussions in Brightspace, in a sense, proofreading the content before it is shared with the group.
- Start by editing the forum. Scroll down to Options.
- Tick, for example, the second option (a moderator must approve individual posts before they display in the forum).
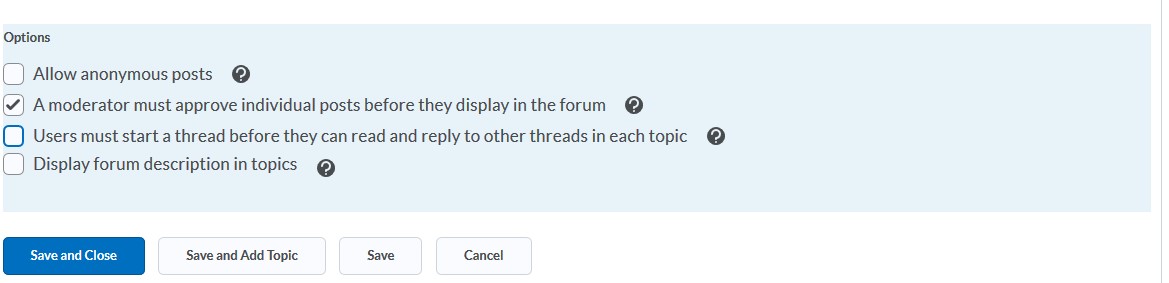 This allows you to check every post before it will be visible to everyone else.
 - Click Save and Close to save the new settings. All topics can now be moderated before they become visible.
- You can also Edit, Pin or Delete a thread.
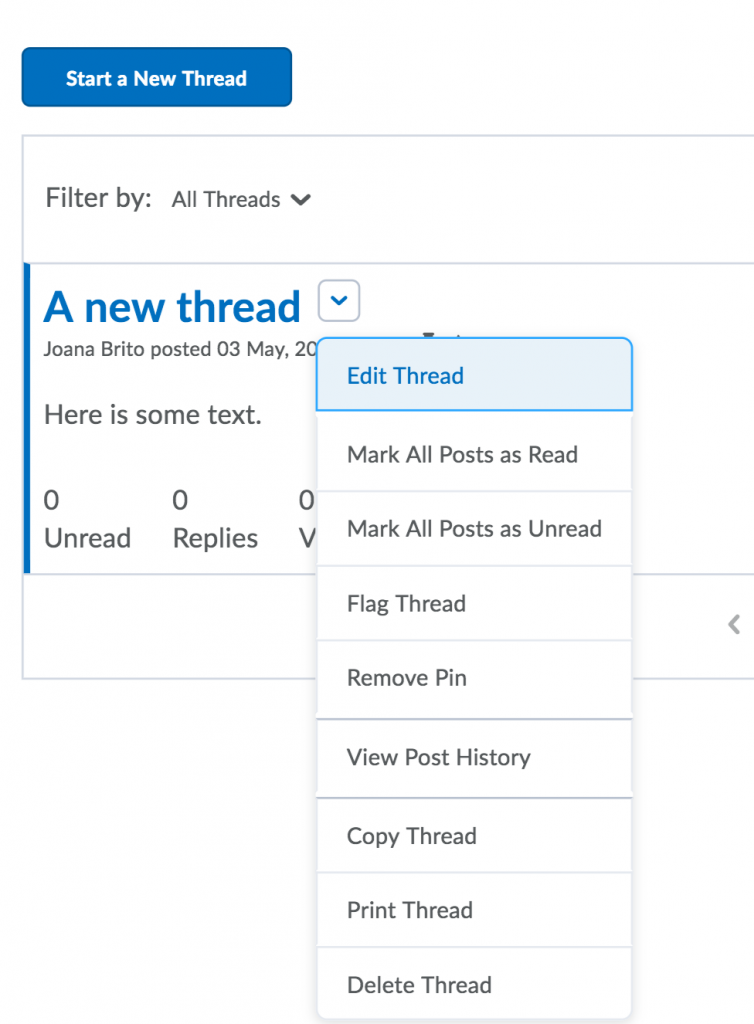 These options are available in non-moderated topics too, but will be discussed here as they are important in keeping your forums organized. Editing a thread could be used to erase parts you do not want students to share or to correct mistakes. An alternative to this is replying to the thread, you will find this option by clicking on the thread title.
 - You can place a very useful thread at the top by pinning it or remove unwanted threads with the delete option.

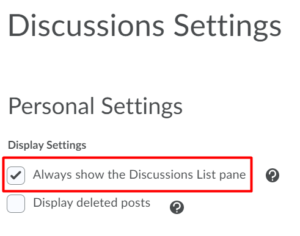
When this view is set, you will always see a discussions board navigation on the left of the screen which makes navigating through Discussions easier.
How to change the view of a discussion board for instructors:
- Go to Course Admin and go to Discussions
- Then go to Settings
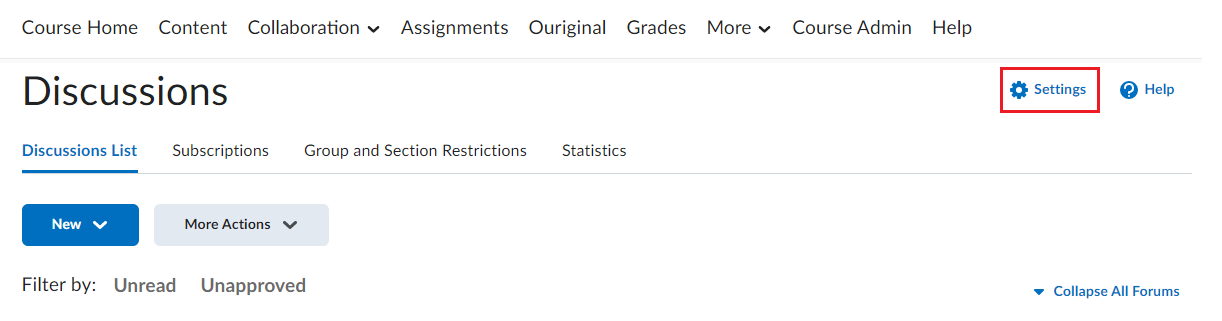
- Select Always show the Discussions List pane.

You can also assess a student’s participation in a discussion forum. To learn more about grading discussion forums, please visit this page.