Welcome to Brightspace! In this article we will introduce you to the platform and guide you through the first steps on how to personalize your Course Page and your Home Page. Feel free to explore the Course Admin area and your Home Page, to see all the possible features you can add to your Brightspace experience.
Basic navigation in Brightspace
Once logged into Brightspace, the Home page will open.
It might appear different to what is shown here, but you will essentially have the same elements. Notice that your name is displayed on the right-hand at the top of the page.
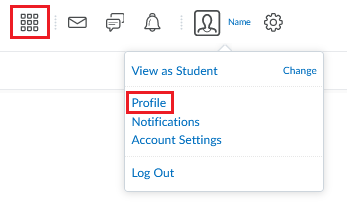
When you click on your name, a dropdown menu will open. Here, you can change your profile or account settings. We suggest you upload a photo of yourself. This tiny photo is visible across the site and helps to personalize it a bit for students. We recommend you don’t fill in your contact information or other personal information, as it will be shared across the site.
In the account settings, you can change the number and percentage format of Brightspace. This way, you can change how Brightspace displays numbers for you (e.g. ten thousand can be shown as 10000, 10,000 or 10.000, depending on preference)
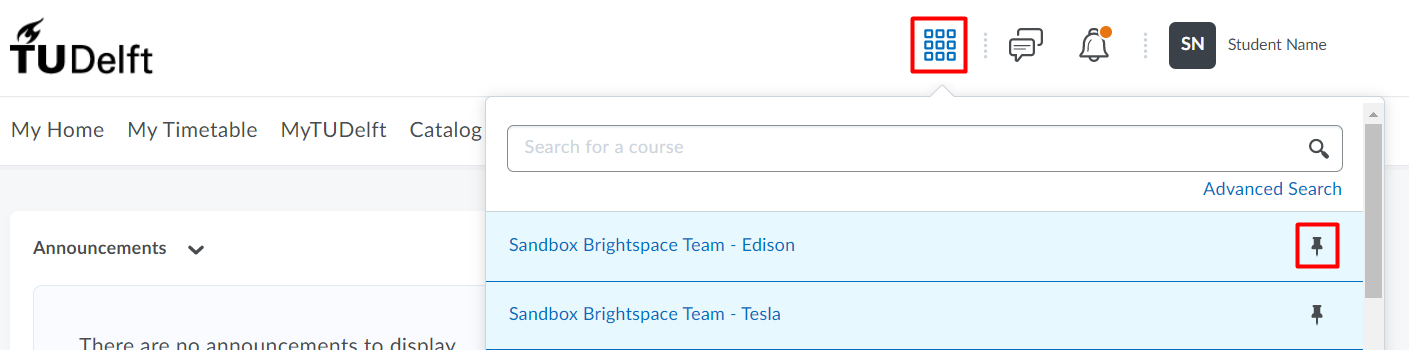
You can search for courses you are enrolled in by using the Course Selector (the 9 square icon on the navigation bar). You can pin the courses you’re enrolled in, so that they appear always on top.
Click on these icons to access the built-in email, instant messaging features and notifications.
![]()
Your students will see an orange dot appearing on the notifications icon whenever new content is available in a course, a new announcement is posted, when grades are released, and so on.
The email feature is available, but should not be used as a replacement for your TU Delft email. There are some limitations to this email system, which we describe in our other videos related to communication. We recommend though, that you use the Announcements tool to communicate with your students in the course.
Below the TU Delft icon, you will find the navigation bar. Here you will find links to the following:
- My Home – to take you back to the Home Page
- My Timetable – where you can see the schedule of various courses
- MyTUDelft – Study information system for study results and registration for exams, courses and minors.
- Catalog – to view courses available for enrolling
- Resources – links to Collegerama; My Kaltura Media and Software Download
- Help – link to this website and tips for how to use Brightspace
Click through each of these to orientate yourself.
To the right, you will see the following icons:
- Course Menu (which looks like a waffle) – where you find your list of courses
- Update Alerts – used for email and instant messaging.
- Subscription alerts – shows students when there’s a new post in a forum, topic, or thread that you’ve subscribed to in instant notifications.
- Notifications (there will be an orange dot indicating new, unread notifications)
- Profile picture, with your name next to it.
Click on your name to expand the settings menu. Here you can:
- Set up your profile
- Change notification settings
- Change account settings
- Progress
- Log out of Brightspace
Navigation in courses
Read how to find Courses in the Course Menu, and how the My Courses and the My Pinned Courses widgets work.
Finding your Courses
- Use the grid-icon (9 small squares) to go to the Course menu and quickly switch between one course and another course.
- You can search for any course in Brightspace with the course code or course name. Only courses to which you are the course manager/instructor/tutor/student will be visible to you.
- Pin and unpin your most used Courses at the Course menu by clicking the pushpin-icon at the rights side of a course. This way you can switch from one to the other Course faster.
- Click on Advanced Search to search on your Role in the course, the Semester, Faculty and course Status.
My Courses
Via the My Courses widget on the homepage you can find all courses that you are enrolled in. Click on the the TU Delft logo in the top-left to go to the homepage.
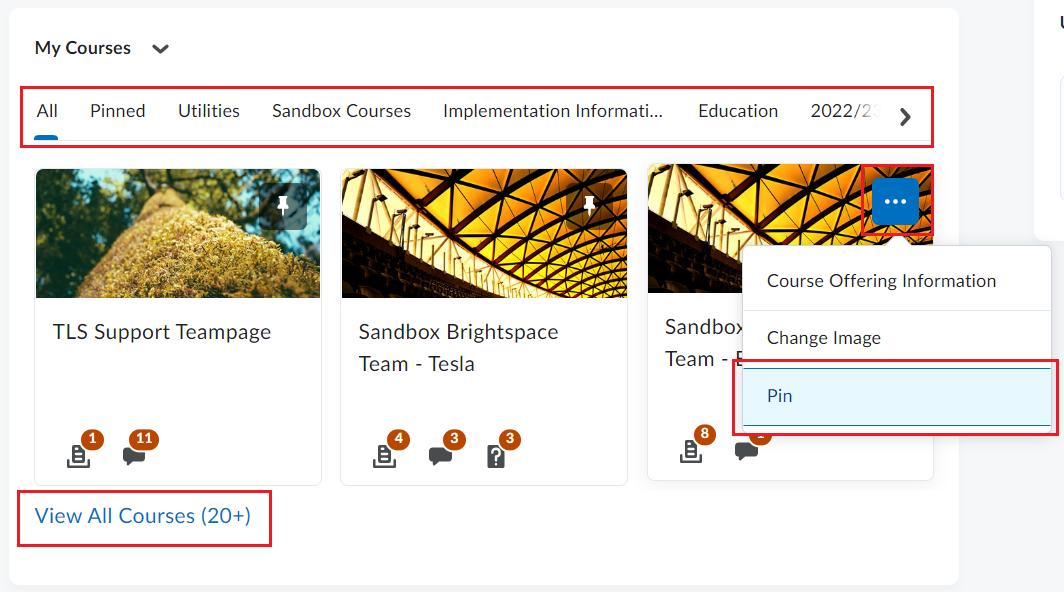
- Use the Tabs in widget to navigate to any course you would like to access.
- On the course cards, Unread-icons indicate if there are any unread Discussions or Ungraded Quizzes/Assignments.

- To Pin Courses simply click the 3-dots in the top right corner of a Course, and click Pin.
- Now the Course is accessible in the Course Menu and the announcements in that course show up in the My Pinned Courses widget on the homepage.
- If you do not see a Course listed, you can use the View All Courses link at the bottom of the widget. In the pop-up that opens you can Search for courses and Sort the courses in differently.
My Pinned Courses
In the My Pinned Courses widget, the last announcement of a pinned course is shown. If a course has multiple announcements, the latest one will be visible and a link below will show how many more there are. The first 200 characters of announcements are shown, and you can use the More link at the end to navigate to the rest of the announcement. The presence of a picture icon indicates that an announcement contains media, links, or attachments that are not visible in the widget.

You can pin an unlimited amount of courses, but to keep a good overview, we advise only pinning current courses and organizations.
If you wish to change the order in which courses are listed, so that the last pinned course shows as the first one in the list, you can pin/unpin courses until they are in the order you wish.
Let’s look at a typical course page:
Click on the Course Selector icon to select a course, and pick one of them.
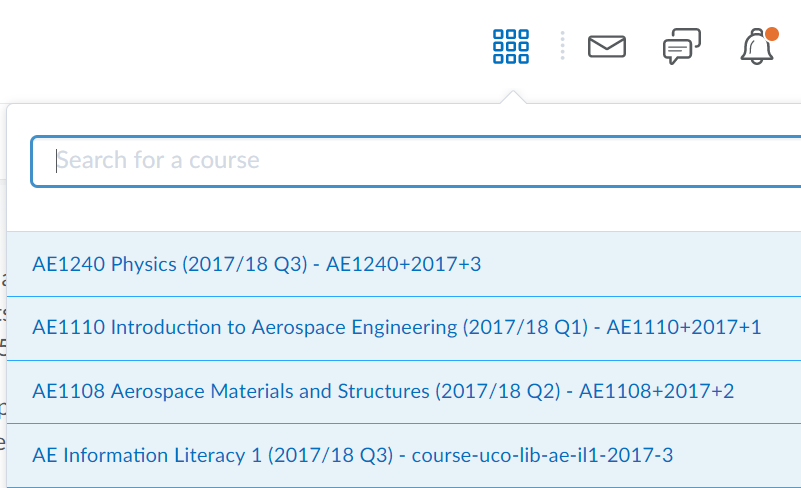
Courses might be configured slightly differently but there are some common elements.
- On the Home page of your course you will find a course banner where the name of the course is shown prominently with a background image. This can be easily customized, see the page we have on that.
- The Course Home link, will always bring you to the Home page of the course. It mostly displays announcements and other useful information.
- Click on Content to access the main part of your course site. It is here that all your course content is placed, and that students will interact with the learning materials. Most of the training material on this website focuses on the Content area.
- Collaboration is the place they will interact with each other, with activities and assignments, quizzes, and so forth.
- Lastly, there is a Course Admin link. The course admin area contains a list of all the functionalities available to you in Brightspace. Everything that you can add, change, or remove in a course is available here. If you are ever stuck looking for a feature that you know exists in Brightspace, this is the place to find it.
The Course Admin area looks intimidating. A quick tip: use the “Find” function in your browser to search for the word you are looking for. The Course Admin area is also grouped into categories, each one of them with several icons to help you locate what you need.
Click on Content to view the structure of the area where your course material is placed for students.
You will see a course menu on the left-hand side, and the content areas spanning the larger part of the page to the right of the course menu.

- Add some content to the Overview section, giving your students an idea of what the course is about.
- Below that you will see Bookmarks. Students can bookmark pages by clicking on the bookmark icon, so that they can easily go back to pages which they want to read again.
- Next is the Course Schedule where dates will be shown that have been made within your course.
- Lastly is Table of Contents where all your course material will be listed in modules that give structure to your course.
You can structure the rest of your modules in any way you choose – by topic, type or date. Read How to create a course structure for more information.
Now that you know how to access the content area, you can get started. Start adding content to your course site from here on.