With Virtual Classroom (Bongo) you can have online interactive classroom sessions in Brighspace with up to 150 participants per session and a duration maximum of 240 minutes.
You can also share a join-link with external (not TU Delft) users, record sessions, and publish recordings to your course in Brightspace. During the Virtual Classroom, you can share your screen, PowerPoint slides, Word and PDF documents, Images, Annotations, and Live drawings on a Whiteboard. You can also use a webcam (you can share up to 7 webcams simultaneously)
Not what you are looking for? Have a look at and compare other online meeting tools.
Configuring Virtual Classroom
For the best functionality of Virtual Classroom use Google Chrome.
Within other browsers some functionalities of Virtual Classroom may be unsupported.
Examples of common issues:
- In Firefox you can only share a specific application window when using desktop share. If you want to share your entire screen, use Chrome.
- Virtual Classroom is not compatible with any version of Microsoft Edge but the newest.
- When using a mobile device, you will be prompted to use the built-in device recorder to create your video. If you have an iPhone or iPad running version 14.3 of their operating system, please use a different device to complete Q&A activities.
To schedule a meeting:
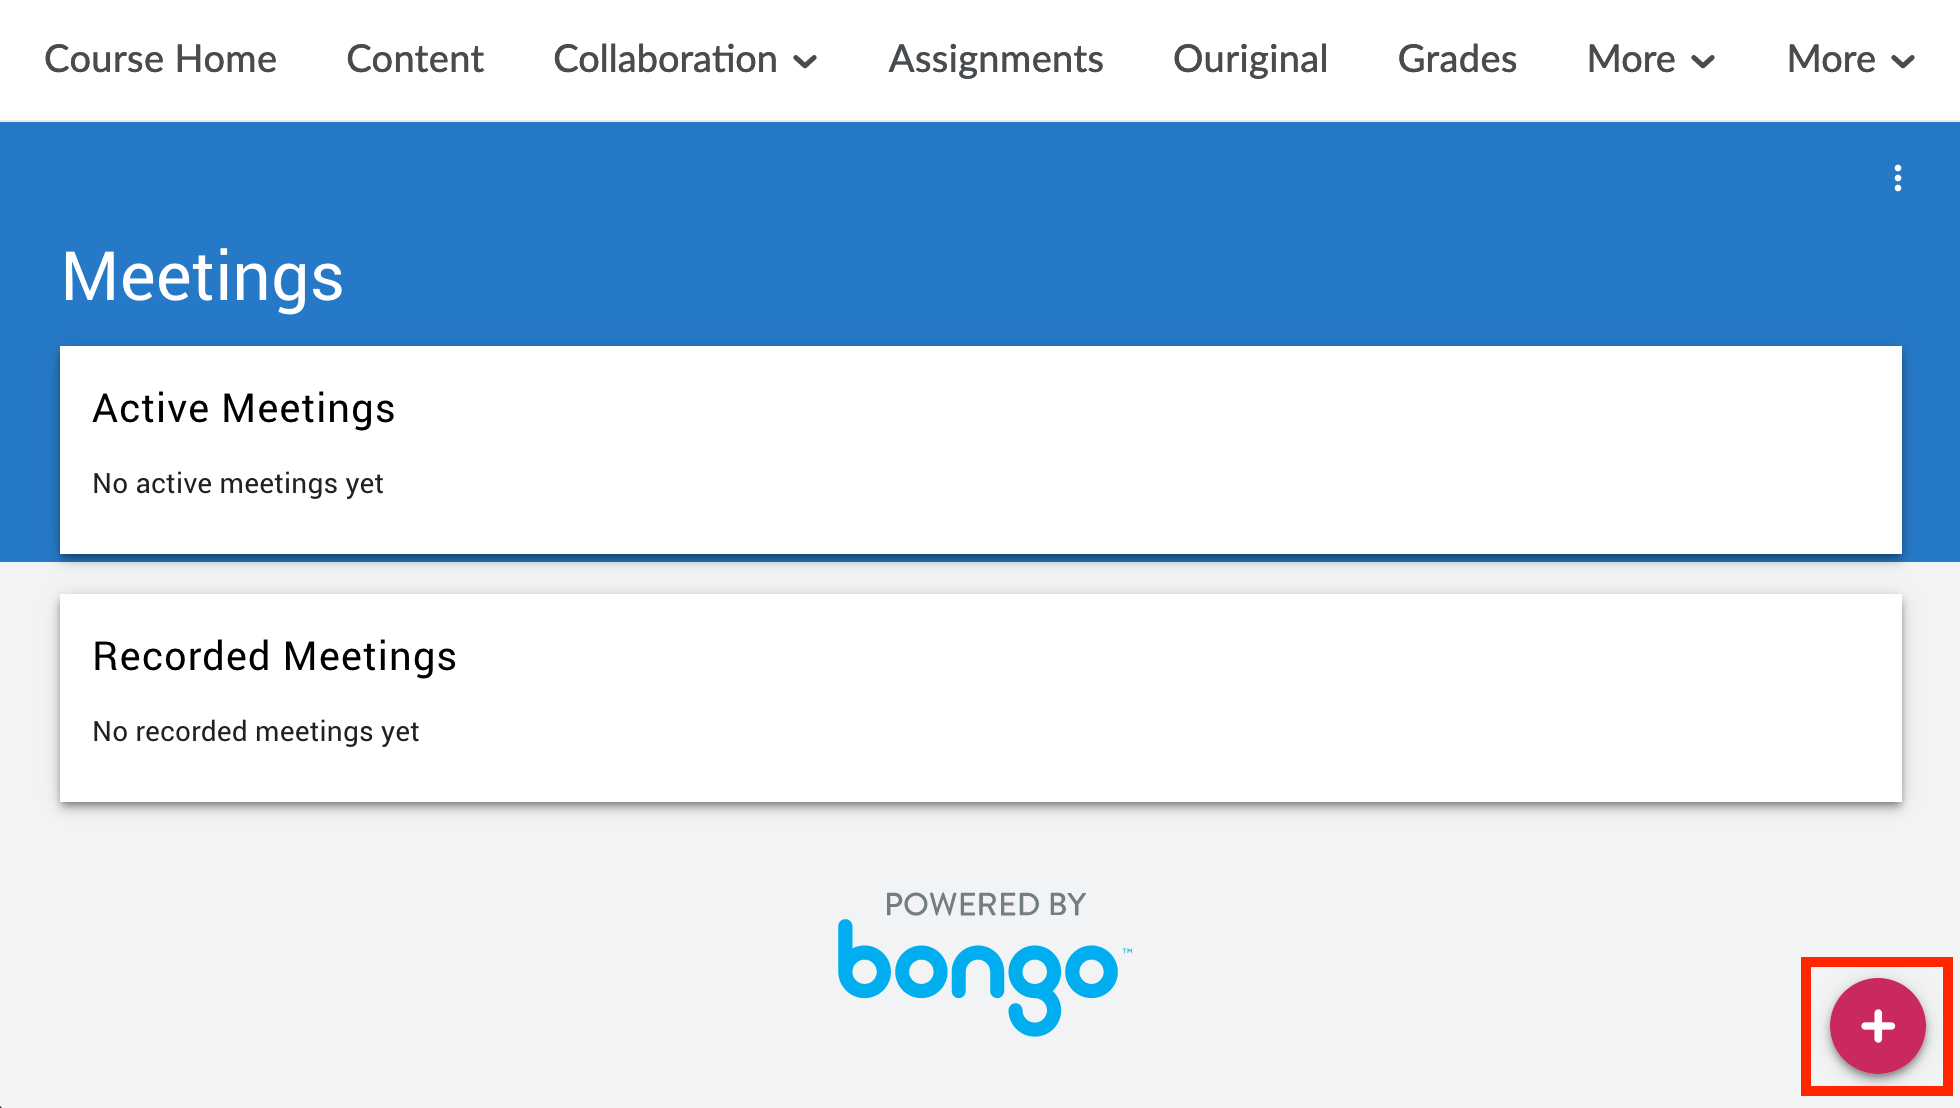
- Go to your course in Brightspace and select Collaboration and then Virtual Classroom in the Navigation bar. The first time you access Bongo interface, you might need to agree to share your information with our single sign-on service provider.
- After accessing Virtual Classroom, click the ”+” button to Schedule Meeting.
The user that creates the meeting will be registered as moderator.
- A new window opens with the Schedule Meeting: give a name to your meeting as well as a date and time of the meeting.
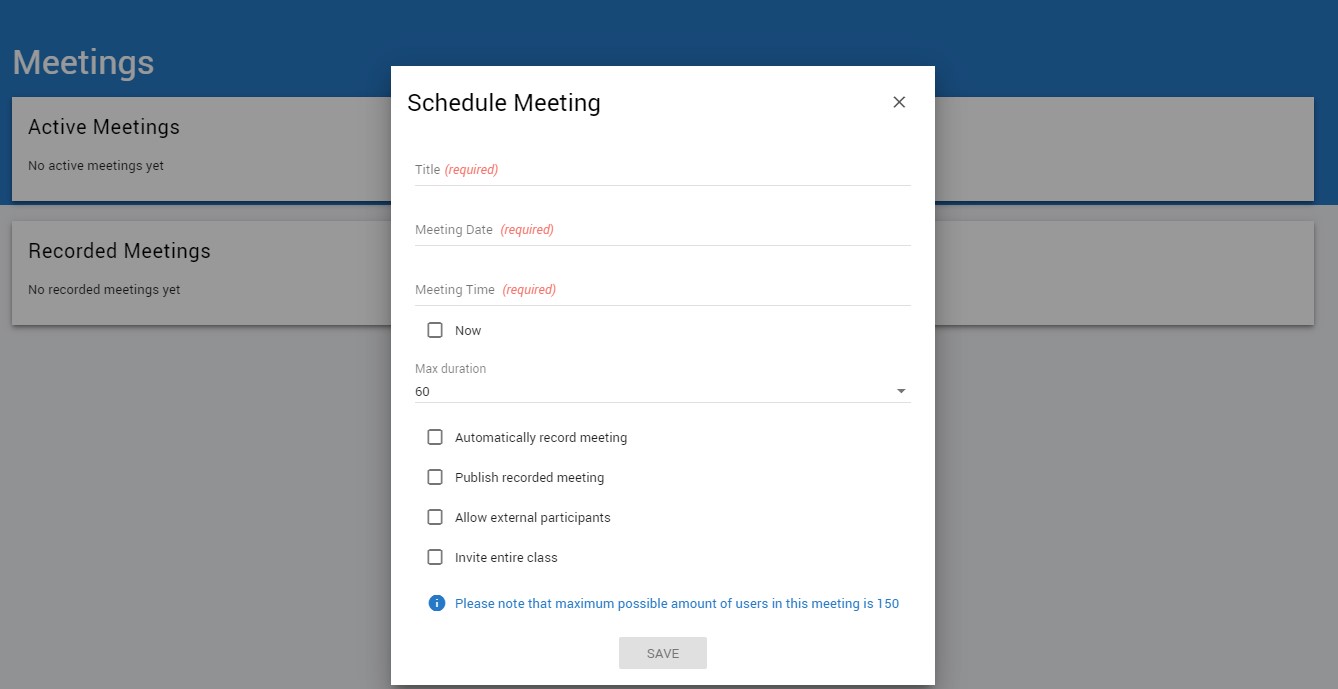
- Choose the duration of the meeting (please note the maximum duration is 240 minutes) and if you want to automatically record your meeting. If you do not enable Automatically record meeting, you will still be able to record the meeting by clicking the Not Recording button in an ongoing meeting. This could be particularly useful if you need some initial time to prepare.
- You can also check the box Publish recorded meeting, which will convert the meeting link to a recording link available for viewing after processing, which may require 30-90 minutes depending on your meeting duration.
- It is also possible to allow for external participants. When ticking the respective box and saving the Schedule Meeting, you can then Copy External Link at the meeting Actions after you have created the meeting. This link can be sent to your external participants. When entering a meeting, external participants will only be prompted to enter their First and Last name. Be aware that anyone with a meeting link can enter the meeting.
- Then, select if the meeting is with the Whole class or not. When not selecting Invite entire class, you will be able to select the users you want to be able to join the meeting. Make sure you save the meeting settings and then click that meeting Actions and then Open meeting invites settings.
Be aware that users that haven’t yet accessed Bongo in the current course will not be listed for selection. Students can access the Virtual Classroom through the Collaboration tab on the Nav bar.
- Lastly, if this will be a recurring meeting. You may have noticed that this option will only be visible if whole class is enabled as it is not possible to select users from the class in separate meetings. Recurring meetings are weekly meetings from 1 week up to 15 weeks and they keep the same settings for every meeting, including duration and start time.
- Once you’re done click Save.
Students can access the Virtual Classroom through the Collaboration tab on the Nav bar, or you can add a scheduled meeting to your course content. The latter is only possible when you have selected invite entire class when setting up the meeting. To add the Virtual Classroom to content:
- Navigate to the course Content and click the module where you want to add the meeting.
- Then click Existing Activities and then Virtual Classroom.
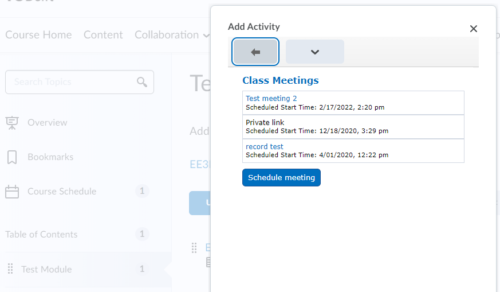
- Choose the meeting you wish to add to your content. It’s recommended to review the title and description of the meeting as it will be added with the exact same information as when it was created in Virtual Classroom.
- Set up a start and end date if you wish your meeting to be visible at a certain time.
After scheduling a meeting, everyone with an instructor role or higher can enter the meeting room from the start time and during the meeting. Students will not be able to enter the meeting room until someone with an instructor role or higher enters. External participants are not able to start or host a meeting.
To start a meeting:
- Go to Collaboration, click Virtual Classroom.
- Select your meeting from the scheduled meetings list.
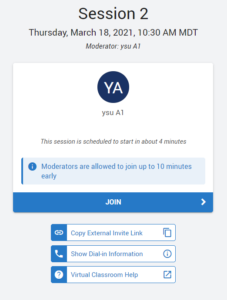
- Click Launch in Actions or access the meeting at Course Content, Calendar Widget or the Course Schedule. You will then have access to the Meeting Lobby Page. Lecturers can enter the Lobby before the meeting start time, but they won’t have access to the Meeting Room. In the Lobby, instructors will find information about the Moderator, the Starting Time, Dial-in and Virtual classroom help.
 Firefox and Chrome are the recommended browsers for Virtual Classroom sessions. More information about the compatibilty can be found here.
 - After clicking Join, instructors and students are asked “How would you like to join the audio?” with the option Microphone or Listen only (headphone icon).

- You will now have access to the Virtual Classroom. To learn more about the canvas, click here.

Managing your Virtual Classroom
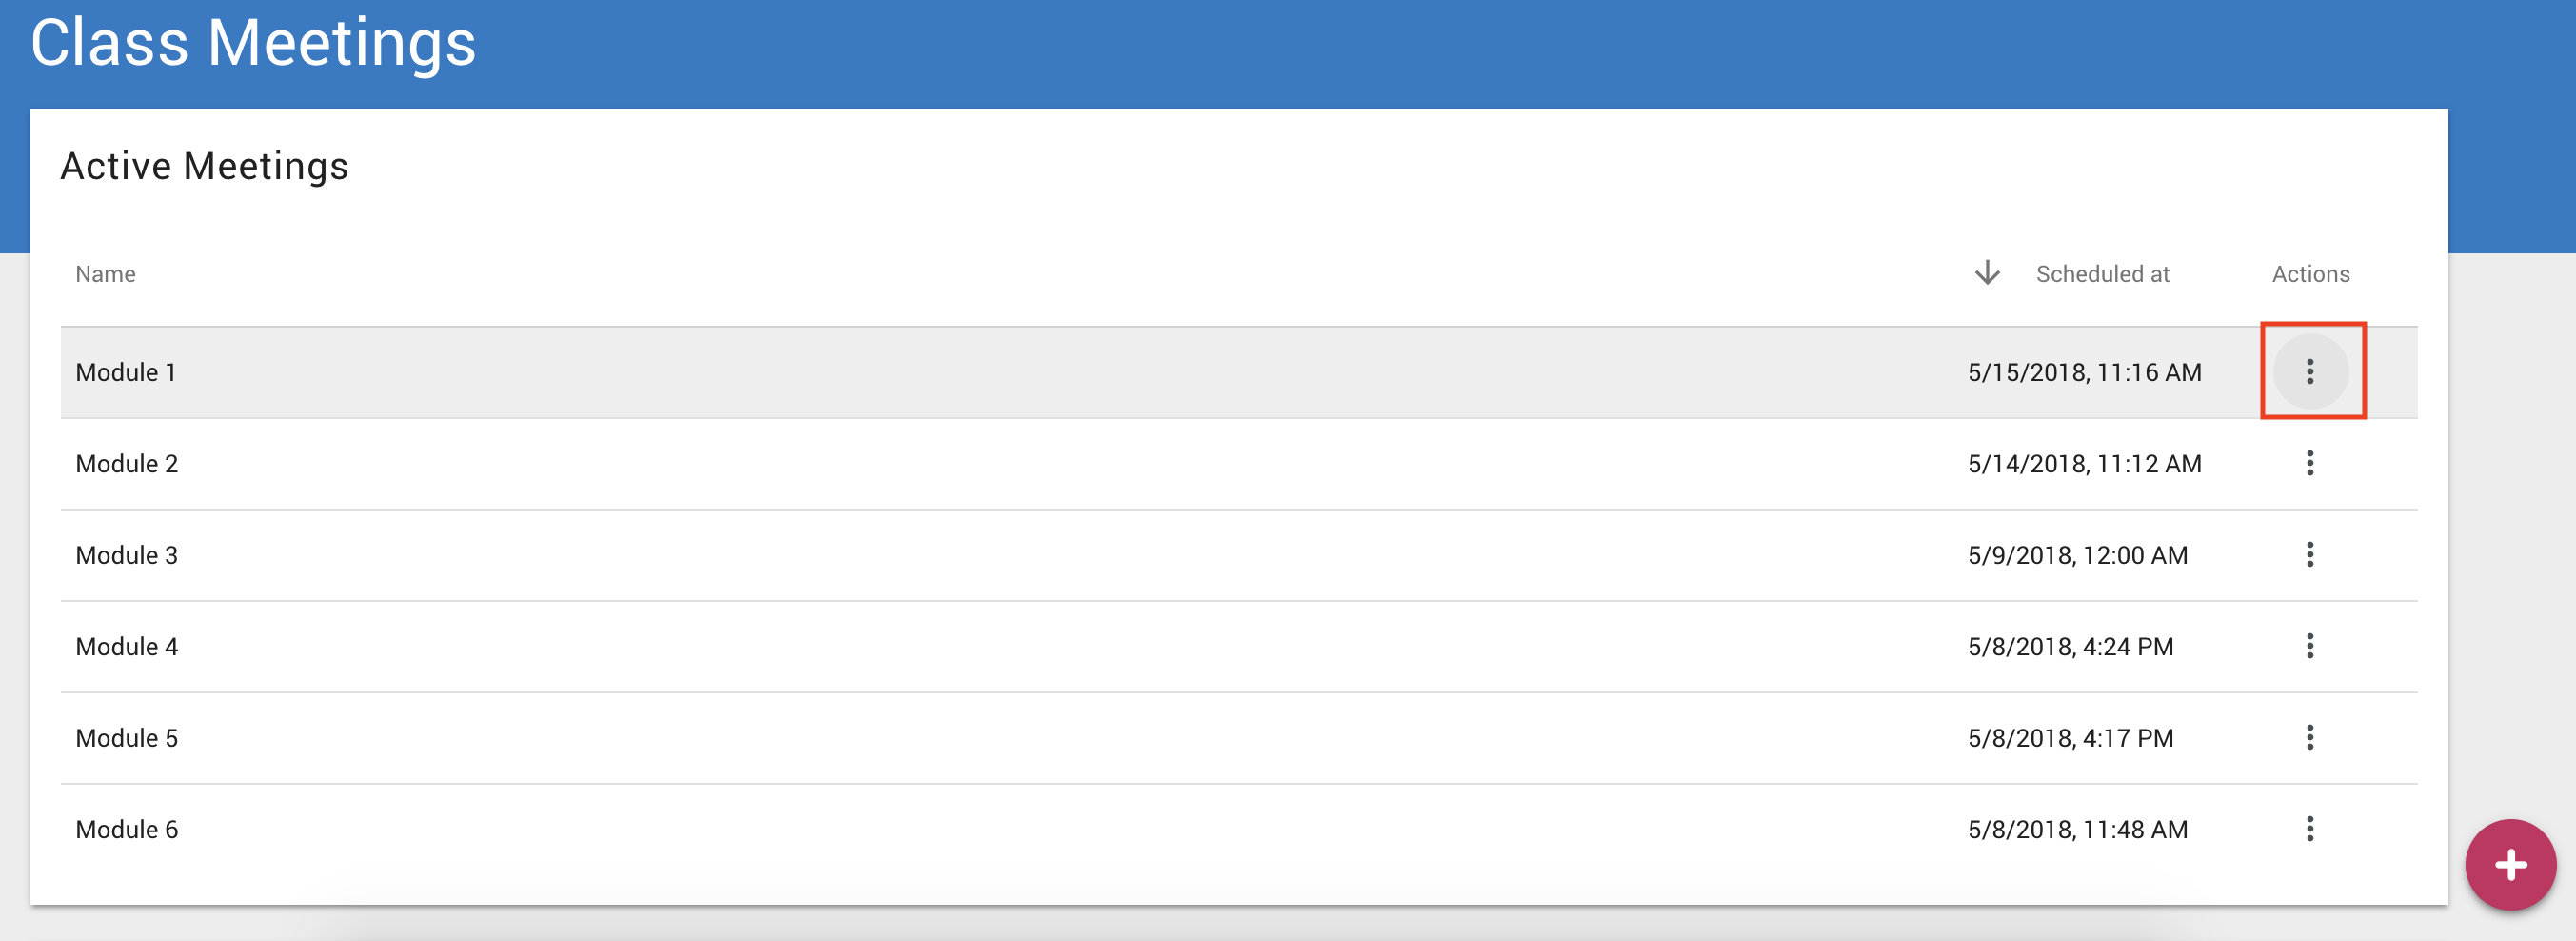
To manage a scheduled meeting, click Collaboration and then Virtual Classroom from the Navigation bar. You will then have an overview of the scheduled meetings and recordings.
When a meeting is scheduled it is possible to Launch, Copy External Link, Manage invites, Edit or Cancel. These options are available for each meeting Action.
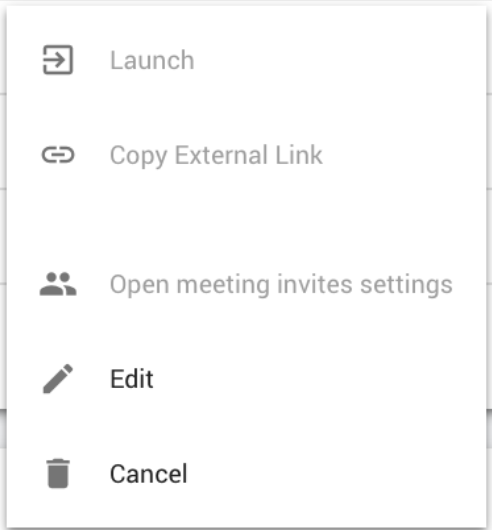
- Launch: launch your meeting.
- Copy External Link: use this to share a link with external participants.
This option is only available prior to the meeting date.
- Manage meetings: In case you didn’t invite the whole class to the meeting, use this option to select your invitations.
- Edit: Within this option you can still edit the date, the time and the duration of your meeting. It is also possible to change the setting of the following:
- Start record automatically
- Automatic link to recording
- Allow external participants
- Cancel: Delete your scheduled meeting.
- It is impossible to enter a meeting that has ended or not started yet.
- Meetings scheduled in the past that did not have any participants stay visible on the Schedule meeting list.
- It is not possible to edit or cancel a meeting that has started.
- Due to a technical issue, it is not possible for instructors to delete scheduled meetings or recordings. If you wish to do so, we recommend renaming the meeting, clearly signalling the meeting to delete (for example adding “to delete” at the end) and contacting Teaching & Learning Support. We hope to solve this issue as soon as possible.
When having multiple meetings, you might need to scroll down to the Virtual Classroom overview in order to visualize the recorded meetings.
Recorded meetings do not become immediately available, they can take up to 90 minutes to process, depending on your meeting duration. After that, it is possible to Preview, Copy Public URL, Download or Delete every single meeting. These options are available under Actions.

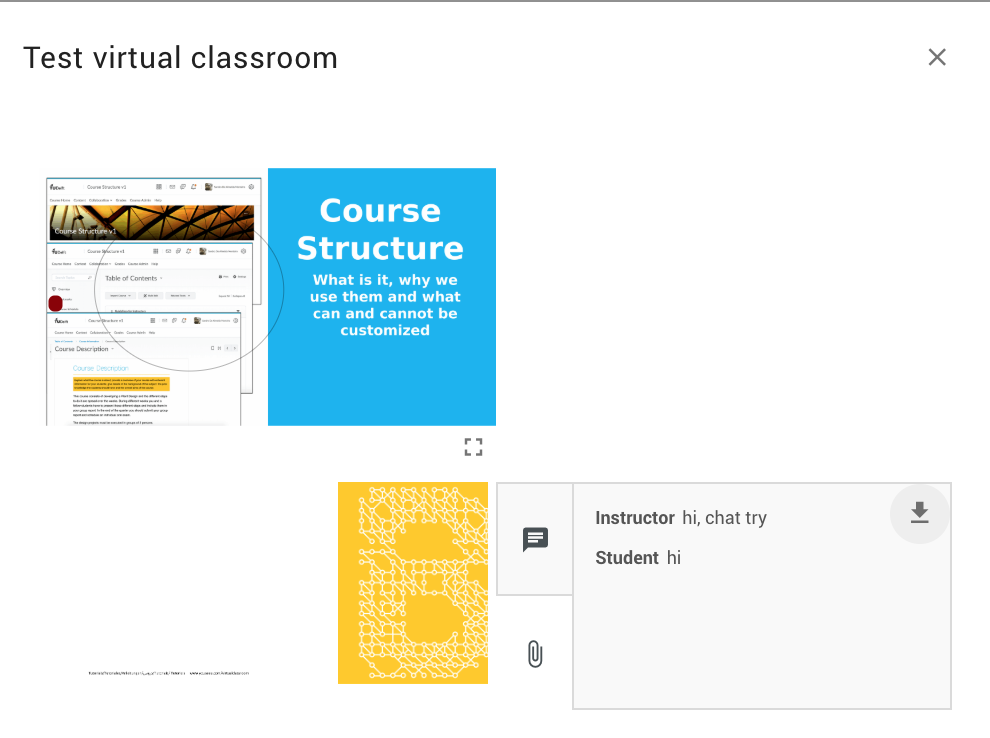
- Preview: see a previous recorded meeting.
A pop up menu opens where you can see all the content that has been presented during the Virtual Classroom meeting.
- Copy Public URL: retrieve the URL of your recording.
- Download: download the recording as a zip file.
- Delete: delete the recording.
Main Canvas Area
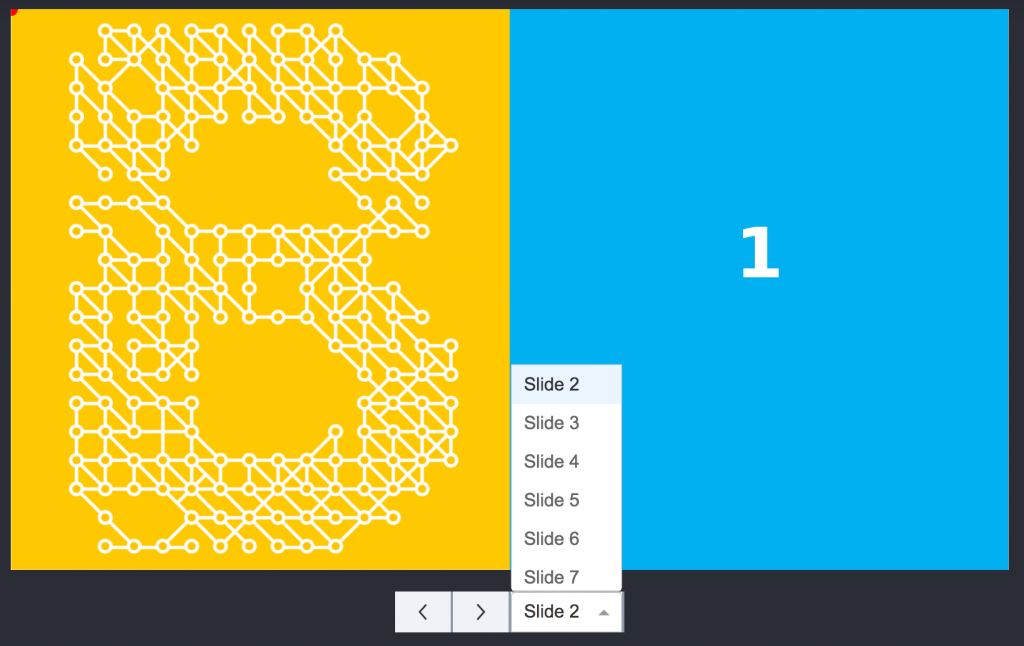
Centered in the middle is the space for slide presentation and desktop sharing. To learn how to upload a presentation, click here.
While presenting slides, the presenter has access to a previous and next button and a Slide selecting drop-down.
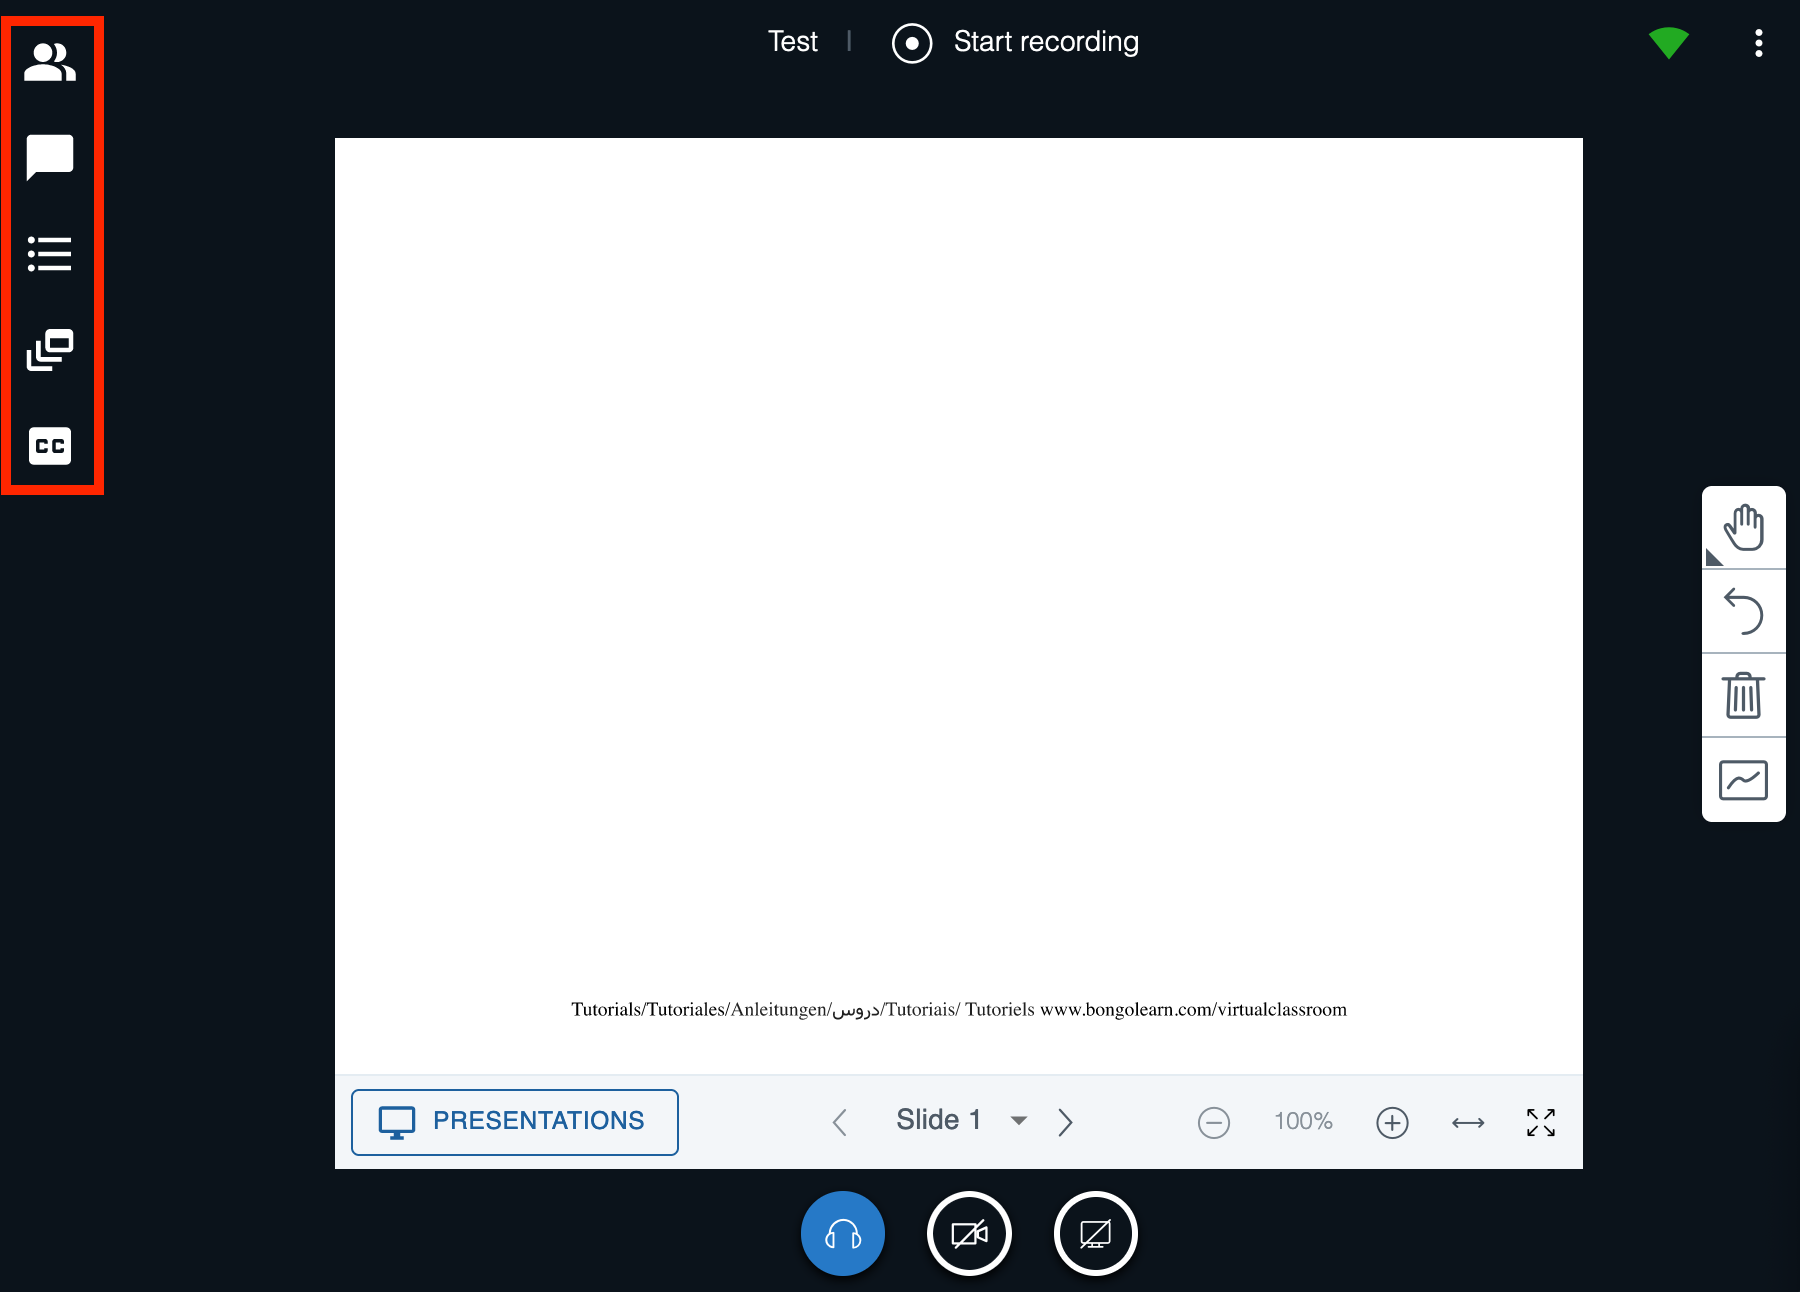
On the right-hand side of the canvas area, four buttons can be found: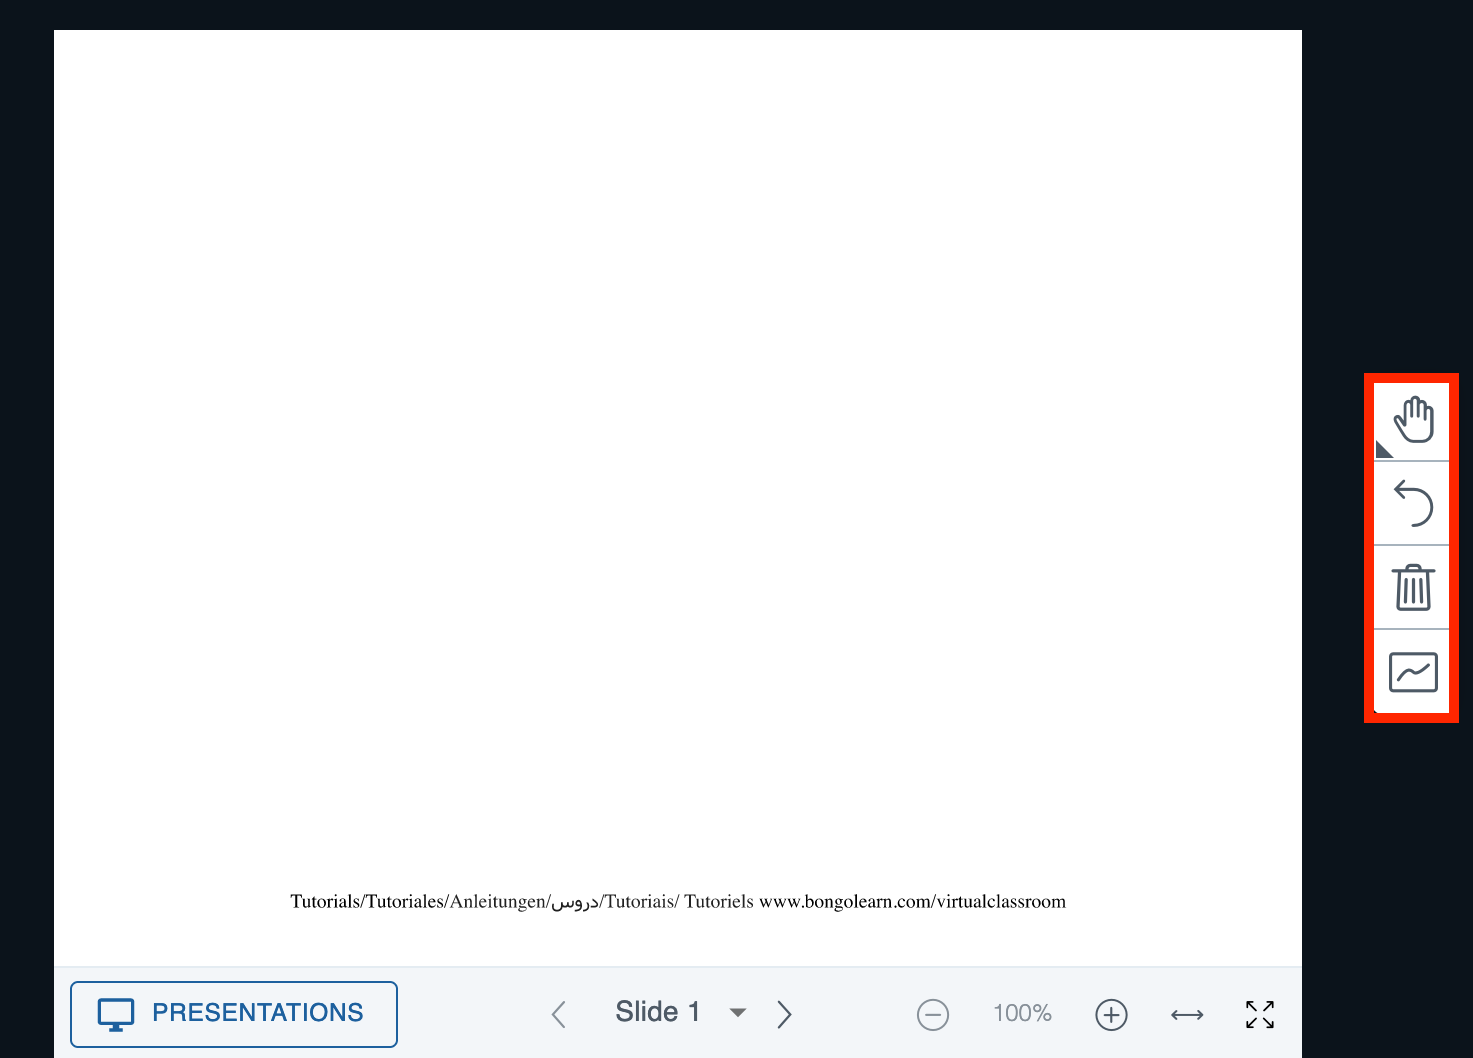
These buttons can be used for (from top to bottom):
- Tools – For selecting drawing, writing or pointer . To add text click T to create a box and start writing.
- Annotation removal (similar to ctrl-z).
- Remove all annotations.
- Multi-User mode initialization – When selected, all users can make annotations.
At the top left, you can expand options for participants list, chat and shared webcams.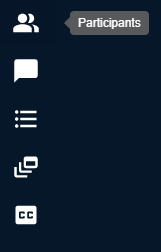
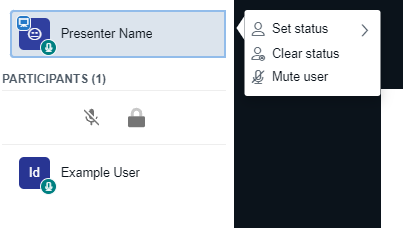
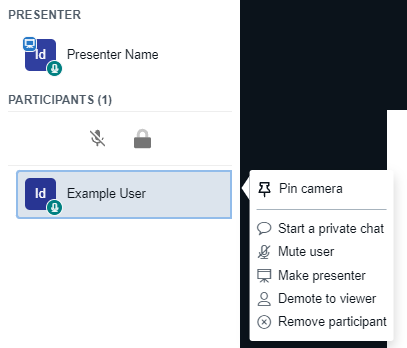
Clicking the first icon will show the Participants list. As an instructor or a student it is possible to initiate a Private Chat with anyone by clicking on the user (unless the feature is locked in Settings) and Clear your own Status. Instructors can also Clear anyone else’s Status, Make anyone presenter and remove a participant. Additionally, a presenter can pin anyone’s video, to make sure that it will be displayed to all users.
If you choose to remove a participant, you can prevent the participant from rejoining the meeting. Note that this is not an option when a participant joins through an external link. In that case, they can only be removed from the meeting, not banned.
At the top left, you can expand sections for participants list and chat.
Clicking the second icon opens the Public Chat.
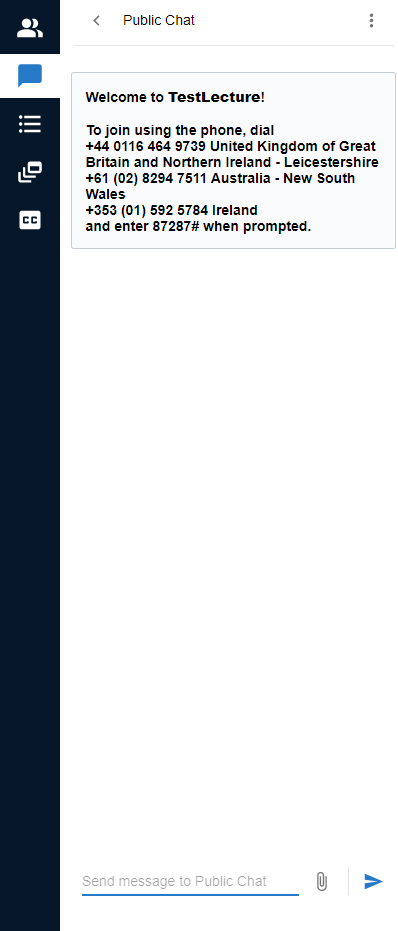
If the Participant list is also open, they are displayed side by side. In case you have selected for Audio earlier on, you will get a welcoming message and also information and tips on how to join the audio, including phone access. Please note that only Instructors can join audio using phone. With Public Chat, both, Students and Instructors can send messages to each other. The Instructor can also upload a file by clicking the paperclip icon next to the input field.
To toggle between the presentation view and (large) gallery view:
- Click on
 on the top-right of your screen.
 - Select Presentation, Gallery or Gallery (Large) to switch between views.
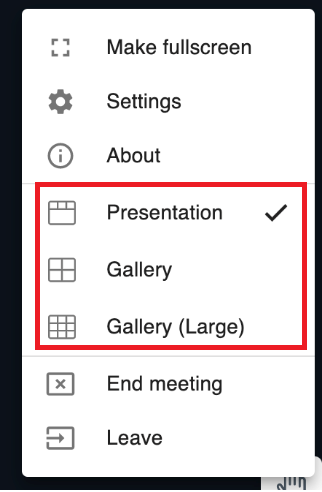
In gallery view, you are able to see up to 10 people at the same time in a grid view, which is the same as in the presentation view. With the large gallery view, you can see up to 25 people at the same time
Title, recording and connection quality
![]()
At the top of screen, you’ll find the title of the meeting and next to it, the recording button. ![]()
The current Presenter can click it to start recording the meeting. The circle will then change to red and the Recording will be visible to all participants.
Be aware that if the Start record automatically option was checked when you scheduled the meeting, the session automatically starts recording the moment you enter the meeting room. However, clicking the record button sets start and end points for the final recording.
If you want to have some initial time to prepare the session, then don’t choose Start record automatically option when scheduling a meeting, and press the recording icon when you are ready.
In the recordings, you can see who participated in that particular meeting and the questions that were asked. Any files that were uploaded during that meeting are visible as well.
If you plan to re-use recordings, we recommend you to use Kaltura or Collegerama.
There are 3 icons at the top right corner of the canvas:
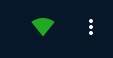
The first icon is an internet connection speed indicator. This green/yellow/red indicator lets you know whether or not you are connected to your Virtual Classroom session with sufficient speed to participate fully in the meeting. You can click on the icon to get more information about your connection:

If you have a yellow or red indicator, you will likely experience issues like not being able to see or share webcams or desktop, as well as potential audio issues. If this is the case, using an Ethernet cable instead of WiFi might improve your connection.
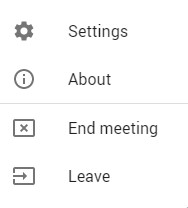
The second icon allows to:
- Enter Settings (more info here)
- See information about your session
- End the meeting
- (Temporarily) leave the meeting
Settings
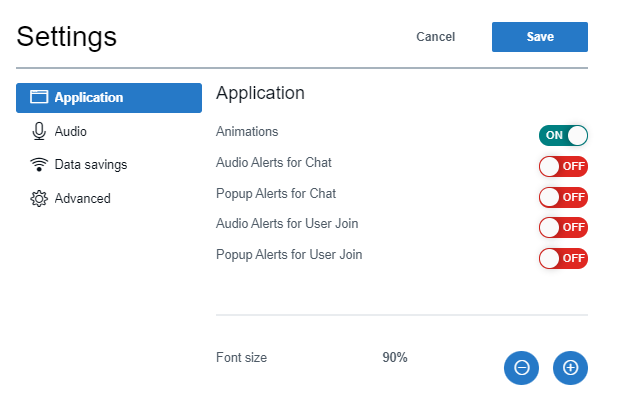
Clicking the Settings icon allows you to change the default Application and Data Savings settings. Any changes made here can only be seen by the user who makes the changes.
In the Application settings it is possible to enable/disable Audio Alerts for Chat, Popup Alerts for Chat, Audio Alerts for User Join, Popup Alerts for User Join and to increase or decrease Font-Size.
The Closed Captions option allows moderators the stenographer role, providing real time captioning for the other participants. To do so, click on Closed Captions in the menu in the upper left corner and start typing in the white space.
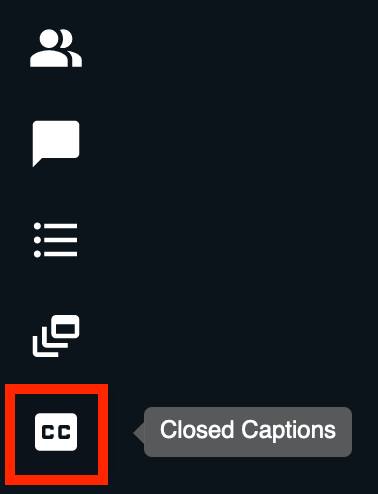

Make sure to enable Closed captions and make it visible for the participants by clicking on the Closed captions button in the bottom left corner and to click start in the popup that appears. It is also possible to change the Closed captions settings in the popup before making it visible.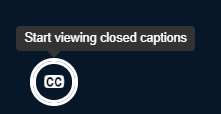
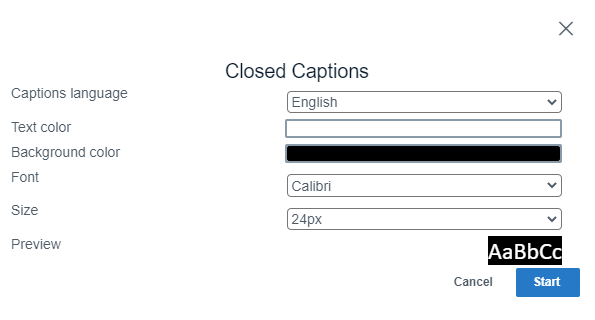
To be able to see captions, participants would then need to enable Closed captions as well. The Closed captions will appear on the bottom of the presentation window on both the moderator and participant screens. Participants who have activated the closed caption function will see, in real time, captions as they are added.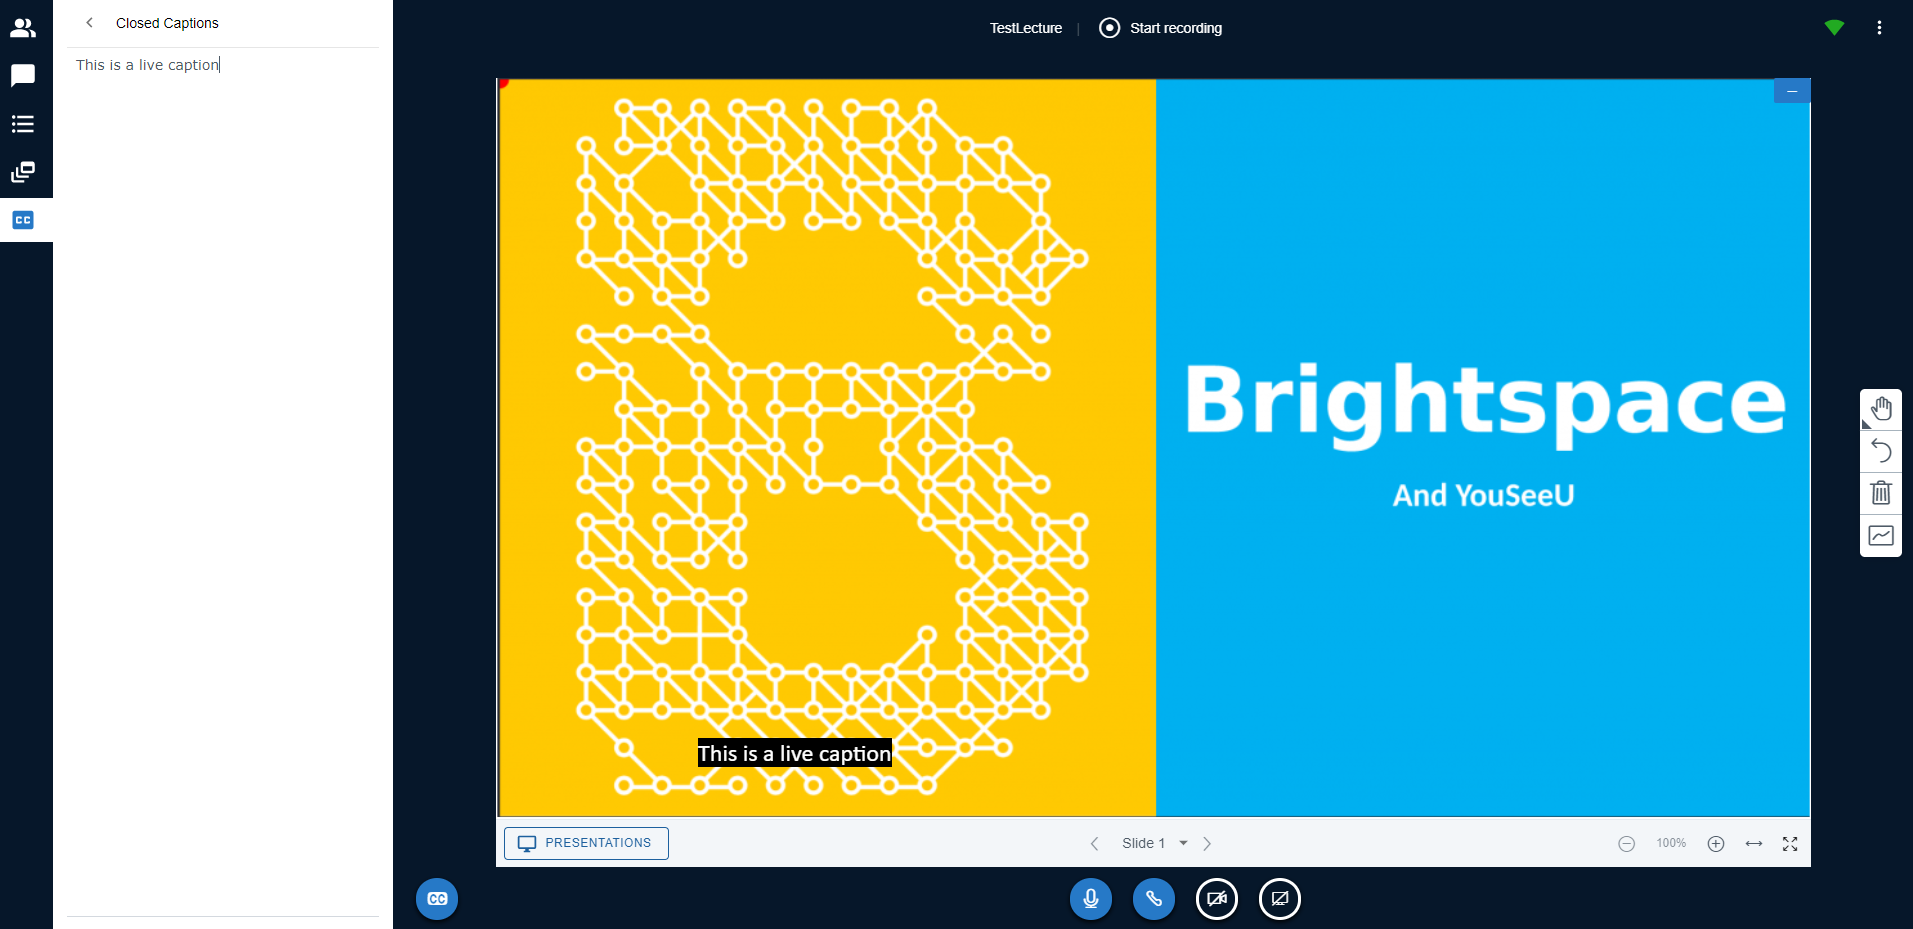
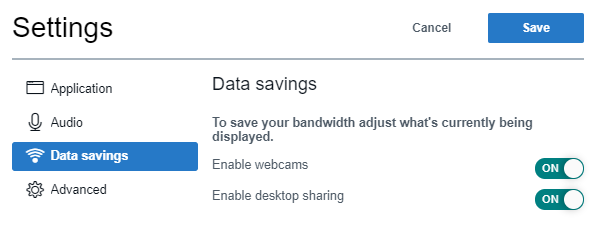
Clicking the Settings icon allows you to change the default Application and Data Savings settings. Any changes made here can only be seen by the user who makes the changes.
The Data Savings settings enable you lower the bandwidth usage, by allowing or disallowing camera sharing and/or desktop sharing.
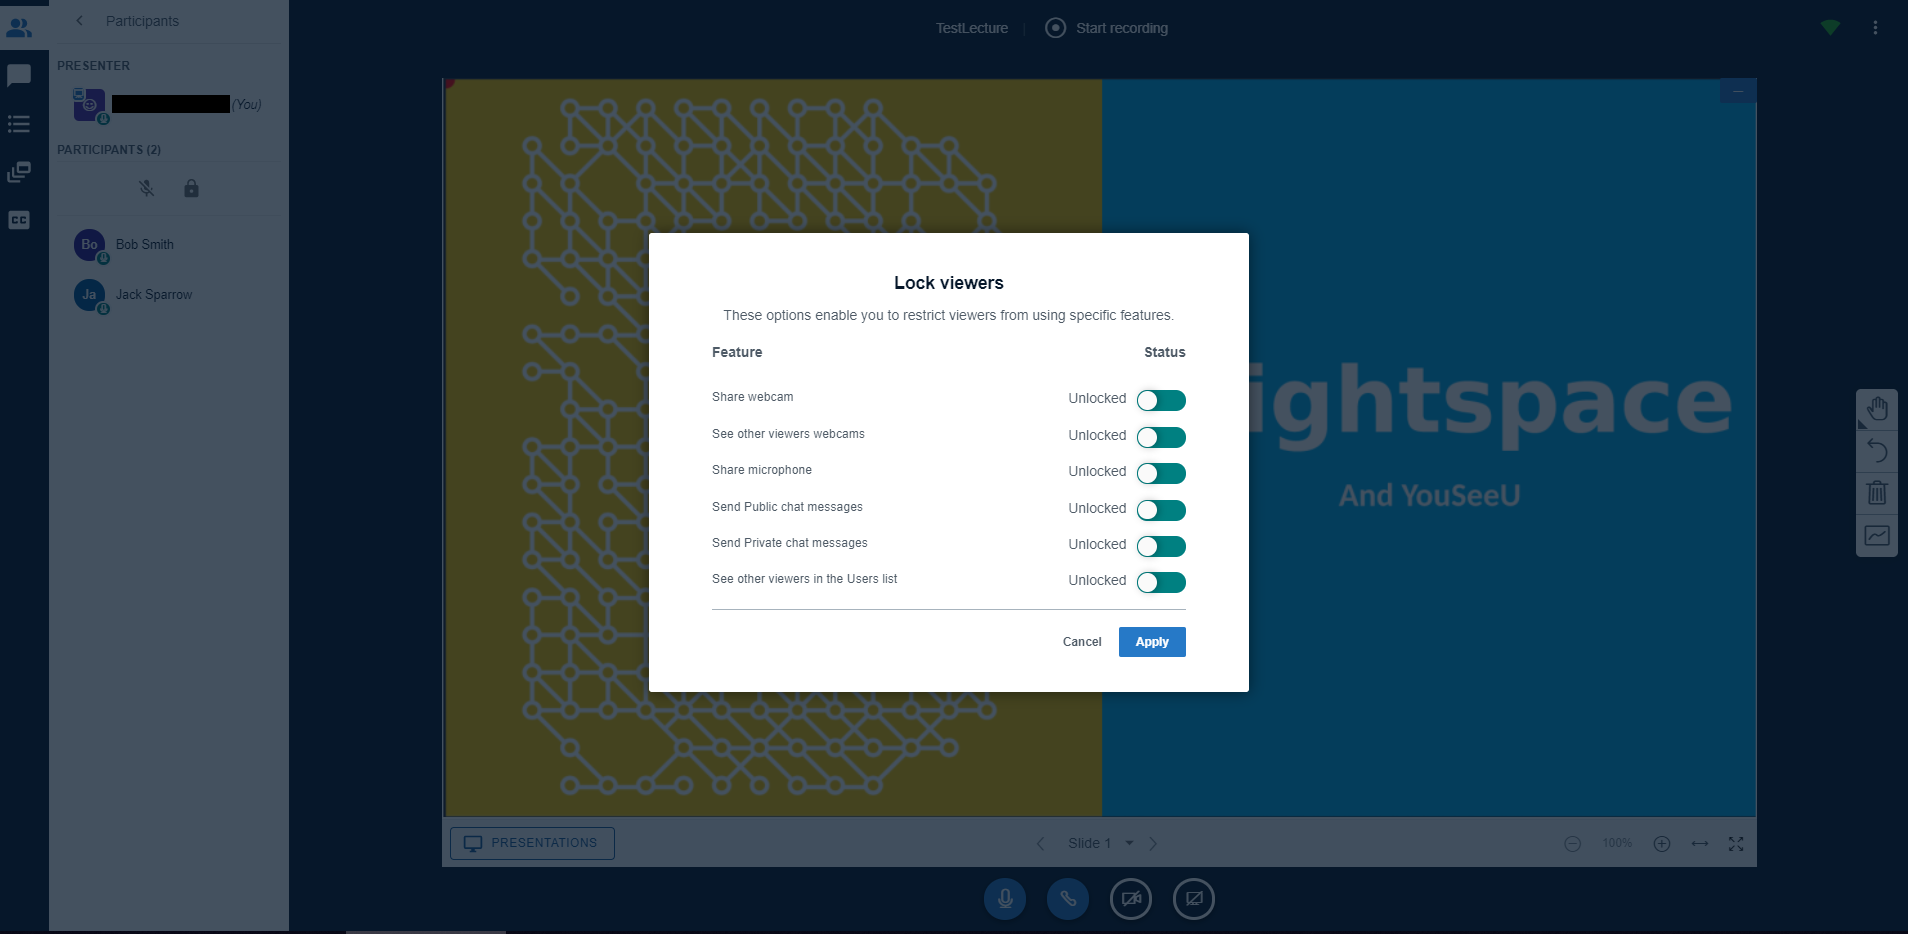
Clicking the Participants icon in the upper left corner allows you to change the Participant settings. Any changes made here can only be seen by the user who makes the changes. 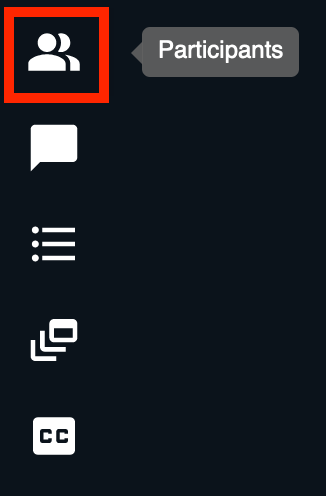
The Participants settings enable you to lock (disable) students’ webcam, microphone, and ability to chat publicly and/or privately.
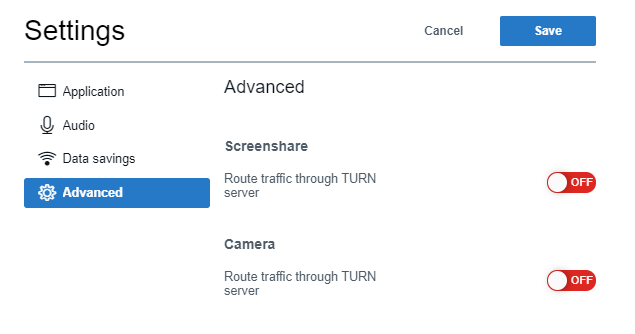
Clicking the Settings icon allows you to change the default Application and Data Savings settings. Any changes made here can only be seen by the user who makes the changes.
The final type of setting you can adjust are the Advanced settings. They enable you to route the data through a TURN server, which assists in firewalls for multimedia applications.
Audio settings, sharing webcam and desktop, drawing and participant status
The following settings and functionalities are available in the bottom center of the screen.

To mute or un-mute your microphone temporarily, click on the most left icon. There is only one button for both options. The icon will change according to the active option.
The following settings and functionalities are available in the bottom center of the screen.
To join or leave the audio, click the most left icon (microphone). There is only one button for both options. The icon will change according to the active option.
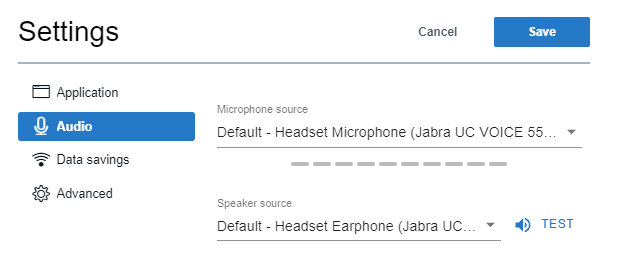
To select a microphone source and speaker source and perform a private test, go to the settings on the top right of the canvas area and go to audio. In the resulting dialogue box you can chose the microphone and speaker source, check the audio stream volume and play sound.
The following settings and functionalities are available in the bottom center of the screen.
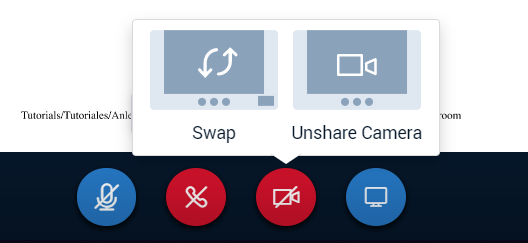
Clicking the third icon from the left will open Video Menu. From here, you can select to Share the Camera. The icon will now become red. When clicking on the icon again, you can now unshare your camera. Up to 30 people can share their camera at once in a meeting.
If you or any other participant is sharing his/her camera, you can navigate to the camera icon and select the swap option. This will make the camera view large, and the presentation small. When clicking on this icon again, you change back to the original lay-out.
Moderators are able to pin a camera that they do not want to be swapped out. While a camera is pinned, all users will be able to see that camera if they are talking or not. Up to 9 cameras can be pinned at once. This allows a user who may not be talking during the duration of the meeting to be seen constantly for all users such as a moderators or presenters.
The following settings and functionalities are available in the bottom center of the screen.
Clicking the fourth button, the Share Screen allows you to share an entire screen (from any screen you have currently available) or an Application Window (which only broadcasts a specific application window).
- If using Firefox, select the window to share and click Allow.
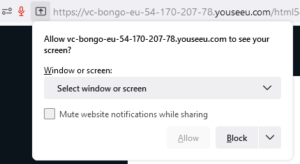
- If using Chrome or Microsoft Edge, select the screen, window or chrome tab that you want to show to the students. If you also want to share the system audio with the users, select Share system audio. This option is available in Chrome and Microsoft Edge.


The Entire Screen or the Application Window will then be displayed in the main canvas area replacing any slide that might have been present. You can pause or temporarily go back to your presentation by clicking view presentation at the bottom of the page.
The following settings and functionalities are available in the bottom center of the screen.
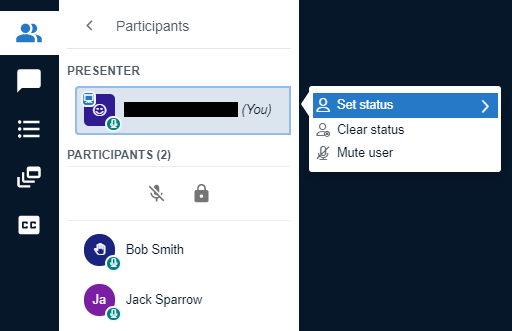 The last icon is Status.
You can raise you hands or share status related to their understanding of the presentation by clicking on your name and Set Status.
This status will be displayed in the Participants pullout, in the circle to the left of the user’s name. 
Creating Groups
For more information about breakout-rooms click here.
Make a meeting for every group and select invite entire class. Then let students go to the correct group themselves via Collaboration > Virtual Classroom. It is also possible to add the meetings to a Module or Content-item.
- Advantage: Least amount of work.
- Disadvantage: no restriction, every student can potentially access every group.
Make a meeting for every group when setting up the virtual classroom; do not select invite entire class. Then for every meeting go to the actions (three vertically stacked dots) menu and select Manage invites. Click on the persons you want in the group (Users that haven’t yet accessed Bongo in the current course will not be listed for selection).
Optional: To add the meeting to the Content/(Sub)Module; add the meeting via Existing Activities > External Learning Tools. (All meetings are listed separately in the list. Do not select Virtual Classroom launch).
- Advantage: Only students who are invited can enter.
- Disadvantages: More work & students need to access Virtual Classroom before being able to make the groups.
Make a meeting for every group; deselect Invite entire class, select Allow external participants and Save the meeting. Then add (Sub)Modules in the Brightspace course for every group and restrict them to a group using the Release Conditions. After this you can add the correct meeting per group via Existing Activities > External Learning Tools. (All meetings are listed separately in the list. Do not select Virtual Classroom launch).
Another option is to mail every student the link with the correct meeting, but this is not advised as they can share the link and you cannot verify the identity of the students.
- Advantage: Less time consuming
- Disadvantage: Students might share the link and/or pretend to be someone else(!)
Actions: breakout room, mute all, initiate a poll, upload a presentation
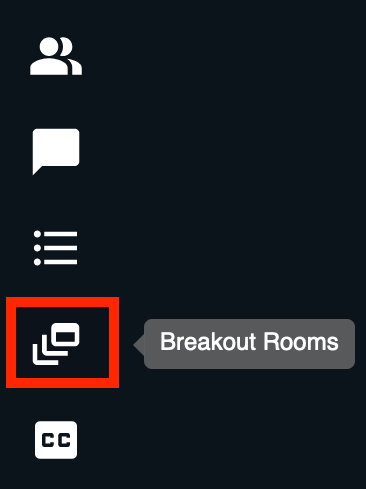
Only the moderator will have access to the Actions menu at the upper left corner allowing him to see the Participants, have a public Chat, go to Breakout Rooms, Initiate a Poll or add Closed Captions.
In Virtual Classroom, instructors can temporarily divide learners into 2-6 Breakout Rooms (small groups) for discussion. Learners enter breakout rooms with moderator roles, that is, there, they can upload presentations, and share their desktop. The work in this space will not be saved or recorded. Breakout rooms are only available for instructor-scheduled sessions. More information about Breakout Rooms can be found here.
Only the moderator will have access to the Actions menu at the upper left corner allowing him to see the Participants, have a public Chat, go to Breakout Rooms, Initiate a Poll or add Closed Captions.
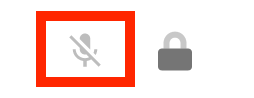
Mute all is acccessible to moderators inside the Participants menu. It will mute the microphone sound of all participants, including yourself. You can confirm by checking the participant list and at the lock icon if you have chosen to enter audio. To unmute yourself click on your name and select Unmute user.

Only the moderator will have access to Actions at the upper left allowing him to go to Breakout Rooms, Initiate a poll or add Captions.
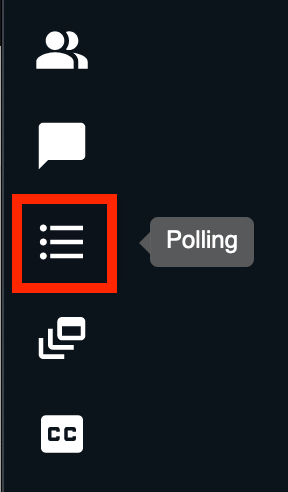
When clicking the Pollling option the moderator will have 7 options: Yes/No, True/False, A/B, A/B/C, A/B/C/D, A/B/C/D/E and Custom poll.
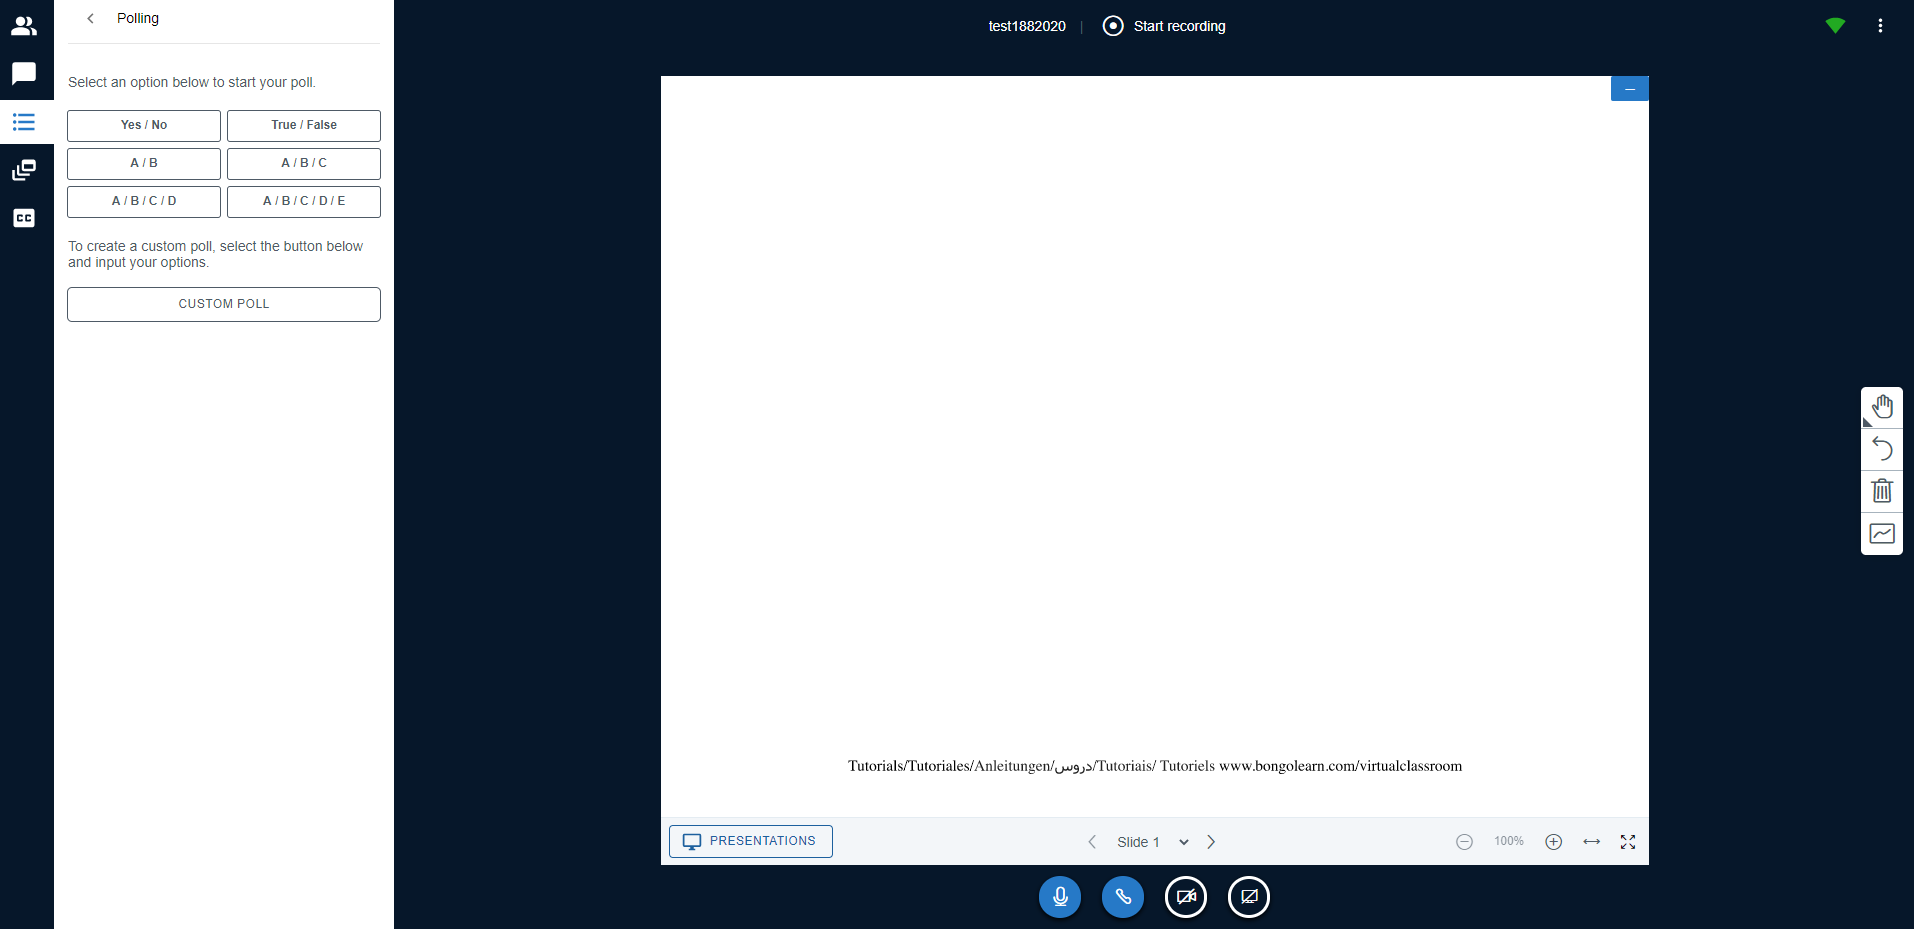
Choose the poll type from the menu that correlates with the type of question you will ask. Ask the poll question and allow time for participants to respond before publishing as it will close down the poll.
You can upload a file/slide with the poll questions and display it in the presentation window while combining them with the poll options.
You can also create a custom poll type if needed. When Custom Poll is selected, you will be prompted to enter polling choices. You may enter up to five answer choices for students to choose from.
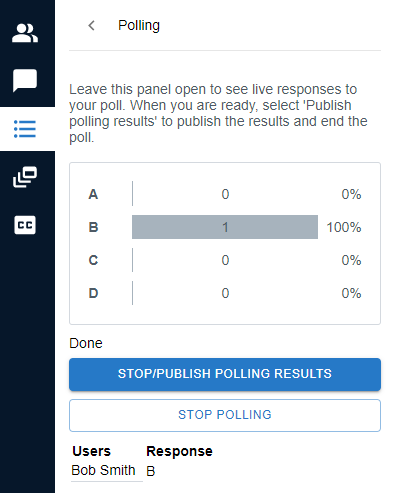
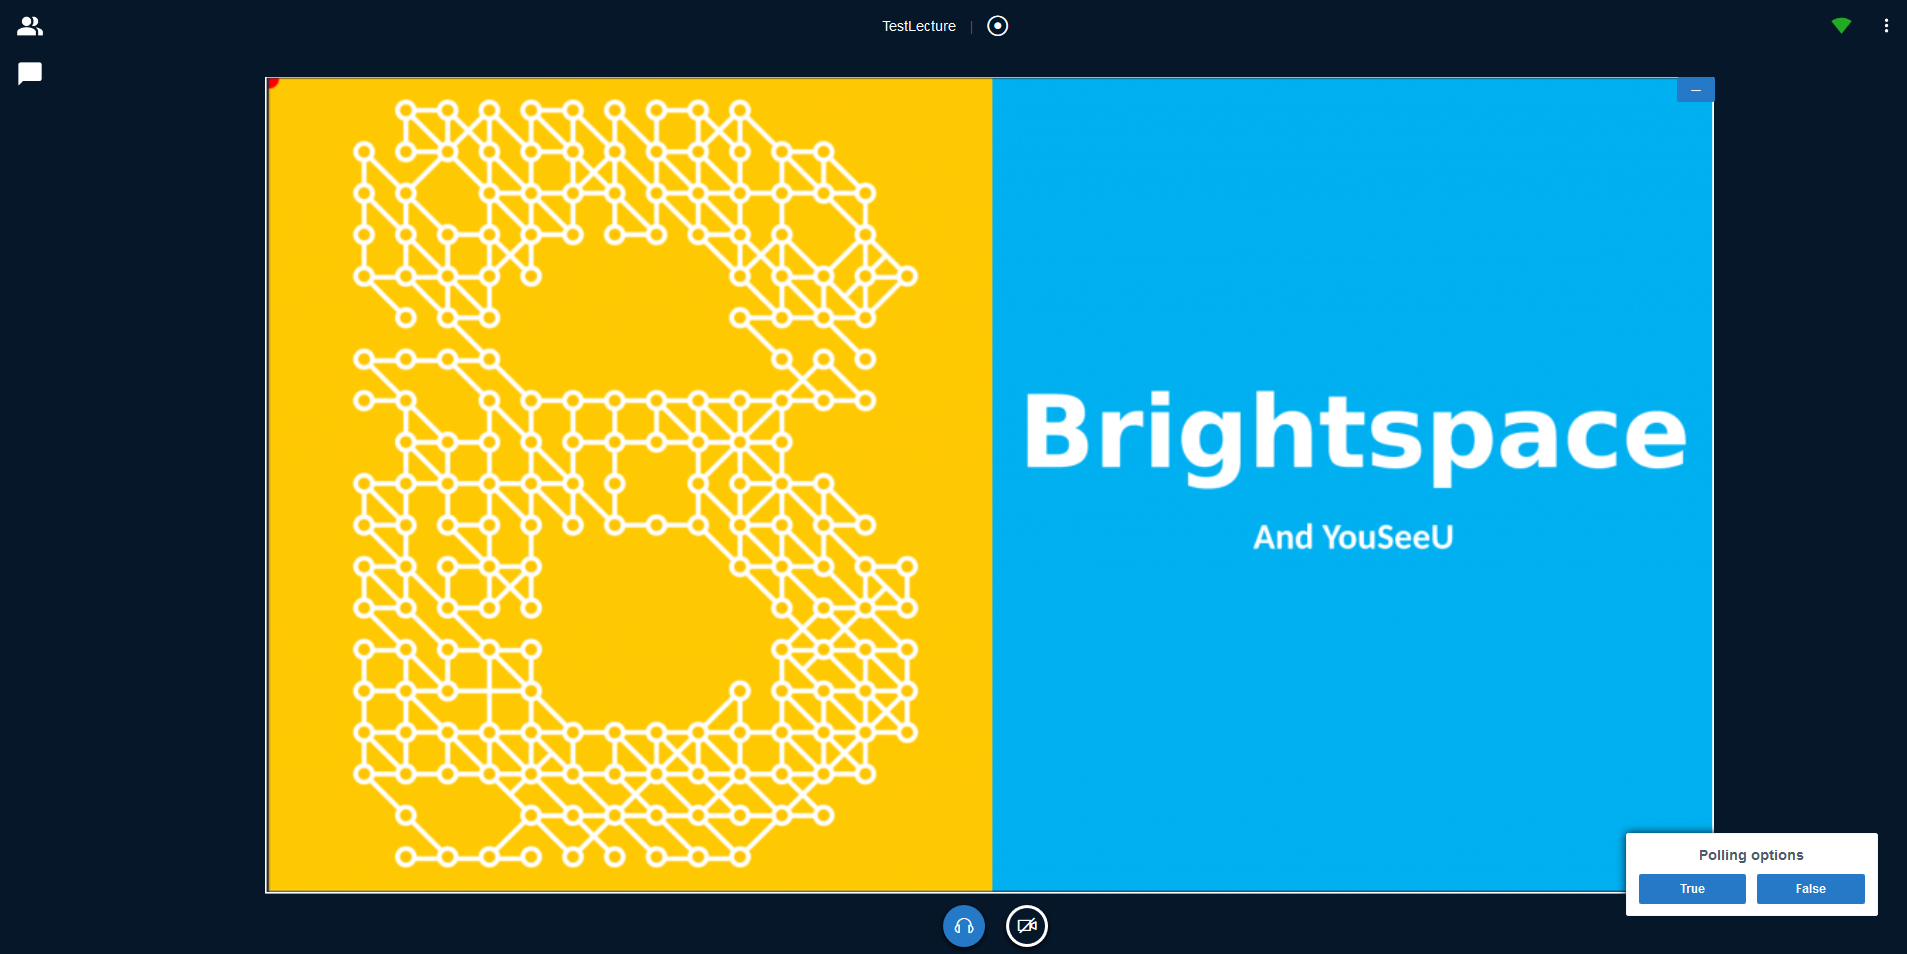
As soon a type of poll is chosen by the moderator, students will see the available options and can chose one. The Live poll results displays the current results before publishing.
After clicking Stop/Publish Polling results, the live poll results are displayed overlaying any existing loaded presentation and no more answers are allowed.

The published poll results stays at the bottom right corner of the current slide and can be reviewed by returning to that specific slide.
Polling results are only visible in the presentation view, they are not visible if you are sharing your screen.
Only the moderator will have access to Actions at the upper left allowing him to go to Breakout Rooms, Initiate a poll or add Captions and a Presentations button at the bottom left of the center to add presentations.
![]()
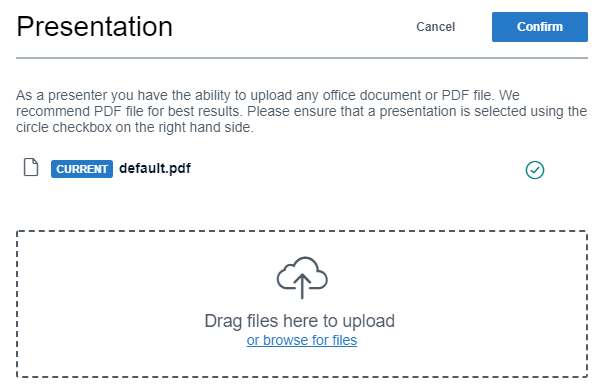
Clicking Presentations activates an overlay window to select files for your presentation.
You can drag a file from your computer into the uploading window or click on “or browse for files” to open your file browser.
 After opening a file, each slide is then converted in pages for navigation.
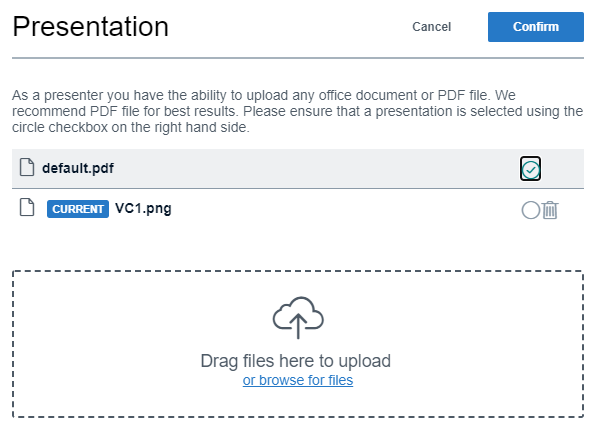 Files selected or dragged into the uploader will appear in a list of presentations with buttons to Confirm or Delete the file. The file most recently uploaded will automatically be shown in the presentation space.
To navigate between uploaded files for use in the presentation space, click the Presentations button to return to the list of uploaded files. Then click the Confirm button for the file you would like to switch to. 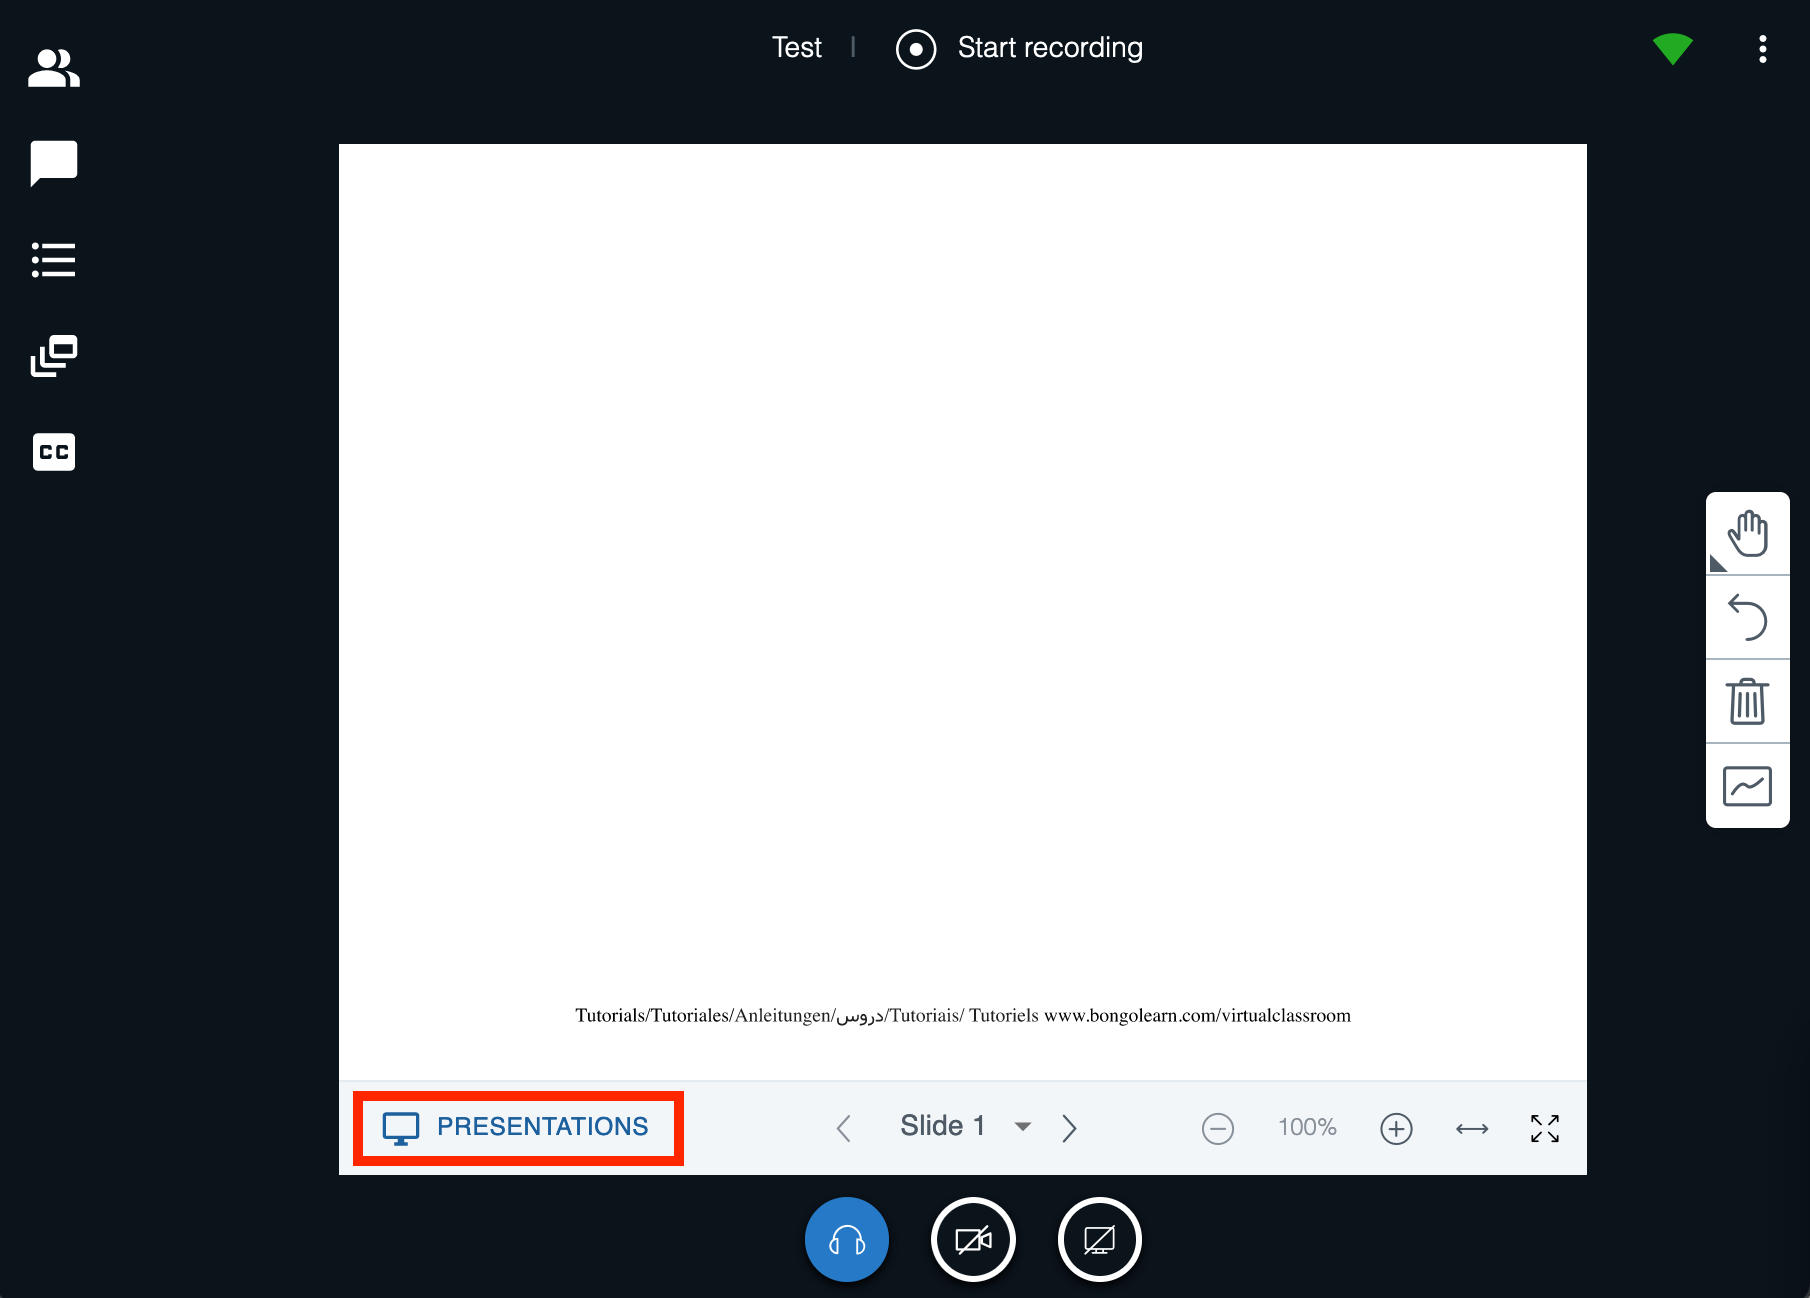
Breakout Rooms
In Virtual Classroom, instructors can temporarily divide learners into 2-6 Breakout Rooms (small groups) for discussion. Learners can upload presentations, and share their desktop. The work in this space will not be saved or recorded. Breakout rooms are only available for instructor-scheduled sessions.
- To initiate Breakout Rooms, go the upper left corner, select Breakout Rooms and click Create Breakout Rooms

- Select the number of breakout rooms you would like to create (minimum of 2 rooms, maximum of 8).
- Indicate the Duration for the breakout session.
- Drag and drop names in the main session to assign them to the preferred Breakout Room or assign them randomly using the Randomly assign button.
- When finished, click Create.
- Users will now receive an invitation to join their assigned Breakout Room. The first person to enter the breakout room will be assigned the Moderator role.
- You can monitor Breakout Rooms by clicking on Breakout Rooms in the upper left corner.
- To join a Breakout Room, click Join Room. The Breakout Room will open a new tab.

- If you would like to leave one breakout room and join another one, close the Breakout Room tab and repeat the process above.
- You can also drop in and out of audio for each breakout room from the main room using the Join audio button.
There is a countdown timer at the top of the screen in a Breakout Room. Learners will automatically rejoin the main Virtual Classroom when the timer runs out.
You can also end a Breakout Room session by clicking on the Breakout button in the upper left corner and selecting “End all Breakout Rooms”. 
Troubleshooting
- Cookies might be blocking your browser activity. Start by clearing all cookie settings and then try again. You will find more information about cookies here.
- Your browser or device might not be (fully) compatible with Virtual Classroom. Try a different browser (Firefox generally works best). These articles on browser compatibility and device compatibility might also help.
- The Bongo website can also be helpful for further troubleshooting.
- If this does not help, don’t hesitate to contact us at Teaching & Learning Support.
It could be that the calendar tool is disabled. Follow the steps below to enable the Calendar:
- Go to your Course in Brightspace
- Click on the Course Admin in the course menu and click on Tools.
- Check if Calendar is activated: If the Calendar tool has an X next to it, change the switch to a V.

- Go back to the Virtual Classroom and try to schedule a meeting again, it should work now.
Students can only see recordings for meetings if they were invited to participate in the original meeting and the box Publish recorded meeting is checked in the meeting settings. If they were not invited or this box was not checked, you can still publish the recording using the following workaround:
- Go to your Course in Brightspace
- Go to Collaboration > Virtual Classroom in the course menu.
- Click on the 3 dots next to the recorded meeting you want to share with the students and choose Copy Public Url. The link will then be copied to your clipboard.
- Navigate to the (Sub)module in the Content where you want to share the meeting.
- Click on Upload / Create and choose Create a link
- Give the link as Title the name of the meeting and paste the link you copied in step 3 into the URL
- Check that it should Open as External Resource.
- Click Create.
- Repeat the above steps until all meetings are created.
Everyone that has the link is now able to watch the recording.
It might be that you set the meeting date and time to Now. In this case, you cannot edit the meeting settings until the time that the meeting is finished. During this time you can only launch the meeting and nothing else. The options to edit or cancel will become available after whenever the “Now” moment was + the selected meeting run-time.
Example:
If “now” is at 20-03-21 at 14:33 and the meeting is scheduled to run for 60 minutes, you cannot cancel or edit the meeting until it is 15:34).
- Reposition the microphone closer to your face, as some microphones are directional and work better positioned in certain directions.
- Connect using a different microphone if available.
- Check your upload speed with this website’s service to ensure it meets the required bandwidth speed for your session. Please refer to this article when calculating the bandwidth needed for a Virtual Classroom meeting.
This is often caused by a large amount of LaTeX formulas contained in the slides. There is no solid fix for this problem, only a workaround which may add borders, disable all interactive buttons contained in the PDF and lessen the quality of your slides. This is the workaround:
- Open the PDF of the slides in a PDF viewer (Adobe Acrobat Reader for example).
- Click the print icon.
- Select Print to PDF as printer and click Advanced.
- Select Print As Image and close the window.
- Use the different sizing options to minimize the white borders and click Print.
This should generate a PDF containing the slides as images, which will load faster in Virtual Classroom.
FAQ
No, it isn’t possible to edit the recording in Virtual Classroom before publishing it. The only workaround is to download the recording and edit it through another program, after which you can upload it to Brightspace to make it available for your students. However, certain features will be lost when using this method, such as cursor placement and presentation slides.
Yes, it is possible for students to enter a Virtual Classroom meeting if students were enrolled into the course in Brightspace after the meeting was created.
You can select the microphone by going to Settings > Audio > Microphone Source. The Settings menu can be accessed by clicking on the three dots next to the connection quality indicator at the top right of the screen.
![]()
Further Help
When you open Virtual Classroom in a course offering in Brightspace, there is more help & information to be found under the action dots > “HELP?” in the upper right corner of the screen. If you do not manage to find the answer to your question here, you can always get in touch with the Teaching Support desk