Communicating dates and deadlines to students is an important part of any course. This can be automated in multiple ways. For example, when you create a new assignment and put a deadline on it, that deadline shows up in the Course Calendar.
You can use the Manage Dates tool to view, bulk edit, and bulk offset the date availability of your Content, Assignments, Quizzes, etc.
The Calendar tool in Brightspace allows instructors to schedule events for and with students. There are a number of possibilities which are explained on this page.
It is possible to import a Calendar into Brightspace from MyTimeTable using an iCalendar file.
Creating a Due Date on an assignment (below), quiz or other Brightspace Tool will appear automatically in the Course Calendar.

If you add lecture slides, a video, or other course materials and include a due date, that date gets transferred to the course calendar so that students can see it:
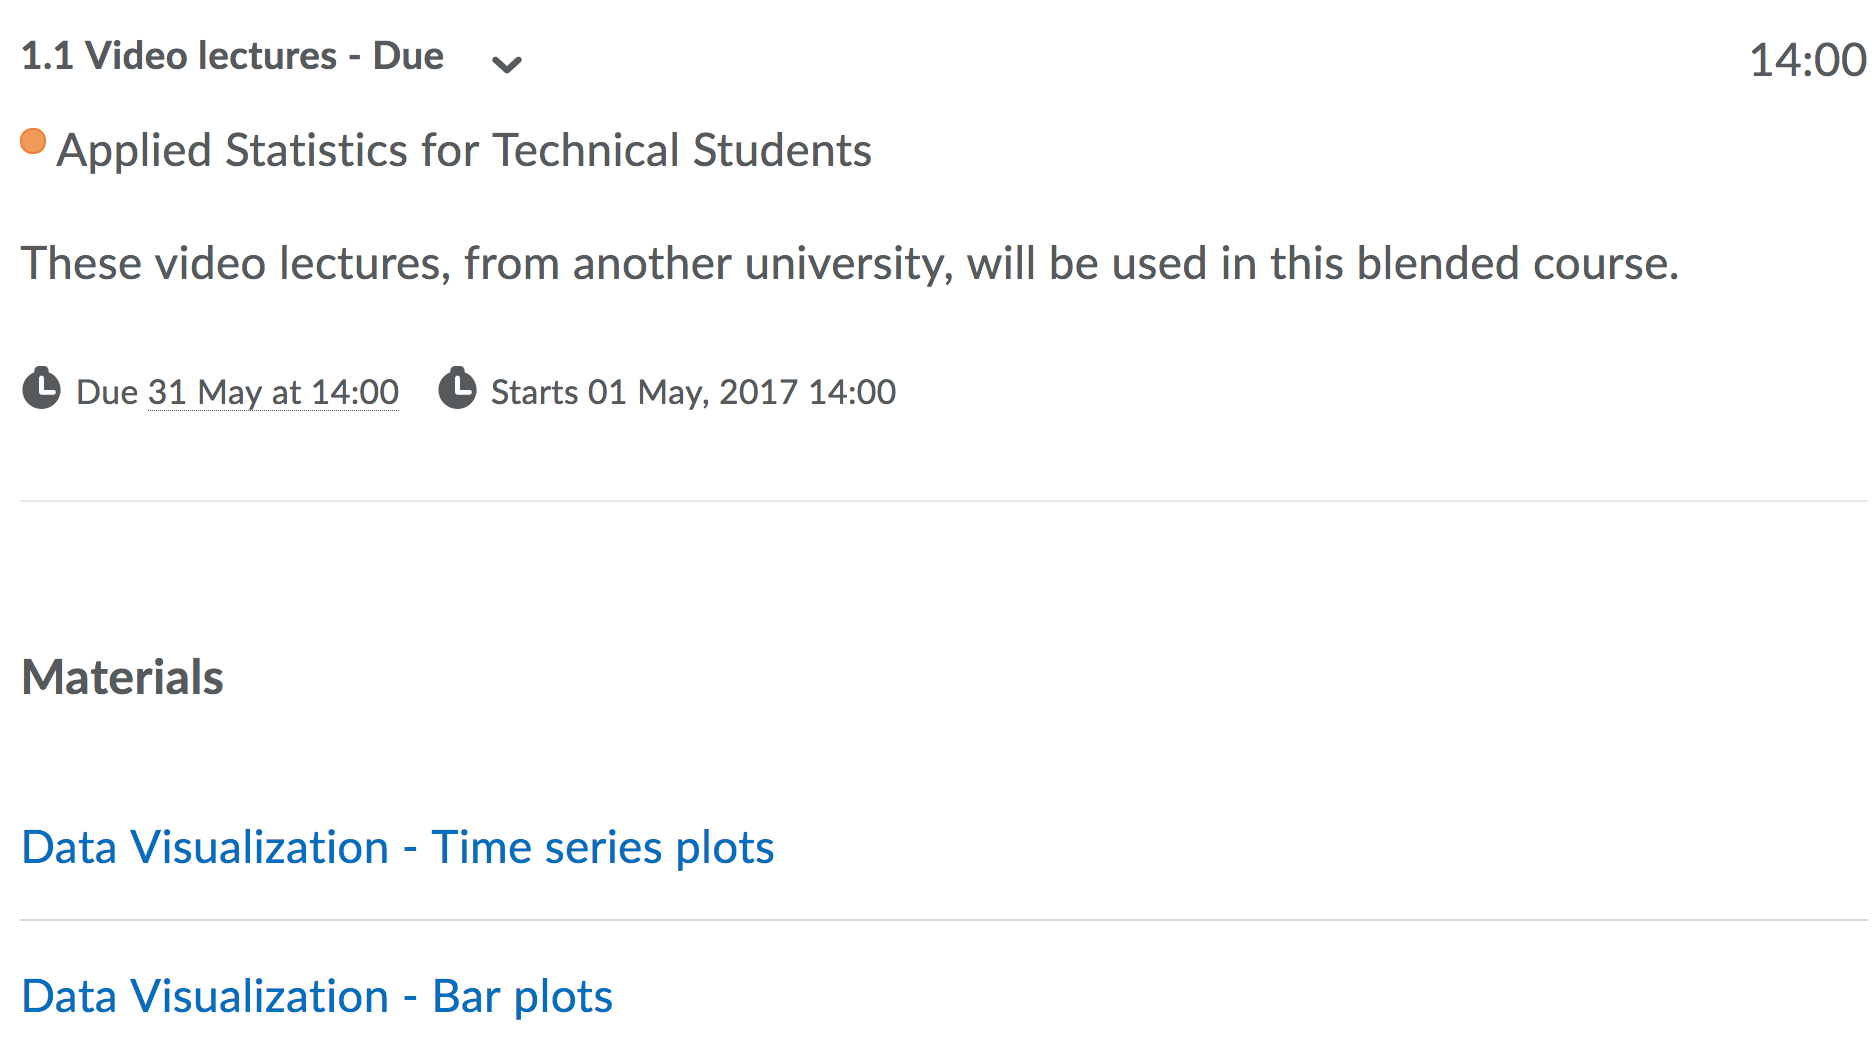
Students will see this information here for your course only, because this course calendar is within your course. However, students can also see all their courses and all their calendars in one view. They can do this, for example, by using the Pulse app from Brightspace, which will show them all the work coming along in the future. This way they can plan ahead if they see many activities and due dates coming up at the same time. Therefore, we recommend, as an instructor or teaching assistant, that you publish dates, as far ahead as possible, so that students can plan ahead.
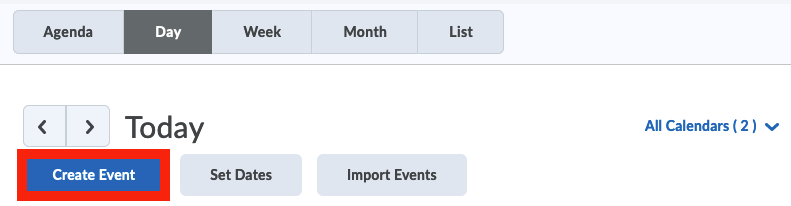
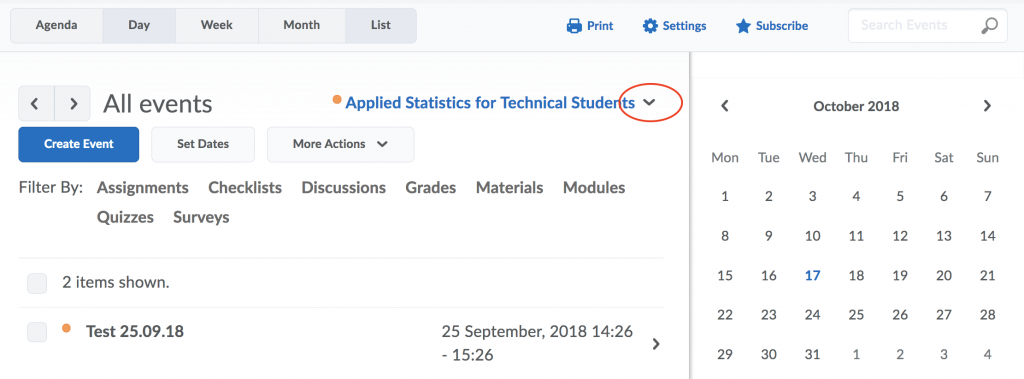
- Click on Course Admin and then click on the Calendar link. Add a calendar event by clicking Create Event.
- Enter in the details, the description, start date, end date, location and whether it is a recurring item.
- Click on Create to finish. That event then shows up in the calendar.
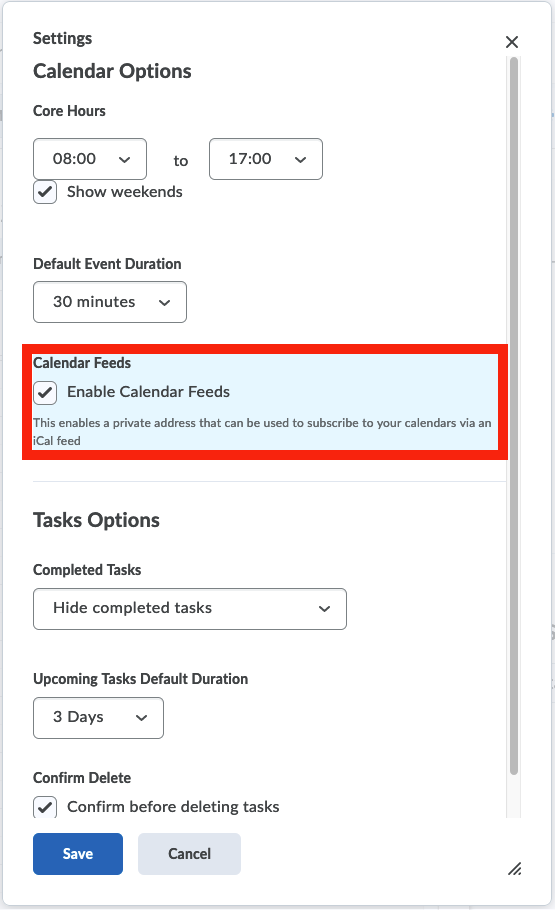
- (optional) You could also Import events, using the iCal format, from other calendar software. If you Enable Calendar Feeds under Settings, you can use a private address to subscribe to your calendars via an iCal feed.
- (optional) If you enabled calendar feeds, you can also allow students to subscribe to your course calendar. To do this, click on Subscribe and then share that link with your class. This gives the students the flexibility to integrate your course’s calendar into their own personal ones.

Subscribing to a calendar allows Instructors and Students to access Calendar events outside Brightspace using iCal feeds. With iCal feeds, course events can be viewed in external calendars such as Microsoft Outlook and Google Calendar. Refer to your device such as iPhones, BlackBerry smartphones, and Android phones.
Refer to your device or application instructions for adding an iCal feed, as each application can have a different method for managing iCal feeds.
Setting up a subscription is done in 2 steps:
Step 1: Enabling Calendar Subscriptions
- On the course Home Page, find the Calendar tool.
- Select the drop down arrow and select Go to Calendar.
- In the Calendar views area, click she settings icon.
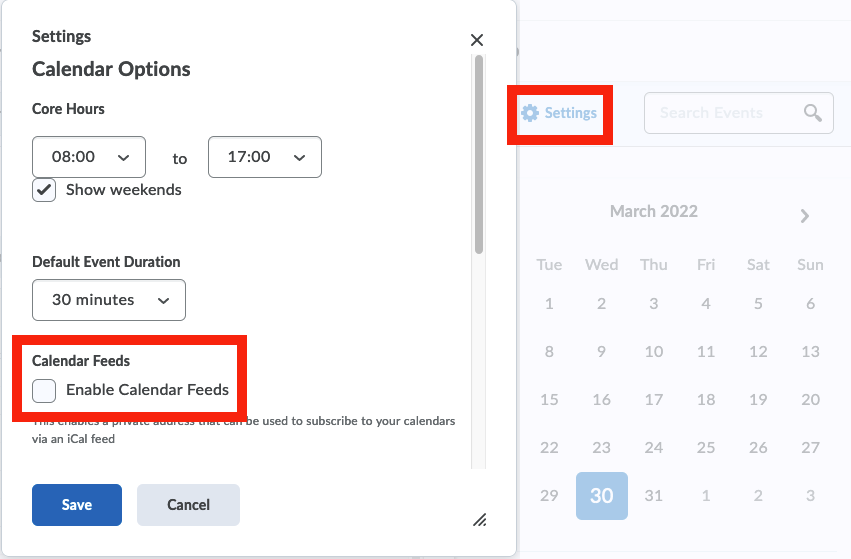
- Select the Enable Calendar Feeds check box.
Step 2: Subscribing to a Calendar
- The first step is to find the instructions to add a calendar subscription from your tool or device.
- Once the instructions have been found, go to the Brightspace Calendar.
- In the Calendar views area, click the Subscribed icon.
- Copy the displayed URL and go back to your tool or device. Paste the URL as the instructions for your tool or device indicate.
- The subscription has been created and events will be displayed in the calendar of your choice.
- You can also access the Manage Dates tool available under the Course Admin section, which enables you to view a list of all objects in your course and edit their date availability values.
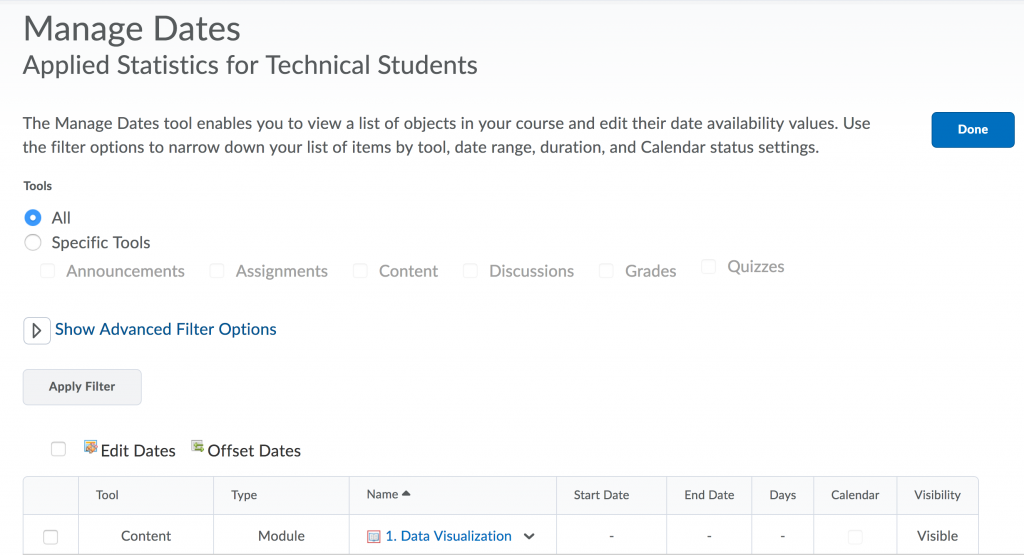
- Use the filter options to narrow down your list of items by tool, date range, duration, and Calendar status settings.
- Click Done to save your changes.

Use the Manage Dates tool to view, bulk edit, and bulk offset the date availability of your Content, Assignments, Quizzes, etc.
To do so, follow the steps:
- Go to Course Admin and click on Manage Dates.
- Select the check box of the items for which you want to Bulk Edit Dates or Bulk Offset Dates.
- In the Bulk Edit Dates dialog box, update the due dates and availability dates. When you are done, click Save.
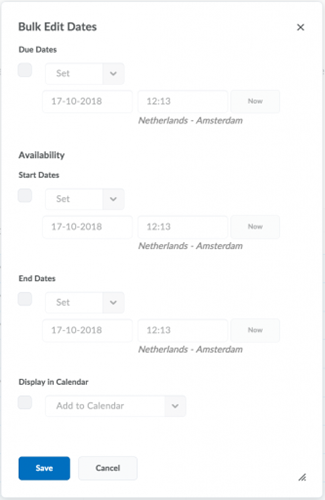
- In the Bulk Offset Dates dialog box, enter your offset details. When you are done, click Save.

It is possible to sort by any of the column headings, including the Type column to sort based on the tool-specific order or use the advanced filter options to work with smaller sets of objects. This allows updating multiple availability dates based on specific criteria.
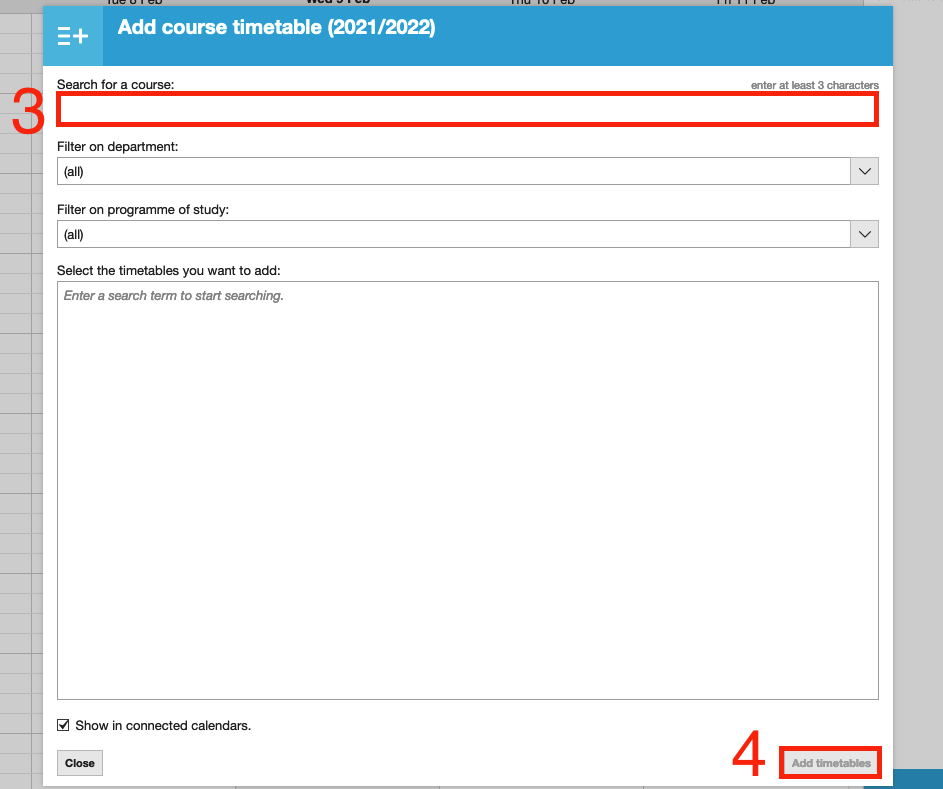
- For your Course Calendar to be visible within your TU Delft MyTimetable feature, you need to first manually add the existing Course Calendar. You can do this by going to MyTimetable, clicking Add timetable (1) and then Course (2). In the pop-up, search for your course and select it (3) and add it by clicking Add timetables.

- From this moment onward your course will be added to your MyTimetable app.
It is also possible to synchronize timetables from various external calendar services:
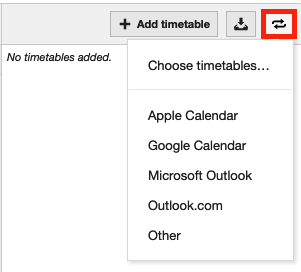
- Go to MyTimetable.
- Add the desired timetable with the add timetable button if you did not already do so (make sure you choose the right academic year).
- Click on the download icon and choose iCalendar
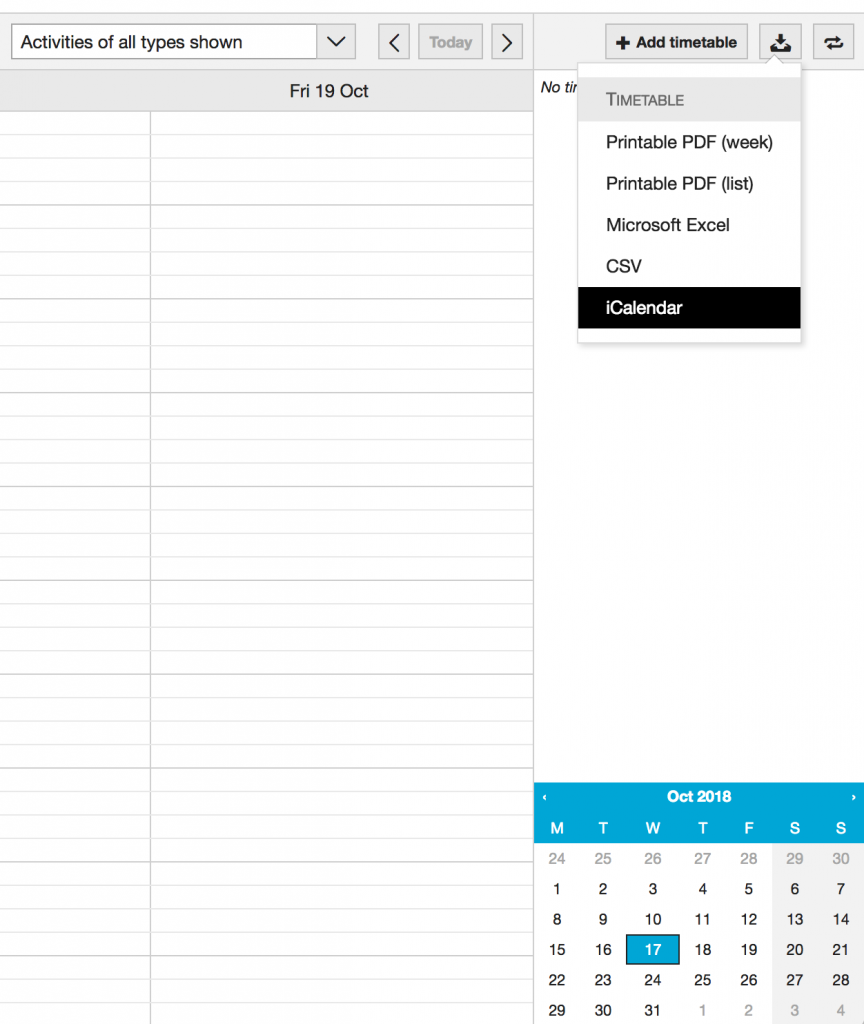
You can now import your TimeTable for desired dates (again, make sure to choose the right year because last years’ periods are also there). Choose the desired period and click download to obtain your iCalendar file.
The file will contain all courses that you gave a checkmark in the timetable menu on the right. So, in case you have a few courses in your timetable but only want to export one single course, make sure to uncheck the courses when creating the iCalendar file.

- Click on the Calendar tool (from course home or course admin)
- Make sure the desired box is selected, example: sandbox: Sandbox of XYZ (see screenshot)
- Choose More Actions and click on Import Events, here you can choose an iCalender file.
If many events need to be scheduled, importing events can be a wonderful time-saving tool. Events to be imported are created using the iCal format. This can require some specific knowledge. A great tool to surpass that is https://ical.marudot.com/ on which you can easily create a file with events that can be downloaded and subsequently uploaded to Brightspace.
- Go to https://ical.marudot.com/
- Please use the on-screen instructions.
- When done, download the iCal file from the site.
- In Brightspace, go to the Calendar of the applicable course and select the Import button
- Please check to see you are currently viewing the correct calendar.
- Select the attendees for the events you are about to upload.
- Select the Upload a file button.
- Browse for your file and select Open in the dialogue screen.
- The events are now added to the course calendar.
Deleting events from the calender can be done in the following manner:
- Go to the Calendar from the homepage or using Course Admin.
- Make sure to view the events in the ‘list’ tab.
- Select the events which should be deleted.
- Navigate to more actions.
- Select delete.
