We advise lecturers who for the first time in their course create a digital open-book exam or paper-based exam (either closed-book or open-book) to already create these in Ans. Closed–book digital Ans exams cannot yet be administered in the secure digital exam environment (on TU Delft computers) due to technical issues. As soon as this is fixed, this message will be updated.
If you have any questions or concerns, please contact us. For more information, please also visit the Intranet page for the Ans implementation.
Möbius is a web-based system for creating exams, tests, quizzes and assignments. It automatically assesses student responses. Möbius can be used for summative testing (exams) and for formative testing (exercises). This page elaborates on creating exercises and using Möbius for formative testing. For more information about summative testing using Möbius, please follow this link.
For exercise purposes a special server was installed: the so-called Exercise server of Möbius. This server is linked to your Brightspace course and is used for formative testing. Students are automatically logged in to Möbius when they click on a Möbius link in Brightspace. Their scores are synced with Brightspace Grades.
Why use Möbius instead of Brightspace Quizzes?
- Möbius has some question types that are not available in the Quizzes tool in Brightspace.
- Möbius can handle very complex questions, Brightspace Quizzes can’t.
- If you are planning to use Möbius in your exam (now or in the future) it’s better to start creating questions in Möbius as you can reuse them and your students will familiarise themselves with the system.
- Questions made in Brightspace Quizzes can’t be imported in Möbius (and vice versa).
Teaching & Learning Support (teaching-support@tudelft.nl) can help you with:
- Setting up new Mobius classes and place them in your Brightspace course.
- Setting up the Grades section in Brightspace.
- Answering questions when using Mobius.
Möbius is only supported in Chrome and Safari. If you have trouble using Möbius, please make sure you are using one of the supported browsers before contacting Teaching & Learning Support.
Firefox, for example, is no longer used for testing and development. This means Möbius will still work with Firefox for now but it is not guaranteed to stay that way going forward.
Setting up Möbius for exercises (formative testing)
If you want to use Möbius, please contact Teaching & Learning Support at Teaching-Support@tudelft.nl. Our team can help with setting up Möbius classes and place the links to the Möbius classes in your course.
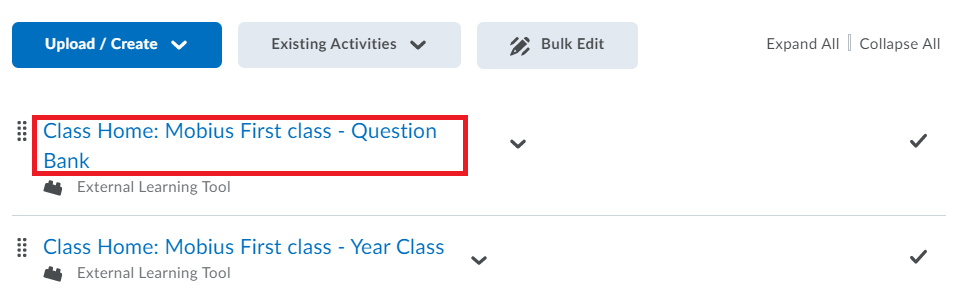
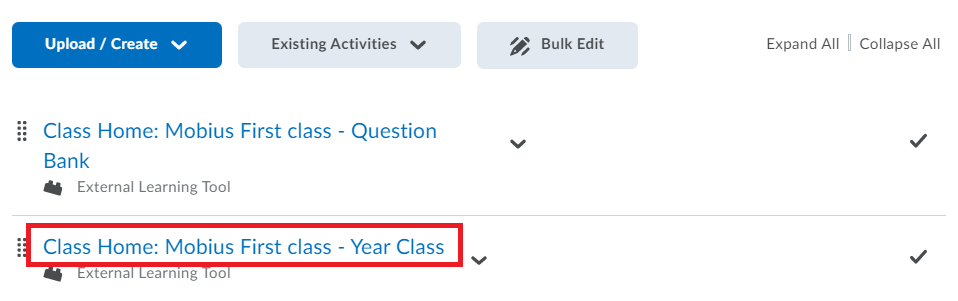
When Möbius is added to your Brighspace Course, you will have 2 Möbius classes in your course content:
- Question Bank (parent class):
e.g. ‘IO2070-18 Design for Sustainability – Question Bank’ ) - Year Class (child class):
e.g. ‘IO2070 Design for Sustainability – 2019-2020’)
To keep it organized we advise you to create and manage your Questions in the Question Bank (parent class) and create and manage the Assignments in the Year Class (child class).
The questions you create in the Question Bank will then automatically appear the Year Class of this year but also in the Year classes of the coming years. This way you can reuse questions each year. By creating the Assignment in the Year class, the results of the students will only be visible in this class and not in classes of coming years.
- Click on the Question Bank link to Möbius in Content of you Course.
- A new tab opens showing the Homepage of the Mobius Class
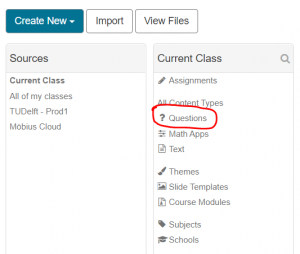
- Click on content Content Repository in the top-menu.
- Click on Questions.
- Click on Create New followed by Question/text to create a new question.
Tip: You can organize your questions in groups (these work like folders).
- Now can create your question. The Question Name is not visible to Students. On this page you can find short videos of all question types in Möbius.
- Click on Save & Close to make more questions.

Always use Notepad if you want to paste text into Möbius while creating questions. Notepad removes all unnecessary codes.
- After moving, importing or adding questions. Click on F5 to refresh the screen. This applies to more actions in Möbius.
- It is not possible to delete a Grade item with Möbius results in Brightspace. So, once you have placed a Möbius link to an assignment on your Brightspace page, never delete it but adjust it.
- It is not possible to copy/paste an image from a word document. You will need to upload the image via the image button in the edit menu of the question.
![]()
- Do not open Möbius in multiple tabs. Because you can be logged out of one tab (timeout for inactivity), while the other tab looks fine – but then when you save work in the other tab, it doesn’t get saved because your global session is logged out. Information can also get crossed over and the data can get corrupted between tabs/ sessions.
Question settings checklist:
- Are the number of points per question correctly assigned?
Check sub questions as well! - Do all questions have an option to answer the question?
E.g. a text box in case of open questions and options in case of multiple choice questions?
A compilation of various questions is called an assignment in Möbius. Follow the steps below to create an Assignment.
- Click on the Year Class link to Möbius in Content of you Course.
- A new tab opens showing the Homepage of the Möbius Class.
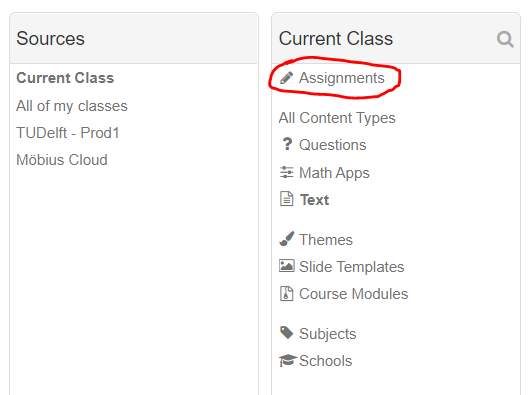
- Click on Content Repository in the top-menu.
- Click on Assignments.

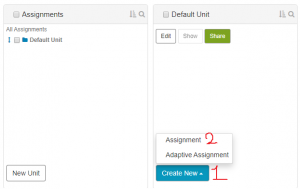
- Click on Default Unit the name of the root folder (you can change this name or create more folders).
- Click on Create New > Assignment.

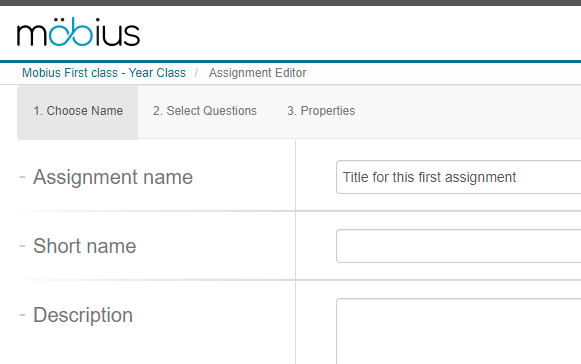
Once you’ve clicked on New Assignment you have to go through a 3-step process:
- In step 1 Choose Name give your assignment a name. Don’t fill in the Short name section.
- Click on 2. Select Questions, and:
- Click on Import Questions.
- Click on Questions in the Current Class column.
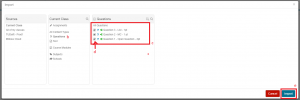
- You will see an overview of the questions you have made (questions with the green icon are questions made in the Parent class).
- Select the questions you want by ticking the boxes.
- Click on Import.
- Change the Points per question (1 point is default).
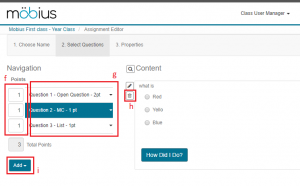
- Change the order of questions by dragging & dropping.
- Optionally delete questions from this assignment by clicking the Trash-can icon.
- Optionally add questions to the list using the Add-button.
- On the tabs in the navigation bar, click on 3. Properties.
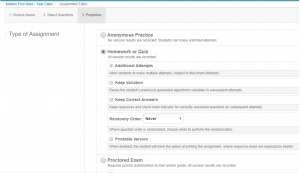
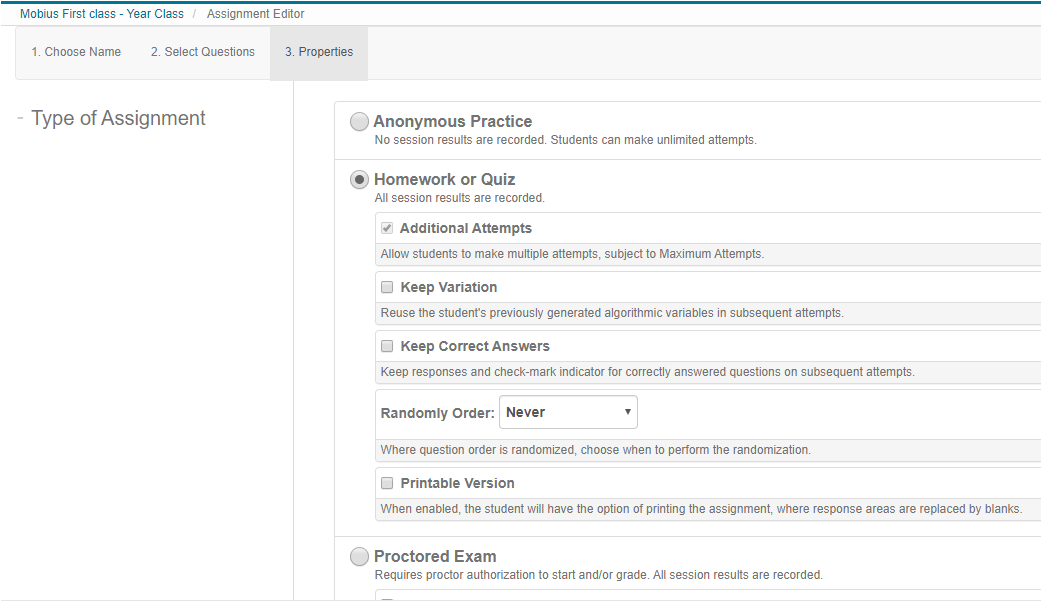
Here there are 5 sections to consider: Type of Assignment, Policy set, General Properties, Scheduling & Visibility and Feedback (after). The settings depend on the sort of homework you want to give in regard to your lectures and teaching activities:


-
- Choose the Type of Assignment, for most exercises: select Homework or Quiz.
- Go through the options of General Properties, Scheduling & Visibility and Feedback (after) and select set the settings that are applicable for you test.
Contact Brightspace support in case you need any help. - Click on Save & Close.
- You will see a Summary of all the settings of your Assignment.
- If you agree, click on Save & Close again.
- Choose the Type of Assignment, for most exercises: select Homework or Quiz.
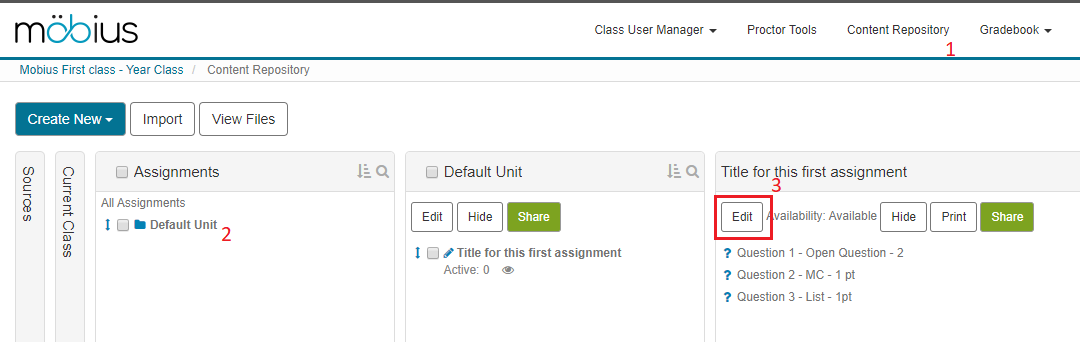
Now you will see the assignment in the Content Repository(1) in the Default Unit(2). If you want to edit the assignment: Click on Edit(3).
Assignment Settings checklist:
- Did you set the number of attempts to the correct value? (mostly set to 1).
You can find this in the Properties of the assignment? - Did you set the Time Limit to the correct value? (Differs per assignment.)
Exam quality checklist:
- Are all questions suitable for Möbius? E.g. no design questions?
- If possible, refrain from using multiple select questions.
Students are punished harder for incorrectly not checking a box, than for incorrectly checking a box. - Did you check for asking the same question twice in a single exam?
- In case of a resit: are the question types the same as in the regular exam?
Fraud prevention checklist:
- Did you implement parameterization in order to give students unique exams?
- In case of multiple-choice questions, is Möbius set to present each student with a random question from a question pool of similar questions?
- Go to the page in Brightspace where you want to add a Möbius test.
- Click on Existing Activities.
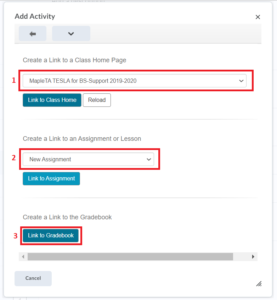
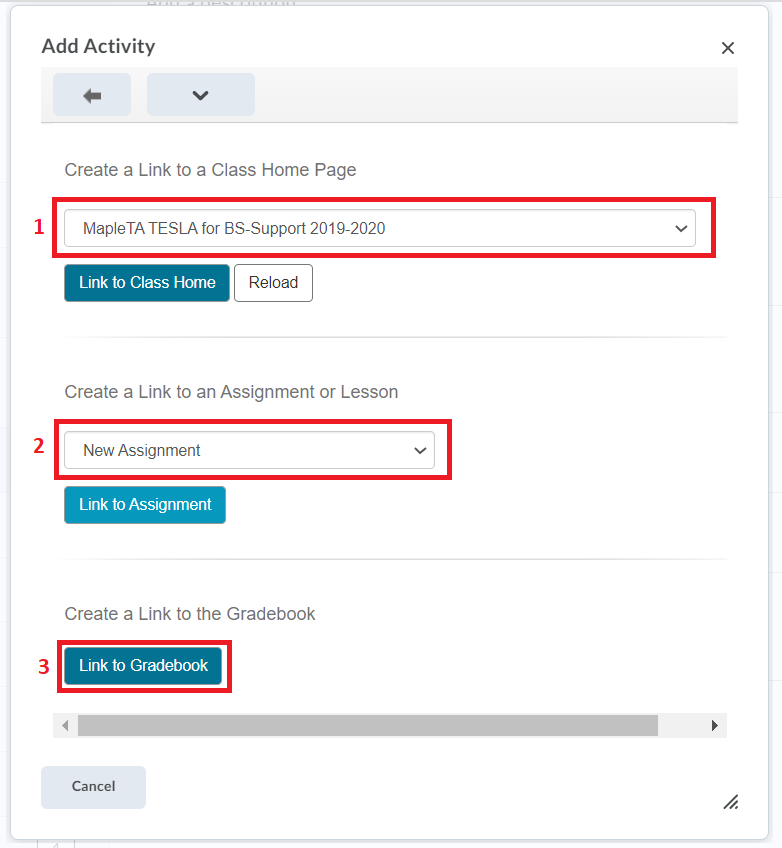
- Select Möbius Assessment.

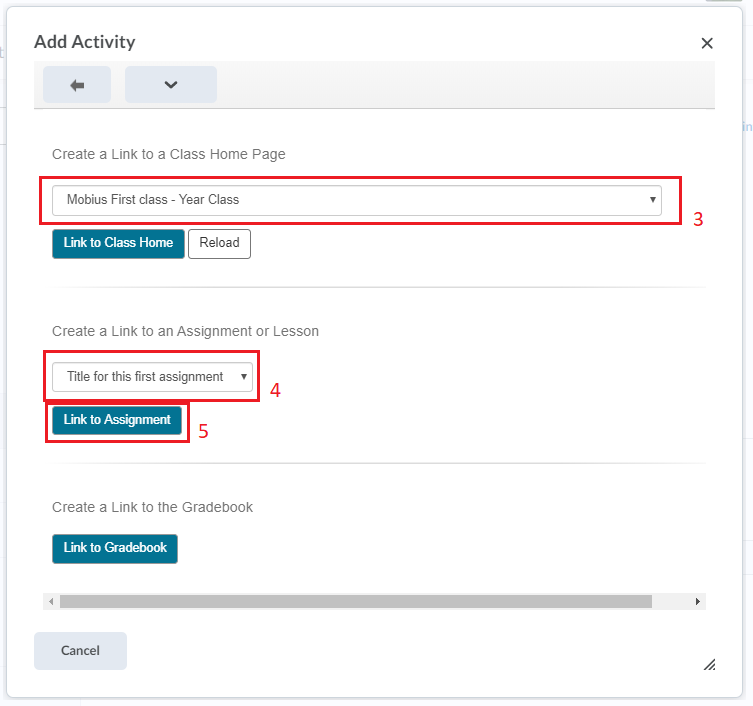
- A new window appears. Select the Year Class from the list.
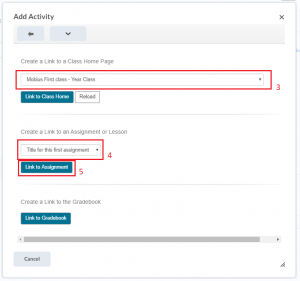
- Select the Assignment you created from the list.
- Click on the button Link to Assignment.
- The assignment is placed on your page as a link.
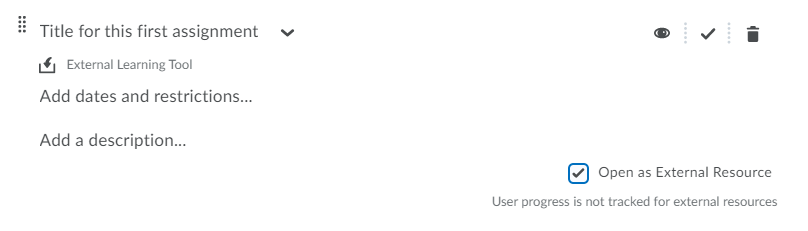
- Click on the Arrow on the right of the link and select Edit Properties In-place

- Click on Add dates and restrictions to add the Start date, End date and Due date.
 Adding a time restriction in Brightspace might not be enough. In Brightspace the time duration is leading, not the starting time. Hence, a student can start an assignment 5 minutes before the end and still use his/her full time. To avoid this, it’s advised to add a time restriction in Mobius as well, to ensure a hard deadline. This can be done using the assignment settings in Möbius from this step.
 - Check Open as External Resource so the assignment is offered in a new tab.
- You are all set up.
Follow the steps below to grade the Assignment:
-
- Login to Möbius and go to the Year Class.
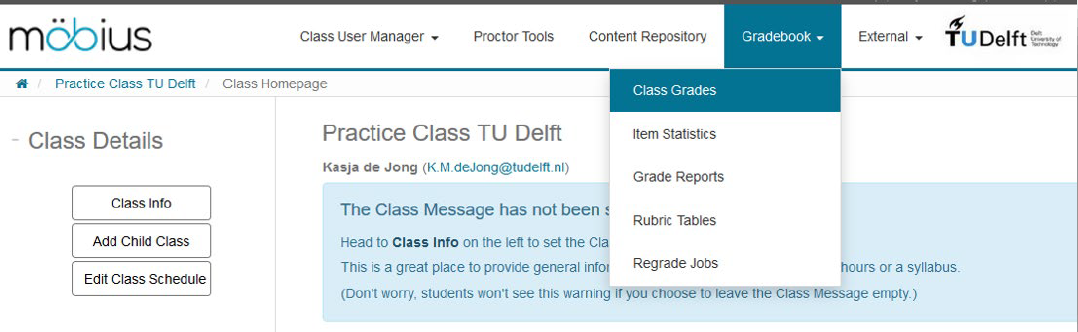
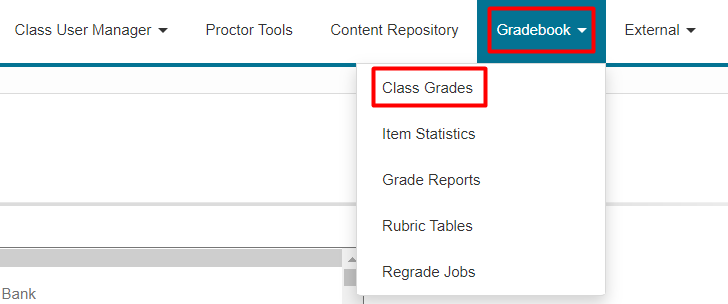
- Click on Gradebook and choose Class Grades in the menu-bar.

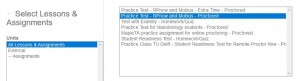
- Select the Assignment(s) you want to view or review.

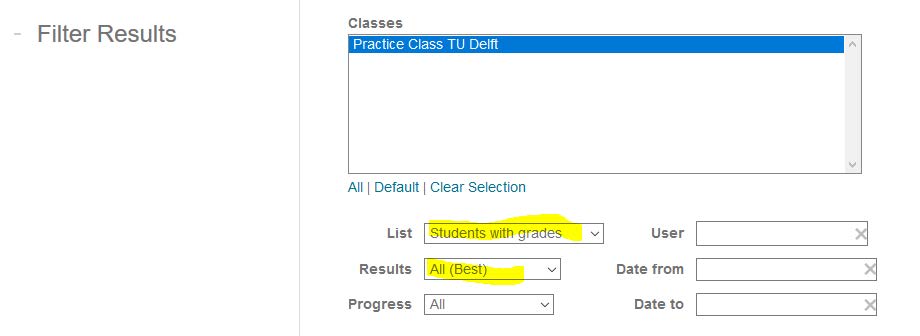
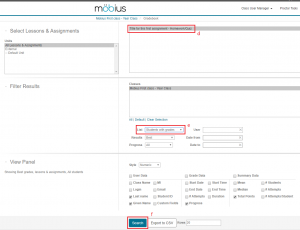
- At Filter Results, choose the Filters:
-
- List: Students with grades.
- Results: All (Best).
- Progress: All.

-
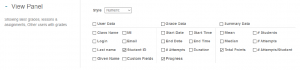
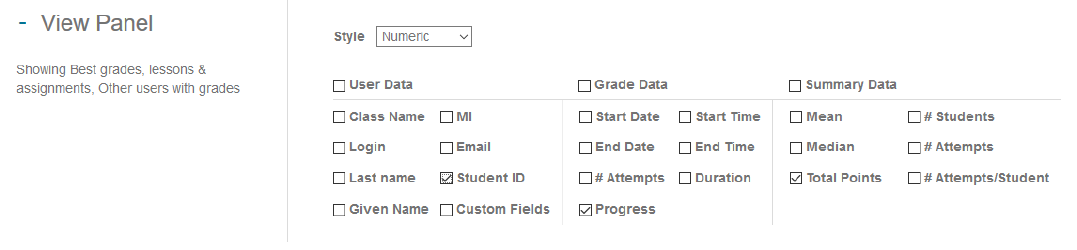
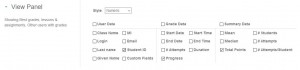
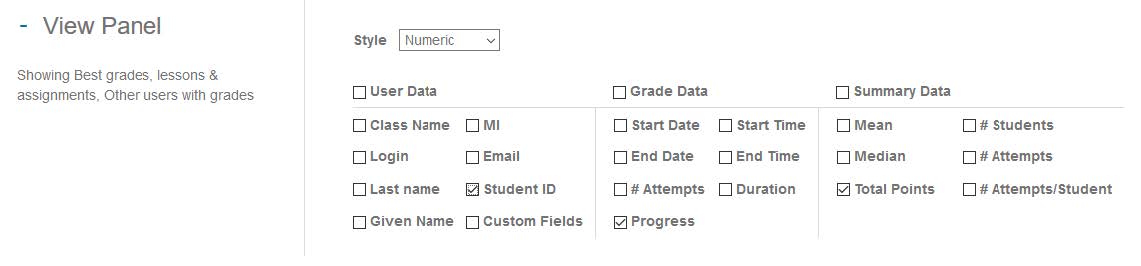
- Select which data that you want to see presented in the results list in the View Panel.
- Make sure you adjust the number of Rows to the number of students that may have taken the test.


- If this is done, hit the Search button.
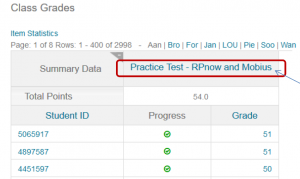
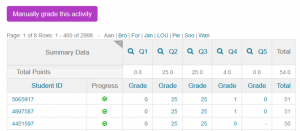
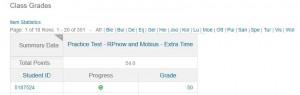
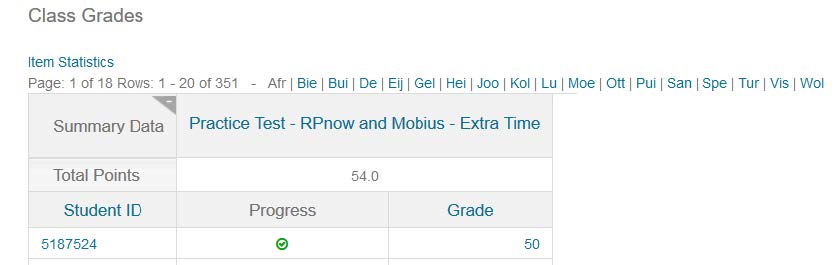
- All students who have taken the test will be shown with their final scores:
- Click on the title of the test to see the Manually grade this activity button.
- Click on the Manually grade this activity button.
- You will now see this overview:


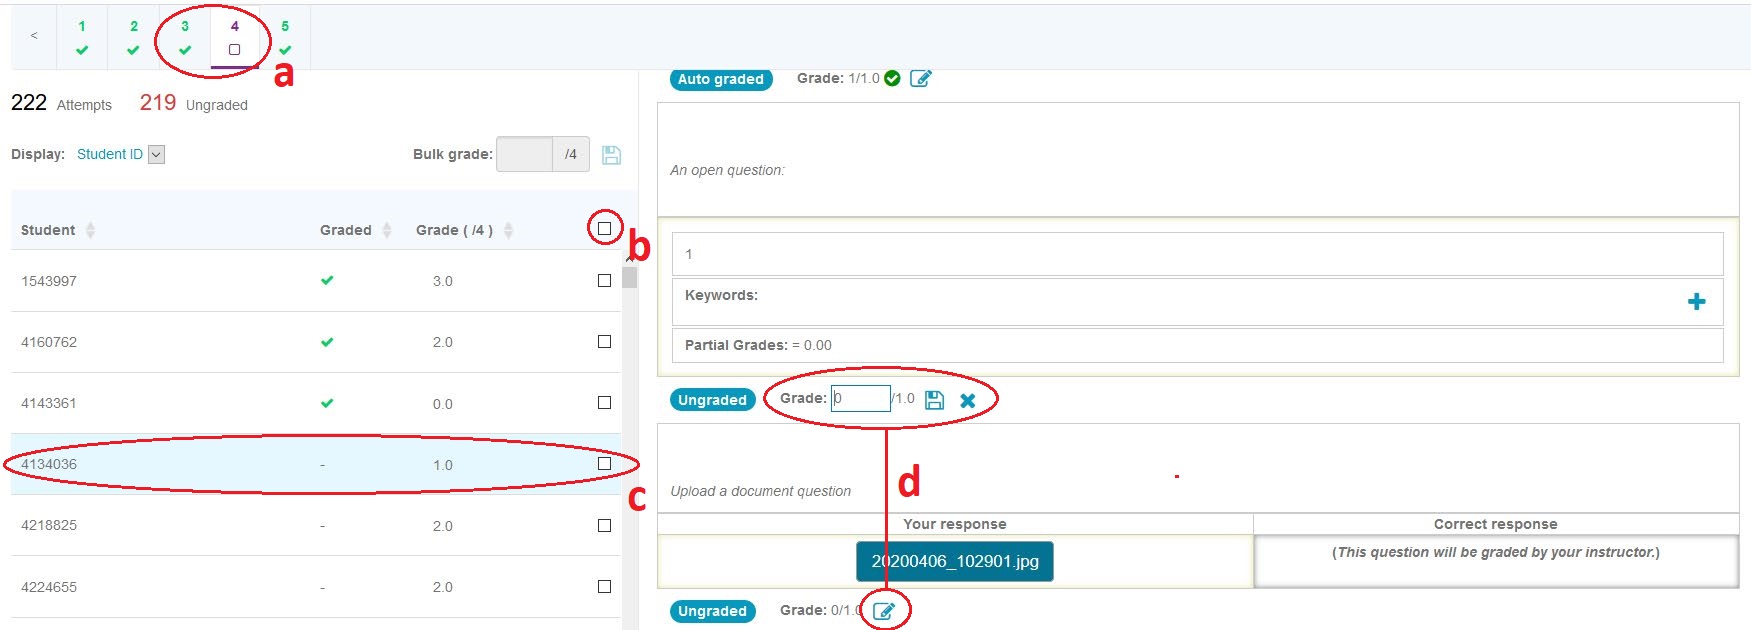
- A question/answers that is graded is green, a question/answer that is not graded is purple.
- Select this box if you want to give all students the same grade.
- Click on a row to see the question/answer on the right.
- Click on the edit-grade-icon to edit a grade and click on the floppy-disc-icon to save the grade.
In Möbius it’s possible to Regrade your exam when you have made a mistake in the answering model. There are however some limitations:
- You can only change the response area. Changing what is asked in the question or swapping out images will not work.
- When changing answers in Matching, Multiple Choice, Sorting and Clickable image questions, you can only change which answer is the correct answer. It does not work to change the content of the answers.
Example: If a Multiple Choice question with options a,b,c where b is correct is changed to a,c,b where now c is correct. The students that originally answered b (index 2) will still be considered as having the correct answer when regraded. - You cannot change existing algorithm variables. Changes in existing algorithm variables will not be recognized. The original state of the algorithm is used upon Regrading.
Follow the steps below to Regrade a question:
- Login to Möbius and go to the Question Bank Class.
- Click on content Content Repository in the top-menu.
- Click on Questions and open the question that you want to change.
- Change the response area in your question.
- After saving the correct answer, go back to home and click on the Year Class.
- Click on Gradebook and choose Class Grades in the menu-bar.
- Select the Assignment(s) you want to view or review Möbius.
- Select the Filters:
- List: Students with grades
- Results: All (Best)
- Progress: All

- Select the data that you want to see presented in the results list.
- Make sure you adjust the number of Rows to the number of students that may have taken the test.


- Click on the Search button.
- You will see a list of all the students.
- Click on the grade of one student.
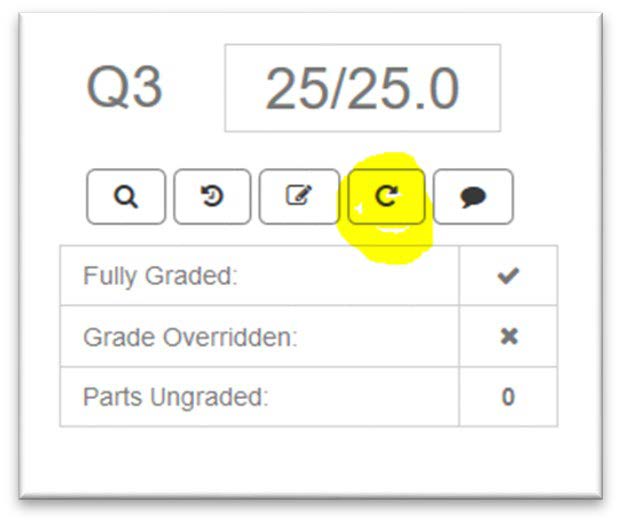
- Scroll to the question you have changed (in this case Q3) and click on the regrade button.
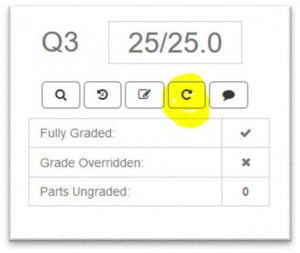
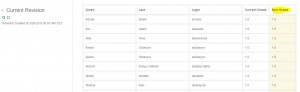
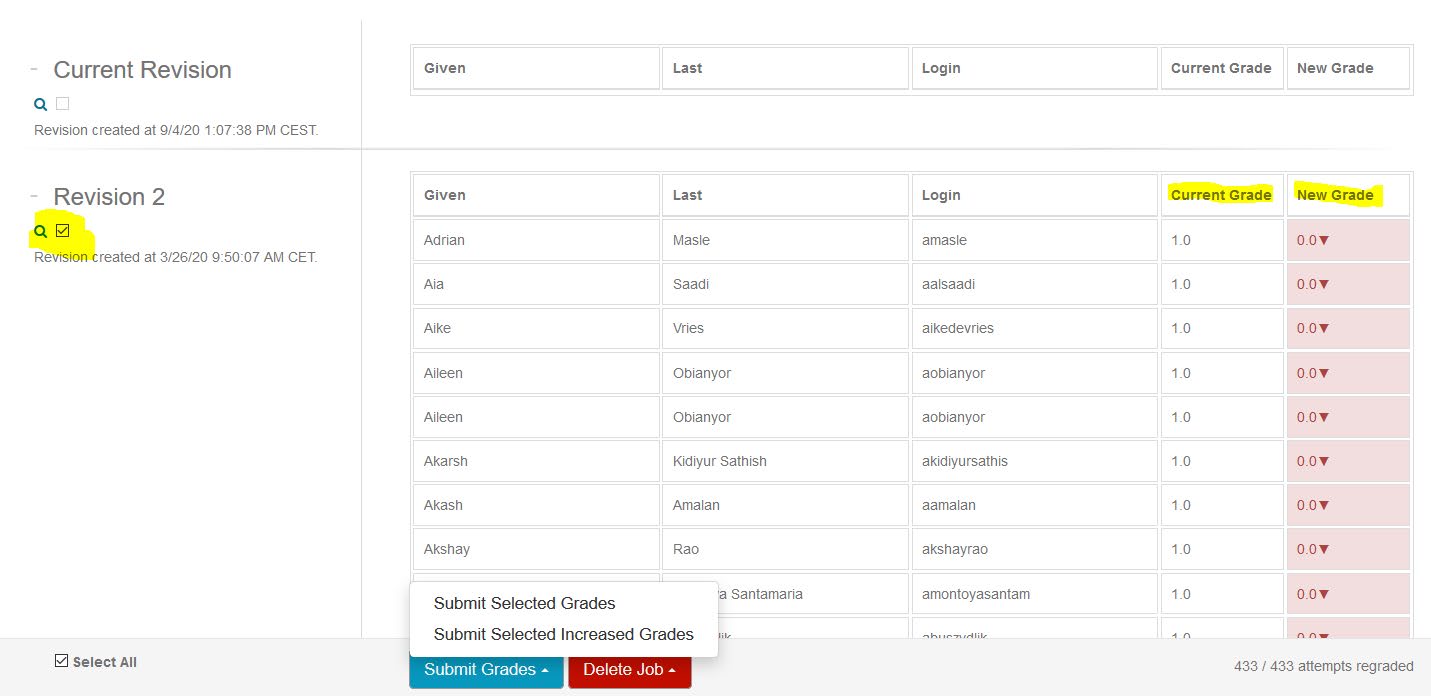
- Now you will see an overview of what the new grade does in the column New Grade.
- If you want to save this change: select all students

- Click on Submit Grades, you have 2 options here:
- Submit Selected Grades: Regrade all students.
- Submit Selected Increased Grades: Only regrade students that will receive a better grade.
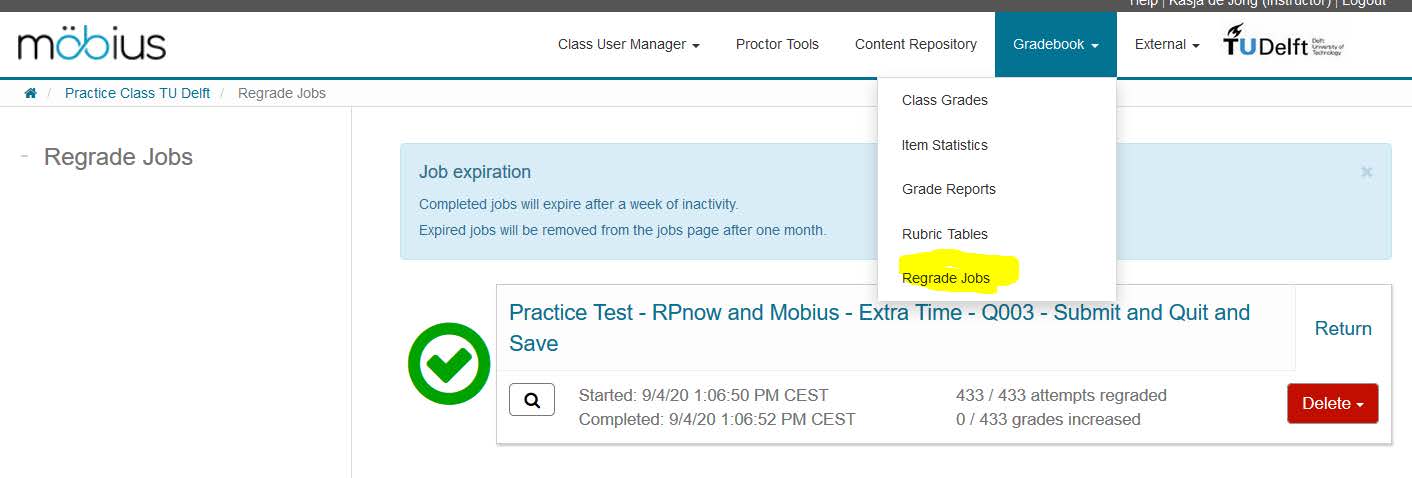
- If it is a large amount of students you want to change, the job will take longer and will be placed in the Gradebook under Regrade Jobs.
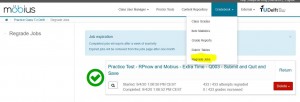
- This is an easy way to return to the job and see if it has been processed: click on Return.
- And you’ll see the result:

Results are saved in the Mobius Gradebook, the scores are pushed to Brightspace Grades.
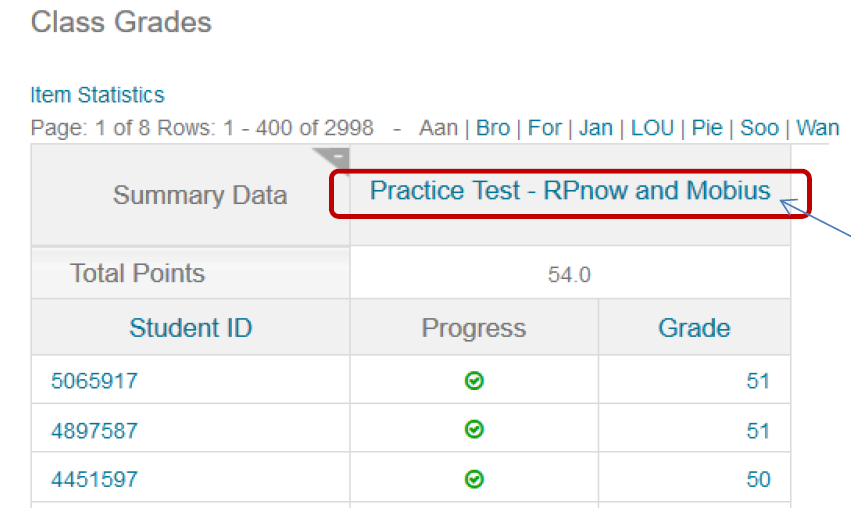
- The total score of a test is saved in Möbius and pushed to Brightspace where automatically a Grade item is made. See Grades:

- To view the results and answers in the Möbius Gradebook:
- Click on the Year Class link in Content of you Course.
- A new tab opens showing the Homepage of the Möbius Class.
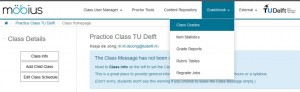
- Click on Gradebook in the top-menu and choose Class Grades.
- Select the Assignment (Test, Quiz, Exam).
- List: Students with Grades.
- Click on Search.
- You will see the list of students with their total scores (in this case only 1 student).

- Click on the grade to see all the answers.
- Click on the Year Class link in Content of you Course.

You can export results of a test to a CSV document.
- Go to Gradebook and click on Class Grades.

- Select Assignments, make your selection and select Search
- Click Export to CSV.

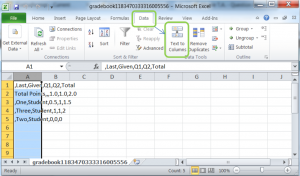
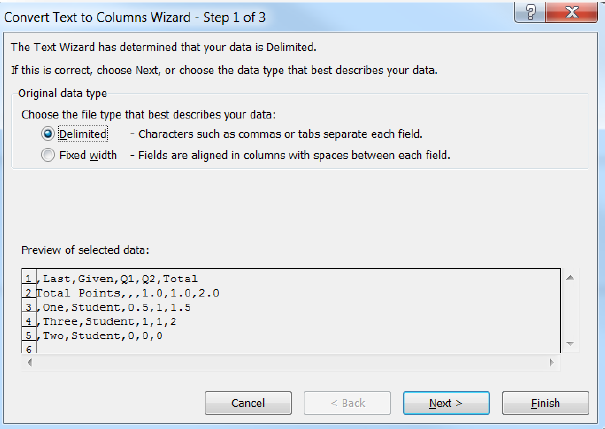
- Open the CSV in Excel en select the first column, select the Data-tab on the Ribbon in Excel and click on Text to Columns.
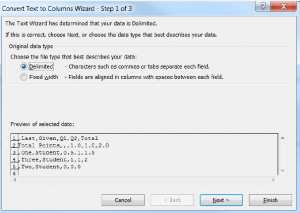
- Select Delimited in Step 1 of the Wizard and click Next.
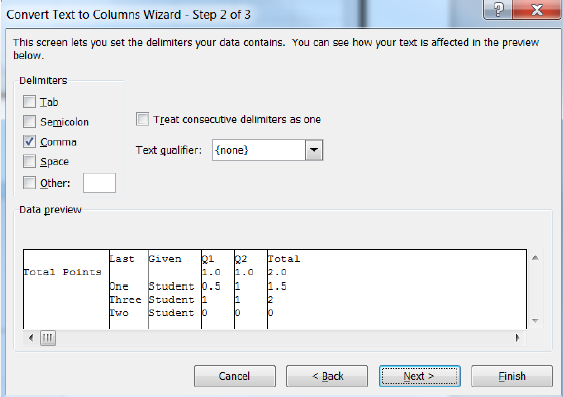
- Select Comma for Delimiters and none for Text qualifier and click Next.

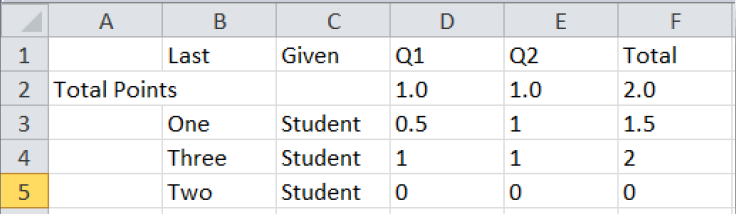
- Click Finish in Step 3 of the Wizard.
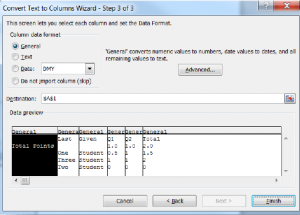
- The result:

- To generate a grade you must translate the final score to a grade yourself.


FAQ
Follow the steps below to add parametrization to a question:
- In the question, scroll down to the Algorithm tab (click on the ’+’ to open).
- Click on Show Designer.
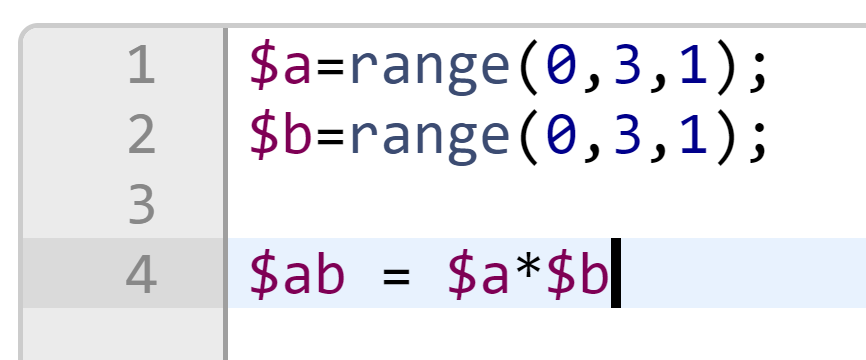
- Under Random Number, create the variables you want to parametrize. For example a and b:

- Click on Add to add the variable.
- Click on Refresh algorithm preview
The variable will now appear in the Algorithm View as shown below. - Create the solution, based on the randomized variables. In this example, the solution is a*b.
- Next, go to the Question Text tab above.
- Type the question
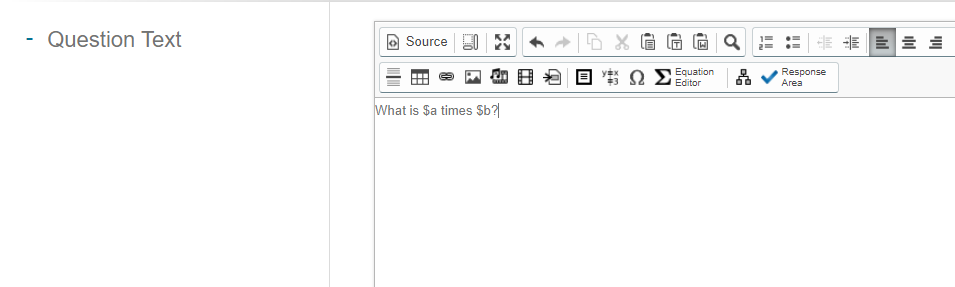
- Add a Numeric Response Area.
- In the Numeric Part, enter the solution variable (in this case $ab)
- Click Insert
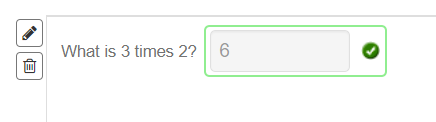
- Save the question and try it out before adding it to a quiz!
You can randomize variables in a question (algorithmic code). You can randomize (shuffle) the answers of a question. And you can randomize your questions. For example: you can give 5 randomized questions from a group of 10 questions.
Yes, you can set a maximum amount of words.
You can use the commonly known types: open questions, multiple choice questions and numeric questions. This is the list of all question types in Möbius:
- Clickable Image
- Essay = Open question
- Scanned Document
- Free Body Diagram
- HTML
- List
- Möbius-graded
- Matching
- Math App
- Mathematical Formula
- Multiple Choice
- Numeric
- Sketch
- Sorting
- True/False
If you would like students to answer a single question with both text and an image, you can create a scanned document type question and ask them to upload a pdf file containing both, as combinations of question types aren’t possible.
You can find the videos about Question creation on the website of DigitalEd (scroll down).
Yes, it is possible to add Teaching Assistants to your Möbius course to help you. Do note that these Teaching Assistants need to have employee accounts (@tudelft.nl instead of @student.tudelft.nl) in order to get proper access to the Möbius environment.
Please contact your faculty’s head of ESA or your chair of department for questions regarding the hiring process.
To organise a digital review the assignment has to be graded first. Once that is done, the process to provide a review follow the steps below:
First you have to make sure that the settings in the Mobius assignment are correct.
- Go to the Mobius Year Class in your course in Brightspace.
- In Mobius go to the Content Repository and select the Assignment in question.
- Click Edit and go to 3. Properties.
- Scroll down until you see the section Feedback (After) and make sure the following settings are set:
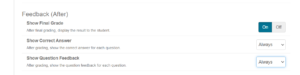

- Show final grade should be on,
- Show correct answer should be set to always
- Show question feedback to always, in case you've given question feedback.
- Optionally change the Scheduling and Visibility settings.
Here you can choose to restrict the student from viewing the correct answers and feedback until a certain date and time.
After making sure that the settings are correct, you have to add a link to the Mobius gradebook to the course.
- Go to the Module in Brightspace where you want to add the link.
- Click on Existing Activities and select Mobius Assessment.
- Select the correct Year Class and Assignment and click Link to Gradebook at the bottom of the pop-up.