In Teams, with the normal staff-license it is possible to create online meetings with up to 300 participants and record them. If you have an audience that is between 300 – 1000 students, you should consider requesting the Advanced Communications License (ACL) or organizing a Teams Webinar. If your audience is bigger than 1000 students you should consider a Teams Live event. Read the Compare Online Meeting Tools-page for an overview.
Teams Online Meeting doesn’t comply with your needs? Have a look at and compare other online meeting tools.
For Educational Purposes the TU Delft has a limited amount of Advanced Communication Licenses (ACL). With this license, it is possible to have up to 1000 participants in an online meeting with the same functionality. Attendees 1001 until 10000 will be added as view-only users. They can listen and see what’s happening, but cannot participate. The ACL can be requested here.
For more information on remote teaching for large groups, go to Remote teaching or Online lecturing for large audiences (80-1500).
Before the Meeting
There are several options to schedule a meeting and invite attendees:
- Go to the Teams-menu on the navigation bar on the left and select the Class Team and the Channel where you want to meet in.
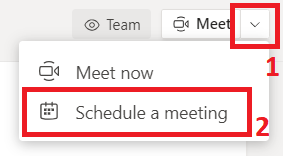
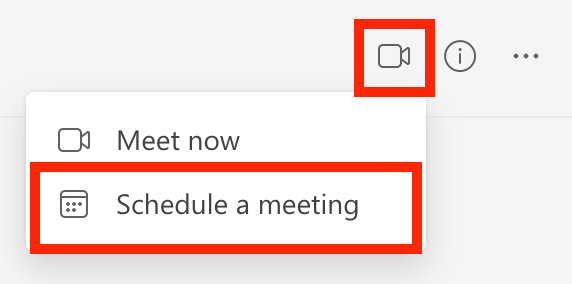
- Click on the Arrow next to Meet (1) on the top-left and choose Schedule a meeting (2).
- Add a Title and
- Set the Date and Time and optionally set the meeting to Repeat.
- Click on Send on the top-right. All members of the channel will receive an email with an invite to the meeting.
- Set the Meeting policies
- Let your students know when and where you meet.
Tip: include the link to the Channel in your message. To get the link: click on the three dots (1) behind the Channel you want to meet in, select Get link to channel (2) and click on Copy to get the link.

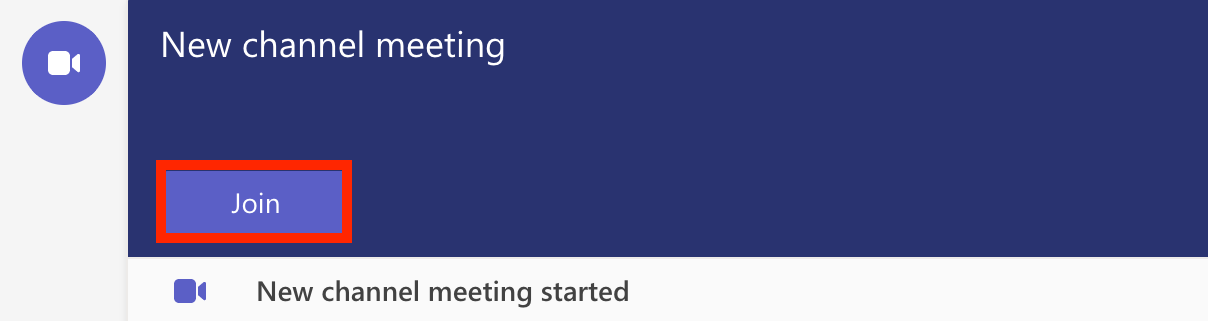
- To start the meeting, go to the Channel, click on the meeting and click Join on the top-left
- When the meeting is started students can click the Join button in the Channel.
To schedule a meeting without a Team, follow these steps:
-
- Go to the Calendar menu on the vertical navigation bar on the left.
- Click on New Meeting on the top right.
- Add a Title.
-
- Add Required attendees one by one.
- Set the Date and Time and optionally set the meeting to Repeat and/or adjust other settings.
- Click on Save.
- The students will receive an invite via e-mail and can accept or decline.
- Set the Meeting policies.
You can schedule a Teams meeting either in Teams or in Outlook.
Schedule the meeting in Teams
- Go to your Calendar menu on the vertical navigation bar.
- Click on New meeting on the top right.
- Add a Title.
- Add at least one person as a Required attendee.
- Set the Date and Time and optionally set the meeting to Repeat.
- Click on Save and open the meeting again.
- Click on Meeting options at the top left, Set the options according to your wish and click on Save.
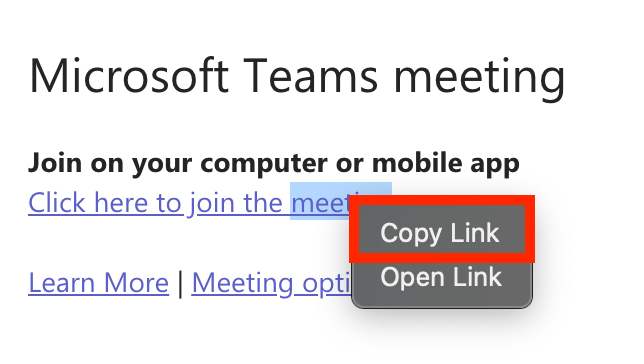
- Back in Teams, Right Click on the link Join Microsoft Teams Meeting in the Text field at the bottom and click on Copy Link.
- Communicate the Date, Time and Link to students.
Schedule the meeting in Outlook
- Go to the Calendar in Outlook.
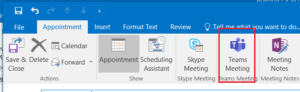
- Click on New Appointment
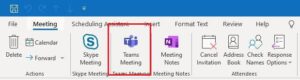
- Click on Teams Meeting on the ribbon at the top.
- Add yourself to the to-field.
- Add a Subject.

- Set the Date and Time and optionally set the meeting to Repeat.
- Hold Ctrl and click on Meeting options in the content field below, this will open your browser.
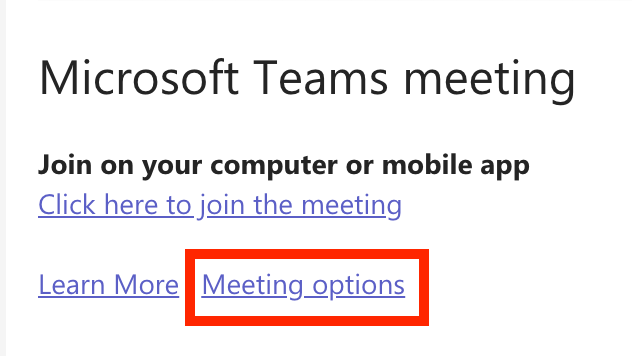
- Set the options according to your wish, click on Save and Close the browser.
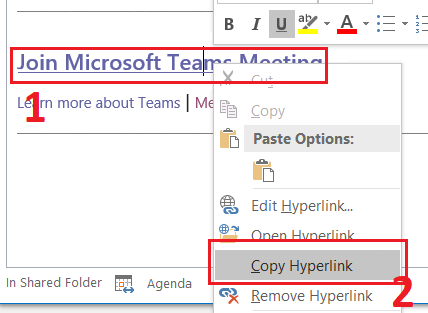
- Back in Outlook, right-click on Join Microsoft Teams Meeting (1) and select Copy Hyperlink (2).
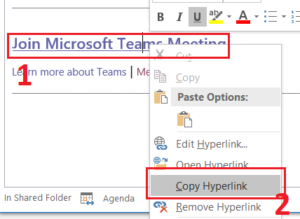
- Communicate the Date, Time and Link to students.
In meetings with registration, the organiser and presenters have more control than in a regular meeting. By default, attendees:
- Wait in the lobby until the organiser or a presenter lets them into the meeting.
- Are muted and their video is turned off.
To set up a meeting with registration, follow these steps:
- Go to your Calendar menu on the vertical navigation bar.
- Click on New meeting on the top right.
- Change Require registration to For people in your org.

- Click on view registration form if you wish to edit the registration form.
- Go back to the meeting set-up.
- Add a Title.
- If you want to, you can Add a required presenter.
- Set the Date and Time.
- Click on Send and open the meeting again.
- Click on Meeting options at the top left, set the options according to your wish and click on Save.
- Back in Teams, click on the Copy registration link button and send to your students.

- Everyone opening the link will be asked to register for the event.
- Go to the Meeting in the Channel or the Calendar.
- Click on Meeting options on the top right. This will open in your browser.

- Set the setting for the Lobby, Announcements for joiners and Leavers and Who can Present and disable or enable the chat.
Tip: Select that only you can bypass the lobby. This gives you the chance to prepare your lecture and accept all participants (at the same time) once you are ready to start.
Tip: The meeting organiser can turn off the mics so that attendees can’t unmute themselves during the meeting. All attendees (but not presenters) will be muted when they join the meeting. Visit this page for more info.
- Click on Save.
- Close the Tab
More about meeting options can be found here.
There are several ways to join a meeting, four of the most used are:
- Via the Teams (Calendar):
When creating a meeting in a Channel in Teams, it will not appear in your calendar. In this case, go to the Channel to join the meeting (see instructions below).
- Go to the Calendar menu on the vertical navigation bar.
- Open the meeting.
- Click on Join on the top right.

- Via a Teams (Channel):
- Go to the Team menu on the vertical navigation bar.
- Open the Channel where you scheduled the meeting.
- Open the meeting.
- Click on Join on the top right.
- Via Outlook: Open the meeting in the Outlook Calendar and click Join Teams Meeting.
- Via the Meeting ID:
- Join the meeting by copying the meeting ID and passcode provided to you. The main location of the meeting ID is the Teams meeting link area sent in the invite message but can be communicated to you by the meeting organiser in different ways.
- Once you’ve found the ID and passcode you can then navigate to your Teams Calendar and fill the blanks after clicking on # Join with an ID in the top right corner:


You can also join a meeting with a link, or -when the functionality works- via a channel in the Class Team. Read more about how to Join a meeting in Teams.
The MS Teams meeting dial-in option is not available at TU Delft.
Setting up breakout rooms during your online lectures allows for small group discussions, evaluations, and collaboration. You can drop into the breakout rooms to offer support and answer questions. Set out a clear plan, time frame, and instructions for the students before initiating the breakout rooms.
In a meeting, you can create and use five different types of polls: a Multiple Choice poll, a Quiz poll, a Word Cloud poll, a Rating, and a Ranking.
Creating Polls
Forms is the functionality for Teams that allows you to create polls within a meeting. Follow the following instructions to understand how polls are created:
-
- Go to the Channel or Chat in which you want to include a poll.
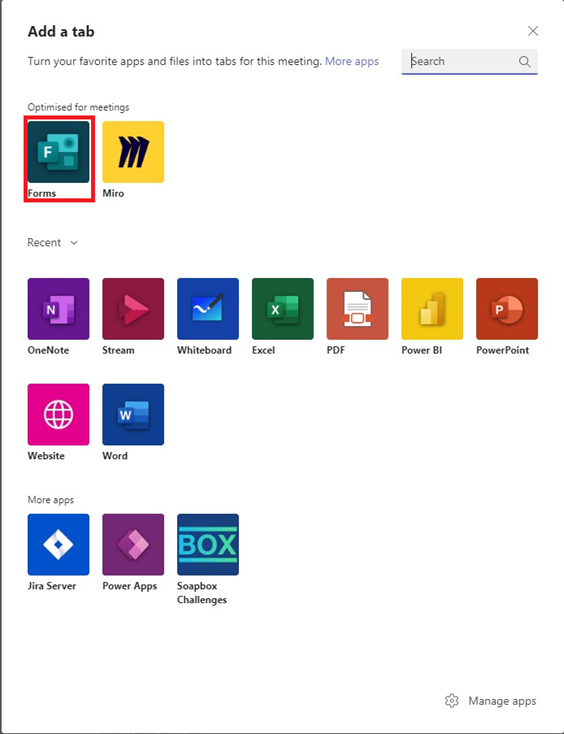
- At the top of your Teams window, click on the + sign and select Forms

- Click Save
- Click + New Poll and choose one of five options. You can also choose My recent polls, for that go to step 9.

- If you choose Multiple Choice or Quiz, follow these steps:
- Add your questions together with possible answers.
- To add more possible options/answers, click Add option.
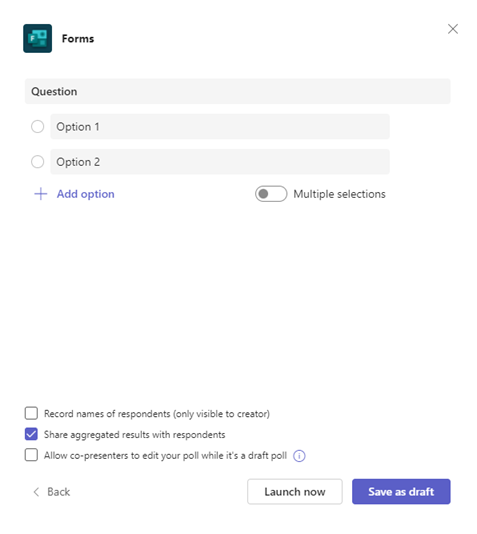
- If you want to allow students to select multiple answers, click the toggle next to Multiple answers. When using a Quiz, this option lets you select multiple right answers.
- When using a Quiz, you can select which answer is correct by checking the circle next to the right answer, or multiple boxes when using Multiple answers.

- Select if you want to Record names of respondents, Share aggregated results with respondents, or Allow co-presenters to edit your poll while it’s a draft poll.
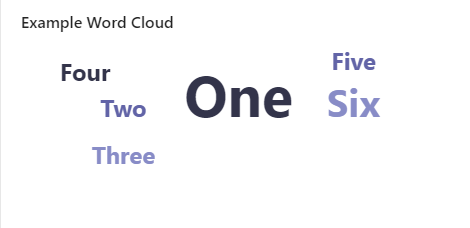
- You can also choose Word Cloud. When using a word cloud, all the given answers are represented in a “cloud”, where the most given answers are presented larger than others. Liking an answer will also result in the answer getting larger.
-
-
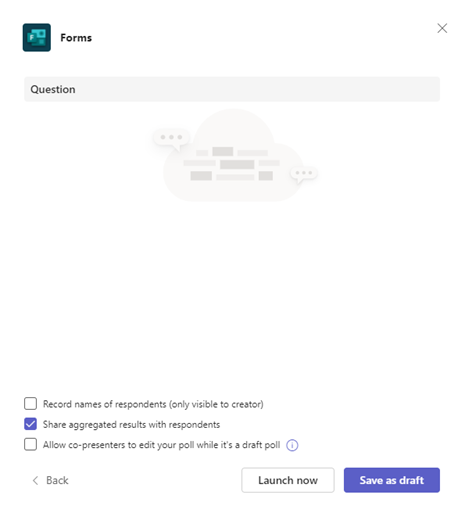
- Add your open question.
- Select if you want to Record names of respondents, Share aggregated results with respondents, or Allow co-presenters to edit your poll while it’s a draft poll.
-
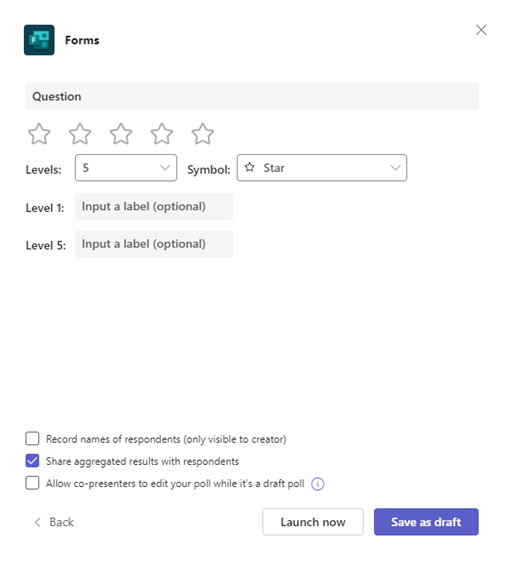
- If you chose Rating, follow these steps:
1. Add your question or explanation for the rating.
2. Choose the amount of levels and the symbol.
3. Describe the lowest and the highest level.
4. Select if you want to Record names of respondents, Share aggregated results with respondents, or Allow co-presenters to edit you poll while it’s a draft poll.
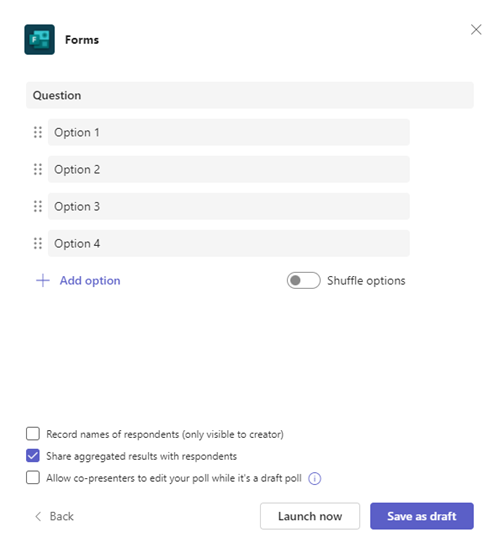
- If you chose Ranking, follow these steps:
- Add your question or explanation about the ranking.
- Fill in the text boxes with the options you want to be ranked.
- Choose if you want the options to be shuffled.
- Select if you want to Record names of respondents, Share aggregated results with respondents, or Allow co-presenters to edit you poll while it’s a draft poll.
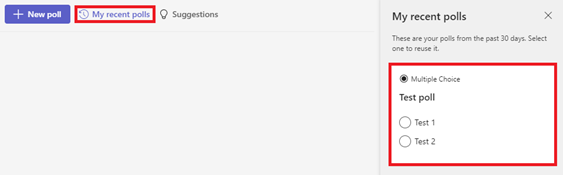
- If you want to reuse an earlier used poll, choose My recent polls. Choose the poll you want to reuse in the menu on the right. After this you can make additional changes.
- Click Save as draft.
- Now you are able to preview your Poll. If you want to edit or delete your poll, open the dropdown menu next to Launch and click the Edit Poll or Delete Poll button.
- If you are satisfied with the Poll, click Launch. Your form will now be live and can be used by people in the meeting or chat
During your meeting
You can change multiple settings during your meeting. In the Participant settings, you can Invite, Admit, Remove, Mute and change participants to Presenter.
When you are in them meeting, click on People on the top to go to the Participants settings.
![]()
Invite participants to meeting
To ask someone who was invited to join the meeting, select the participants’ name > More options > Ask to join.
You can also type a person’s name or phone number in the search box to add someone who was not previously invited. 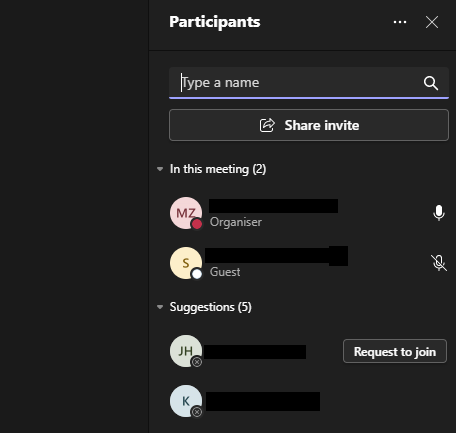
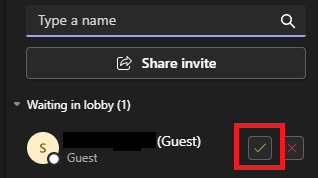
Admit people from lobby
To Admit people that are in the Lobby: click on the Accept icon.
Lock a meeting for additional joins
You can lock the meeting for new participants while in the meeting. To do so, click on the 3 dots ![]() next to Participants and select Lock the meeting.
next to Participants and select Lock the meeting.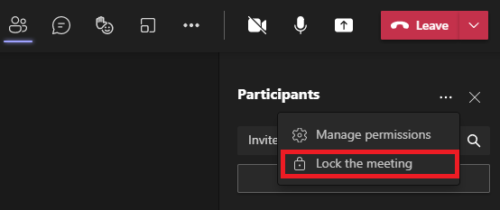
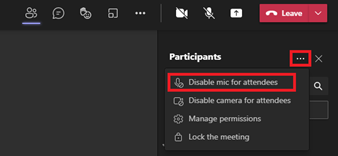
Mute attendees
The organizer and presenters can disable the microphone for all attendees. The attendee can then only unmute when the presenter has allowed the microphone again. To disable all participants’ microphones:
- Click on the 3 dots
 next to Participants.
 - Select Disable mic for attendees.
Similarly, you can mute a single participant by clicking on the 3 dots ![]() next the name of the attendee and selecting Mute participant.
next the name of the attendee and selecting Mute participant.
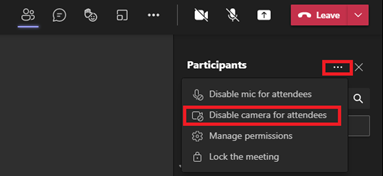
Disable camera for attendees
The organizer and presenters can disable the camera for all attendees. The attendee can only enable the camera when the presenter has allowed the camera again. To disable all participants’ cameras:
- Click on 3 dots next to Participants.
- Select Disable camera for attendees.
Similarly, you can mute a single participant by clicking on 3 dots ![]() next the name of the attende and selecting Disable camera.
next the name of the attende and selecting Disable camera.
There are several ways in teams to help engage your public. You can let attendees raise their hands, have people working together on a whiteboard, organize polls and divide the group in Breakout rooms.
Attendees raising hands
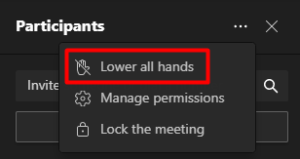
Attendees are able to raise their hands. This allows them to bring attention upon them. However, as an organizer you are able to lower all the hands at the same time.
- Click on People to go to the Participant settings.
- Click on the 3 dots.
- Select Lower all hands.

Whiteboard
You can share a whiteboard during a meeting, by clicking Share Content ![]() and selecting Microsoft Whiteboard. You can choose whether you want to be the only one to edit, or if you want everyone to be able to edit.
and selecting Microsoft Whiteboard. You can choose whether you want to be the only one to edit, or if you want everyone to be able to edit.
![]()
Sharing content
To share content in a meeting, select Share content ![]() in your meeting controls. Then, choose to present your entire desktop, a window, a PowerPoint file, or a whiteboard.
in your meeting controls. Then, choose to present your entire desktop, a window, a PowerPoint file, or a whiteboard.
Accessing polls during a meeting
When you have joined the meeting, you can access the polls by clicking Polls in the bar in the top of your meeting screen.
Breakout rooms
Setting up breakout rooms during your online lectures allows for small group discussions, evaluations, and collaboration. You can drop into the breakout rooms to offer support and answer questions. Set out a clear plan, time frame, and instructions for the students before initiating the breakout rooms.
Go to a detailed description of how how to create breakout rooms.
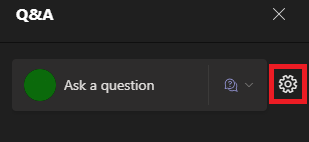
Q&A lets you manage questions from attendees as an organizer. To enable Q&A, go to More Actions > Meeting Options > Enable Q&A. The Q&A icon will appear on the top.
In the settings, you can enable replies, anonymous posts, and more. Responses to questions are threaded in a conversation with the original question.
You can choose to have a moderated or unmoderated Q&A. You can organise a moderated Q&A by checking Moderate attendee conversations. If you have turned on moderation, the Q&A pane will have three Tabs: New, Published and Dismissed. Some remarks:
- In review: All new questions will appear in the In review tab. Any moderator (organizer or co-organizer) can review and either publish or dismiss questions.
- Published: The question is visible to all attendees.
- Dismissed: Dismissed questions can be published later, if desired.
During your meeting, you can customize the way you see the content and participants. In your meeting settings, you can select multiple options:
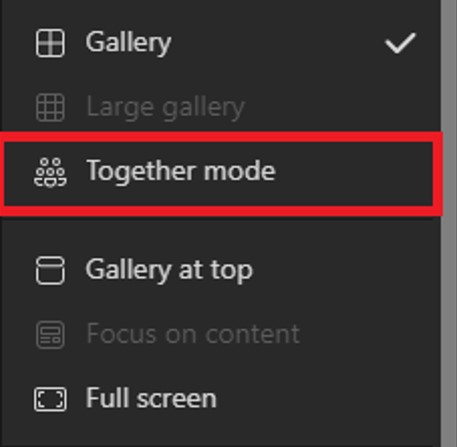
- Together mode: By using Together mode, you add all the participants to a class background, as if they were sitting in a real classroom. To enable Together mode, click More at the top of your meeting screen and click Together mode. This will open the selection menu with the various scenes and their capacity.
 The option Select Together Mode for everyone is not selected by default. Once selected and after clicking on Apply, the new scene will be selected and the Teams meeting view of all participants will get changed to Together Mode. New meeting participants will join in Together Mode view directly (they are able to switch their own view away from Together Mode).
You will also have the option to Assign seats. With this option you are able to place participants in assigned seats by dragging the participant to the seat you want the participant to be assigned to. Click on Assign when done.
To relocate or alter the scene, go to Change scene in the bottom left corner. - Gallery view: when joining a meeting, this view is automatically enabled. All the participants will be shown in a grid. If there are too many people on the screen, it will not show all participants. By clicking More and subsequently Gallery at top, the gallery will be compressed at the top of your meeting screen. If there are 10 people or more in your meeting, you can click More and then Large Gallery. This will create a gallery where more participants will be added to the view in a larger grid.
- Spotlight/Pin participant: You can spotlight or pin a participant by clicking the three dots under the participant, followed by clicking Pin for me or Spotlight for everyone, depending on whether you want to be the only one to zoom in, or if you want the whole meeting to zoom in on a single participant. You can also spotlight your own video by selecting Show Participants, right-clicking on your name and then selecting Spotlight.
- Focus on content: When sharing a presentation during a meeting, you can click More in the top of your meeting screen, followed by Focus on content to zoom in to only the content you are sharing. If you are not familiar with sharing a presentation, visit this page.
- Fullscreen: If you want to go full screen during your meeting, click More at the top of your meeting page, followed by Full screen.
Sharing your screen
To share content in a meeting, click Share content ![]() on top, then choose to present your entire desktop or a window. If you share your screen or a window that you have open, you can choose to include system audio to share the audio of your computer.
on top, then choose to present your entire desktop or a window. If you share your screen or a window that you have open, you can choose to include system audio to share the audio of your computer.
Sharing a Whiteboard
You can share a whiteboard during a meeting by clicking Share Content ![]() and selecting Microsoft Whiteboard. You can choose whether you want to be the only one to edit, or if you want everyone to be able to edit. Sharing a Whiteboard will not be recorded.
and selecting Microsoft Whiteboard. You can choose whether you want to be the only one to edit, or if you want everyone to be able to edit. Sharing a Whiteboard will not be recorded.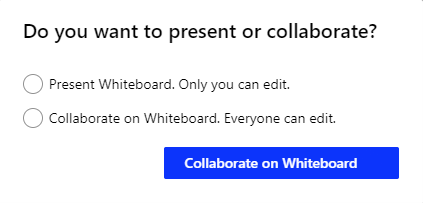
On this Whiteboard, you can add Notes, Text, Documents and more. You can use this Whiteboard as you would use a physical whiteboard, for example by working out math problems or making mind maps. Microsoft Whiteboard also provides handy templates for a lot of different diagrams and such which you can use.
You can Lock an item to the Whiteboard by hovering over the item, clicking the three dots and clicking Lock. By doing this you make sure nobody can edit or remove your Whiteboard item.
Any users (guests, external or anonymous) in a Teams meeting can view and collaborate on the whiteboard during the meeting. They will not have continued access after the meeting ends.
Share PowerPoint slides in a meeting
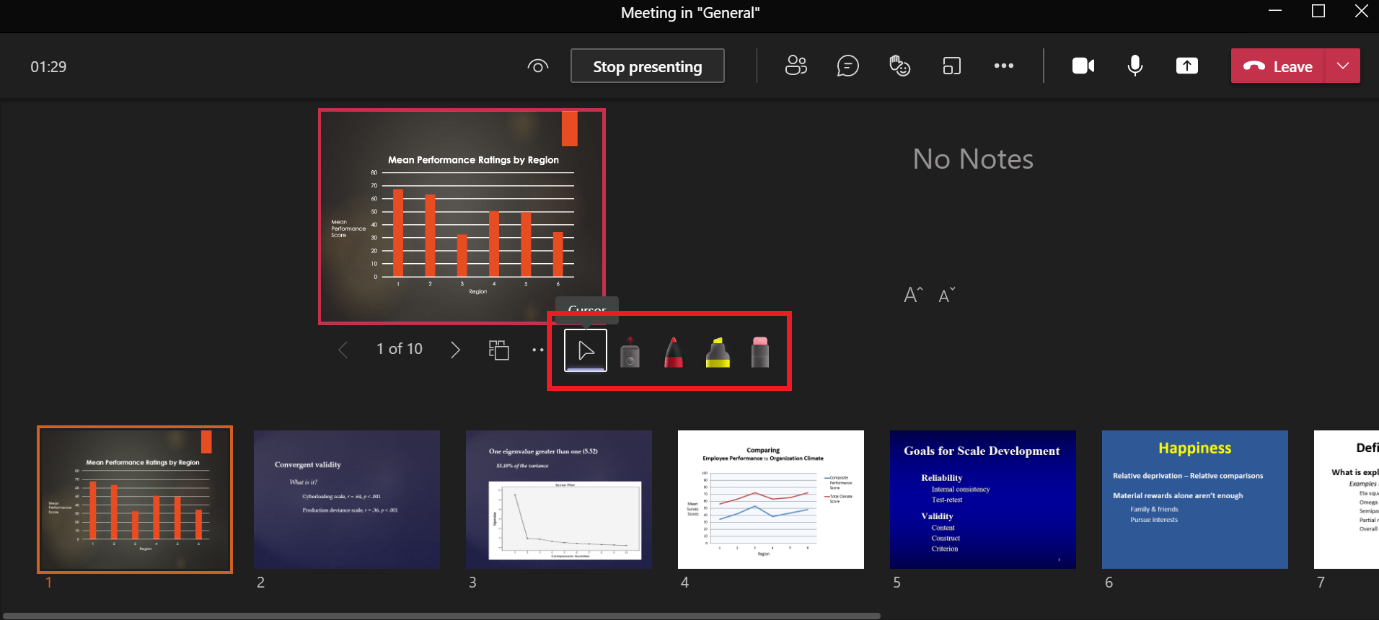
To share a PowerPoint presentation in a meeting, select Share content ![]() and select or upload the PowerPoint presentation you would like to use. After uploading a PowerPoint presentation you can use a multi-coloured laserpointer, pen, highlighter, or the regular cursor to add notes or point to specific parts of the presentation. To the right of the presentation you will see any speaker’s notes added and below the presentation you will see the slides coming up next.
and select or upload the PowerPoint presentation you would like to use. After uploading a PowerPoint presentation you can use a multi-coloured laserpointer, pen, highlighter, or the regular cursor to add notes or point to specific parts of the presentation. To the right of the presentation you will see any speaker’s notes added and below the presentation you will see the slides coming up next.
If you choose to share a PowerPoint file in a meeting, participants will get some special capabilities:
- They’ll be able to move around to different slides without interrupting the main presentation.
- They can sync their view back to the presenter’s view with one click.
Presenter mode
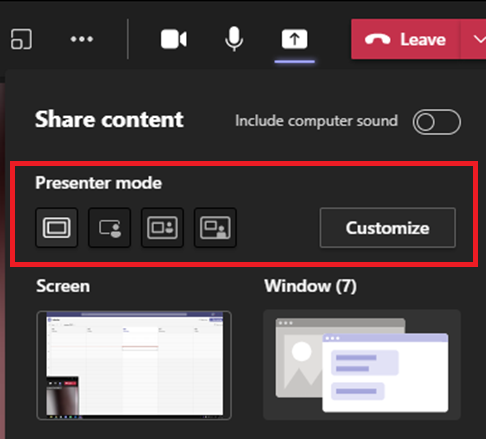
When sharing your screen, whiteboard or Powerpoint presentation you can also choose the Presenter mode which allows you to include your camera and the shared content in one view. You can choose the Presenter mode in the Share content ![]() settings. Note that this does shrink the effective size of the shared content to accommodate the camera being included, however, the presenter video can be resized and moved. Clicking on Customize allows you to choose a different background from a selection.
settings. Note that this does shrink the effective size of the shared content to accommodate the camera being included, however, the presenter video can be resized and moved. Clicking on Customize allows you to choose a different background from a selection.
To change the Presenter mode during a meeting you can navigate to the navigation bar at the top of the screen and change the mode there, using the same icons as the icons in the Share content menu.![]()
Use live captions
To enable live captions in a meeting, navigate to More options (the three vertically aligned dots), and click on Turn on Live Captions.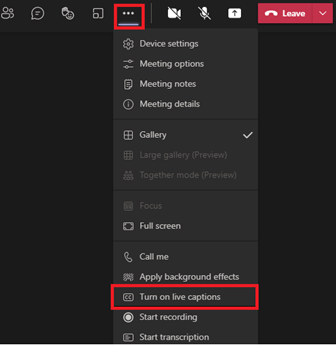
Use live transcriptions
- Go to More actions
 at the top of the screen
 - Click on Start transcription
 To change the spoken (and transcript) language, take the following steps:
- In the transcription pane, click the More Actions icon ().
- Select the language of preference.
- In the transcription pane, click the More Actions icon (
Disable/enable incoming video
The organizers are able to disable/enable incoming videos. You cannot turn on their camera. However, you determine whether the attendee is able to turn on the camera or not. Even if their camera is on, but you have selected the option to Turn off incoming video, you will not be able to see the participant. The participant will in this case be able to see himself.
- In your meeting select More Options.

- Here you are able to Turn off/on incoming video for the participants.

- Click on the 3 dots (1) (more options) on the menu bar at the top of the meeting and Click Start recording (2).
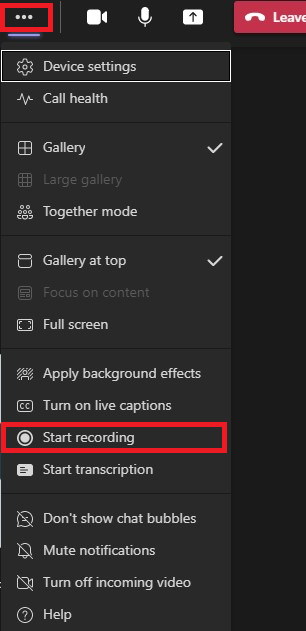
- A red recording dot will appear on the bar and everybody in the meeting will get a Notification that the recording is started.

- Audio, Video, Chat and Screen share is recorded.
- To stop the recording hover click on the 3-dots on the menu bar again and click Stop recording.
A recorded meeting is available for everyone after the meeting, with the person who recorded the meeting being the owner of the recording. Only the owner can download and/or delete the recording. After downloading the video file one can always manually upload and share the file, for instance with your team or somewhere external such as Brightspace.
After your meeting
After the Meeting, the chat stays available. The Whiteboard is not saved, so if you want to save that, you must do that before the meeting ends. The Meeting Notes are saved and are being posted in the channel automatically after the end of the meeting.
When the meeting was recorded, a recording is available for everyone after the meeting is scheduled to end. If the meeting was held in a channel, everyone in the channel can download the recording. After downloading the video file, one can always manually upload and share the file, for instance in your team or somewhere external such as Brightspace.
Breakout Rooms
You can create breakout rooms before the meeting starts. To do so, follow the following steps:
- Go to the Teams calendar and open the Scheduled meeting.
- Go to Breakout rooms in the top menu

- Click on Create rooms.
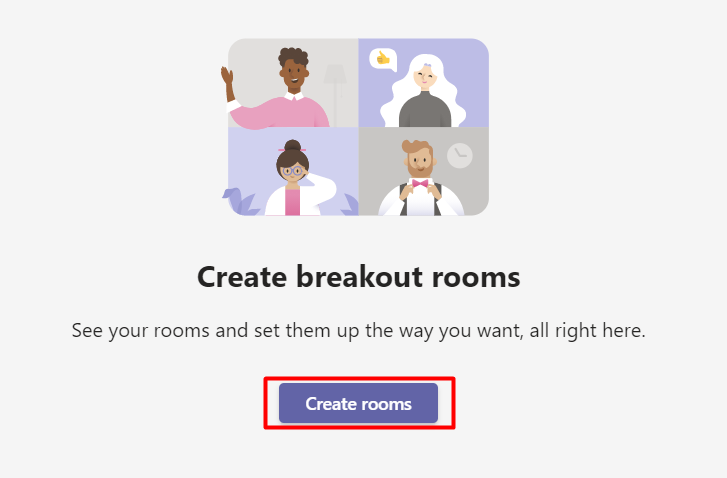
- In the Create rooms menu, you can select how many rooms you need up to 50 different rooms and select Add rooms.

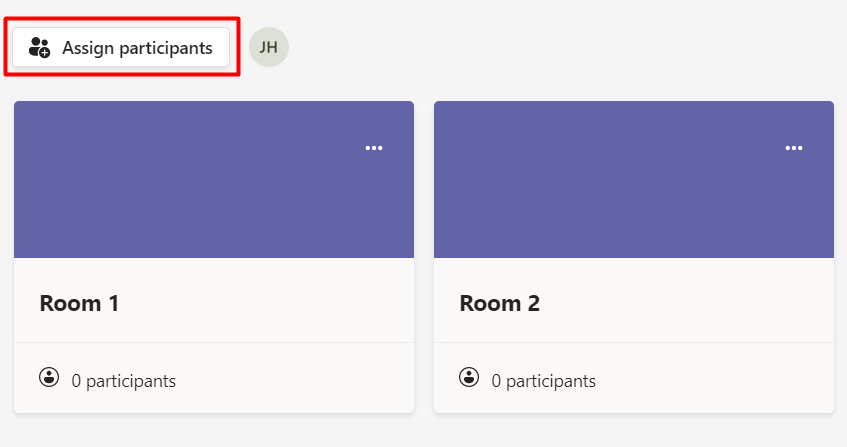
- When the desired amount of rooms is created, you can Assign participants either Automatically or Manually. Assigning automatically will assign students evenly to the rooms. Assigning manually will give you the possibility to assign students to the different rooms yourself.
It is also possible to appoint managers for each breakout room before starting your meeting, see below for more information.
To be able to create Breakout rooms, you are required to be the organiser of the meeting. If someone else organises the meeting, creating Breakout rooms is not possible for you. You can however assign people to manage the rooms before the meeting starts or during the meeting.
When the meeting starts, you will see in the top right the option to create Breakout rooms:![]()
Follow the following instructions to create the Breakout rooms:
-
- Click the Breakout rooms-icon shown in the picture above.
- You will see the following menu:
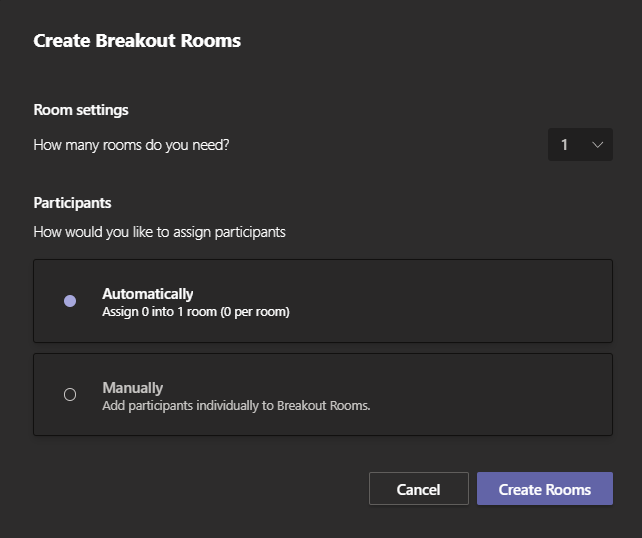
- Select the amount of Rooms you would like to create.
- Choose to assign students to the Rooms Automatically or Manually and click on Create Rooms. The rooms will then be created but not yet opened.
- If you chose Automatically, the rooms will be created and you will see the sidebar titled Breakout rooms.

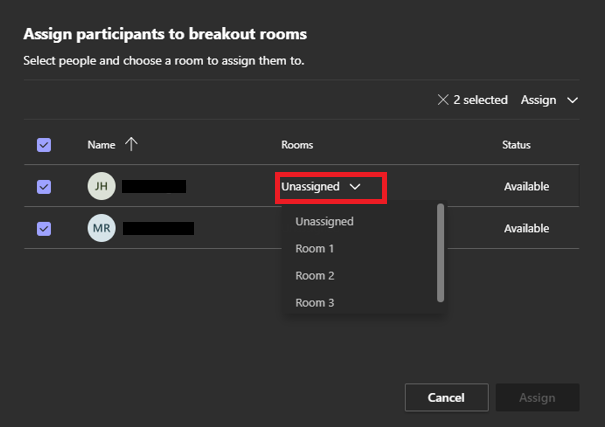
- If you chose Manually, you will be presented with the following screen that lists all participants, their room and their status. You can select multiple participants and assign them to a room by clicking the Unassigned dropdown menu. Click Assign once you have assigned all participants. This will prompt you with a window that asks for confirmation about the upcoming move of participants.
- If you chose Automatically, the rooms will be created and you will see the sidebar titled Breakout rooms.
-
- The settings can be accessed by clicking on the Gear icon in the sidebar. In the settings menu, you can Assign presenters to manage rooms, Set a time limit, choose to Automatically move participants to rooms and/or allow Participants to return to the main meeting.
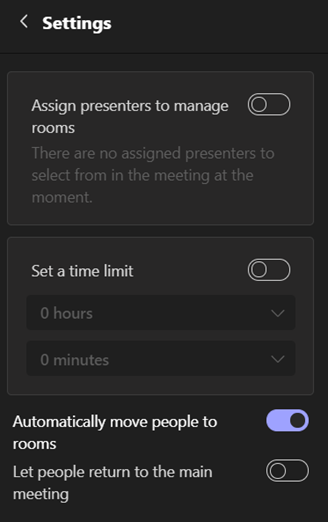 Assign presenters to manage rooms allows a meeting organizer to assign presenters as managers of the breakout rooms.
- The settings can be accessed by clicking on the Gear icon in the sidebar. In the settings menu, you can Assign presenters to manage rooms, Set a time limit, choose to Automatically move participants to rooms and/or allow Participants to return to the main meeting.
- If you want to change how you assigned the participants, click Assign participants. This will also list the unassigned participants.
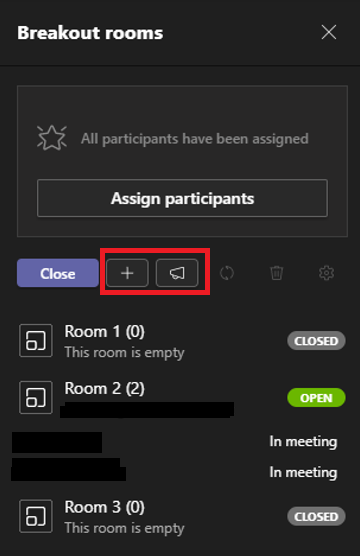
- After finalising the settings and participant assignment, click Open in the sidebar to open the rooms. The sidebar will then look as follows:

- You can generate additional rooms by clicking on the + button or create announcements to all the rooms with the Speaker button.
- During the Breakout room session, the organiser is able to access all the Rooms in the chat menu with all the Rooms materials. Here, you can see what is discussed in the chat, but also all the announcements that were made. Next to that, the Files, Meeting Notes, and Whiteboard can be reviewed.
- When the time is up, you can close the rooms by clicking on Close rooms. The students will see the following announcement: ‘This room will close in 10 seconds. You will be automatically moved back to the main meeting’.
Find more information (for example about Joining room, adding later joined students and Sending an announcement to all Breakout rooms) in the link below.
Read more about using Breakout rooms
You can also Watch this video where Breakout Rooms are explained
The workaround to work in smaller groups in Teams is simply to create several normal Meetings. There are 2 options: either you create several meetings in one Channel or you create a Channel for every Group. The latter one has the following advantages:
- Materials are easy to share – all team members have access to materials, even if they are guests.
- You don’t need to share meeting URLs – students can join in directly via the channel.
- The chat is always available for everyone.
Follow the instructions below to create break-out rooms:
- Go to the Teams-menu on the vertical navigation bar on the left and select the Class Team.
- Optionally Create a Channel for every Breakout room.
- You can choose to make the Channels either Private or Public.
When a Channel is set to Public: all users will be able to see the Channel automatically (the Channel can be made to show up first in the Channel list by selecting “Automatically show this channel in everyone’s channel list”. All meetings in Public Channels can be recorded.
When a Channel is set to Private: users will only be able to see the Channel when added by the owner, see point 3. Do note that meetings in Private Channels cannot be recorded. Also, students will have to use the meet now options to start a meeting, it is not possible to start a meeting upfront. - Make sure that you set the correct privacy right away; you cannot change the privacy settings afterwards.
- If you have a Private Channel for every break-out room; click on the 3 dots next to the Channel and select Add Member to add all students one by one.
- You can choose to make the Channels either Private or Public.
- Schedule the Main lecture and the Breakout rooms as separate meetings. For each meeting:
- Go to the Channel where you want to schedule the meeting.
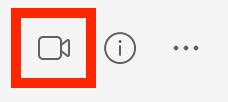
- Click on the Camera-icon at the top right.
- Type a Subject
- Click on Schedule a meeting
- Add a Title and optional details and click on Send on the top-right.
- Open the meeting again and click on Meeting options and set who may present.
- When you want to start, simply open the meeting and click on Join on the top-right. Students can also open meetings. In private channels, students should use the meet now button at the top-right.
- When the meeting is open, students see the following:
- When you want the Breakout session to start, simply ask students to go to the correct Channel and Meeting.
Tip: Instruct students to stay in the main meeting join when they join the breakout meeting. The main meeting will automatically be put on hold. When they end the breakout meeting, they return to the main meeting automatically.
You can either appoint managers before or during your meeting. To appoint managers before your meeting:
- Go to your Teams calendar and Edit the meeting invitation.
- Go to Breakout rooms and select Room settings via the Gear icon.
- Switch the Assign presenters to manage rooms toggle on
- Select Search for presenters and choose who you want to be breakout rooms managers
To appoint managers during your meeting:
- In the meeting controls, select Breakout rooms.
- Select Room settings by using the Gear icon.
- Switch the Assign presenters to manage rooms toggle on.
- If no one in the meeting is designated as a presenter, select Go to Meeting options to add presenters and choose who you want to be a room manager.
- Choose presenters from the dropdown menu.
- Select the back button < to save your changes.
To help you setting up your breakout rooms, here are some tips & tricks:
- Before: Prepare a Word-document or OneNote with prewritten text you can copy-paste to Teams chats and conversations. You can use different styles (colours for example) for different main topics like: general event info, schedule posts and important reminders.
- Before: Upload documents to the Breakout Channels.
For reference or for students to work on simultaneously. - During: Ask the students to turn on ‘Do not disturb’-mode.
The less notifications they get during the event the better they can focus. - During: Activate the chat for the Breakout meetings. Instruct students to get in touch with you in the meeting chat if they have issues using an @-mention.
- During: Visit different rooms when starting the breakout part so you can help students who have issues.
- During: Let students know that the main meeting chat is used for the support, so they can re-join if they have issues.
FAQ
Unfortunately, it is currently not possible to integrate MyTimetables with Teams.