*An instructional video is also available for this topic. Scroll down if you wish to watch the video. *
You can upload almost any file format to Brightspace, including PDFs, PowerPoint lecture slides and programming language source code files.
There are three ways to upload files to Brightspace, so choose the option you feel most comfortable with. Click on the + to read more about each.
When uploading files, the file name may not contain:
- more than 128 characters
- illegal characters, such as: \ / : * ? ” < > | ~ # % & + { } –
Uploading files that do contain one of the above will result in an error while uploading or trying to access the file.
The quickest and simplest way to upload one or multiple files simultaneously is to drag and drop them into the content area directly where you would like them. You can do this by dragging files directly from your Windows Explorer window, or your Finder window if you are on a Mac, to your Brightspace course page.
As the files are dropped into the place, they will upload and a progress meter is shown for each file. The files are uploaded in the order that you dragged them. However, if the order is not quite as you would like them, you can rearrange the files after they have been uploaded. This is probably the easiest and simplest way to do it.
After uploading, you can individually adjust the settings for each of these files. The most convenient way to do that, if you have uploaded multiple files, is to use the Bulk Edit button.

When you are finished, click Done Editing.
- Click on Upload/Create and then click on Upload Files.
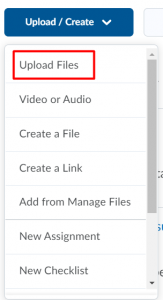 In this window, click My Computer to drag and drop your files, or click the Upload button, and select them from your computer. A progress bar is shown as each file uploads. The location of the saved files is also indicated here.
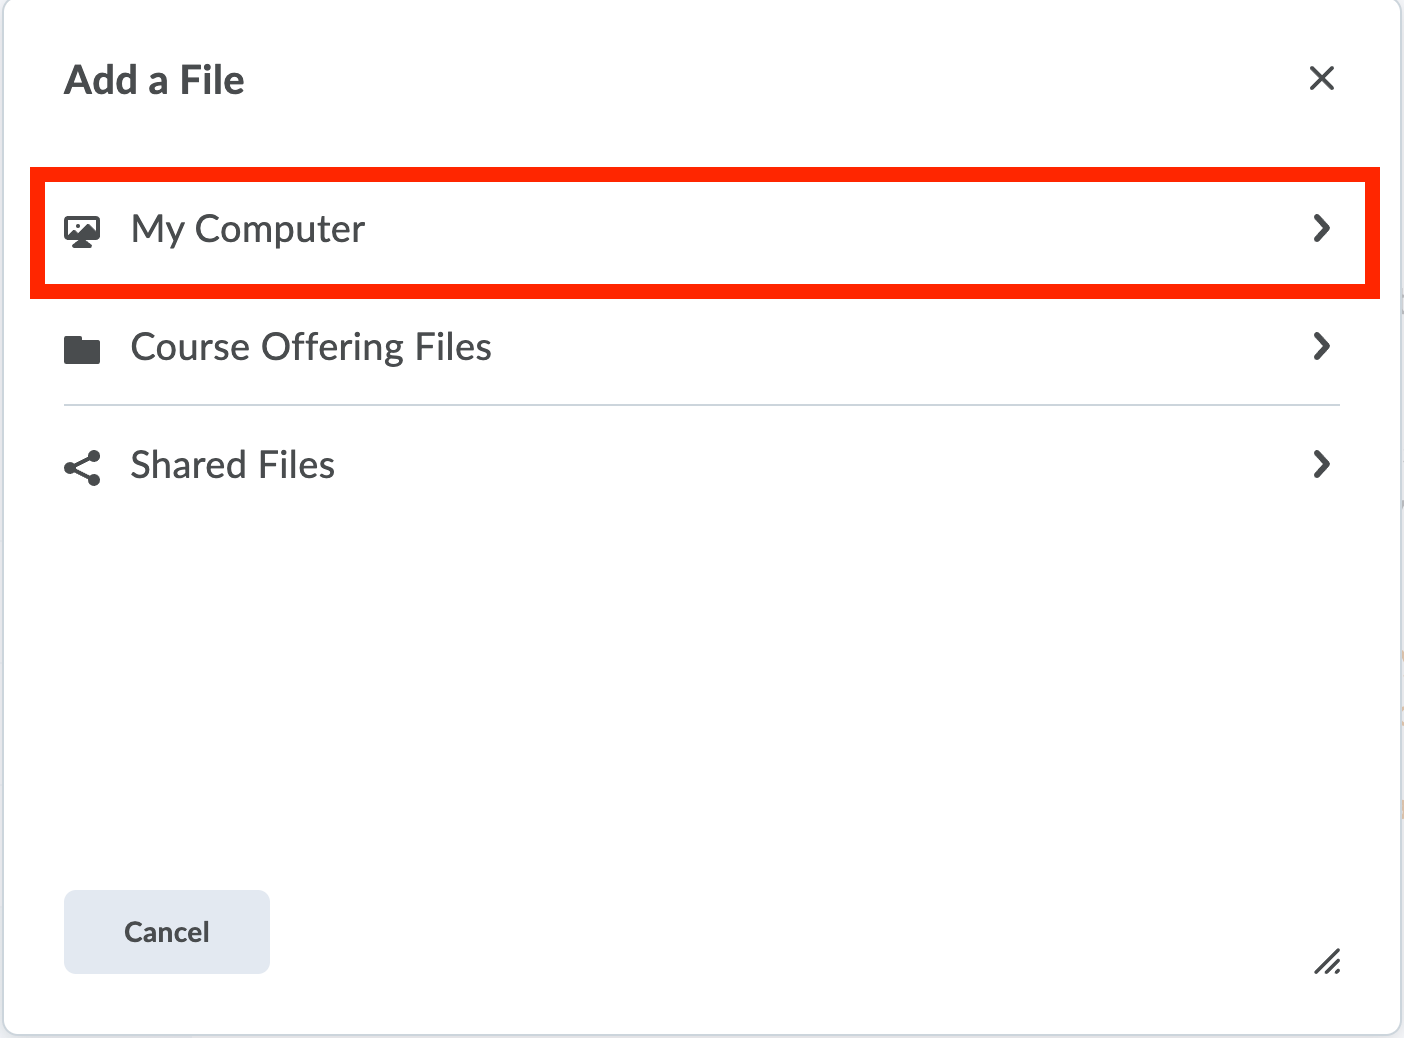
- When you have finished uploading the files, click on Add.
As your course progresses, you will be adding files, and sometimes you may want to reuse a file that you have already uploaded. So to add that file to make it visible to students now:
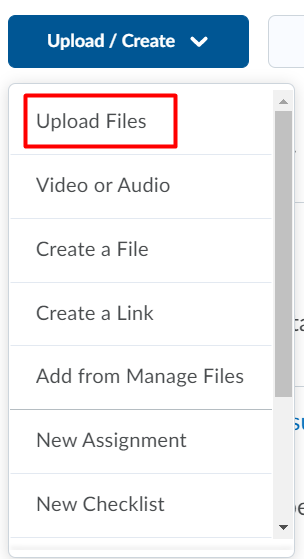
- Click on Upload/Create and then Upload Files;
- Once there, click on Course Offering Files.
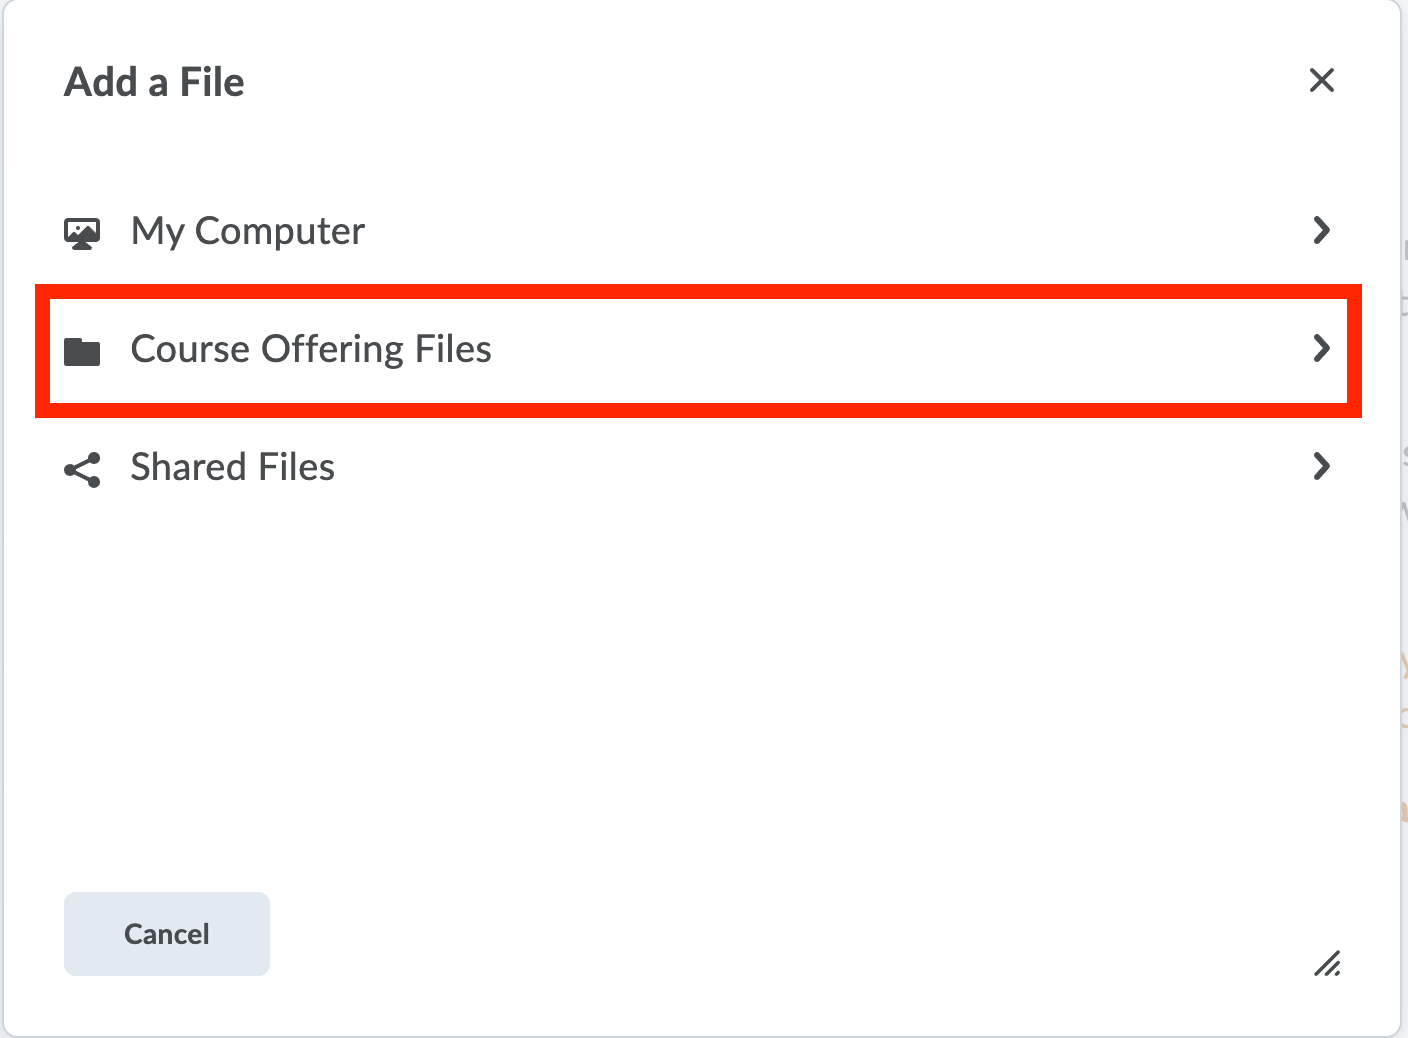
- Select the correct file from the shown selection, based on files you have uploaded at a prior time. After selecting a file, click on Add. The file will now appear in the content area.
A handy shortcut to get to the Course Offering Files, is to click on Upload/Create and then on Add from Managed Files. This takes you automatically to the “Course Offering Files” sections.
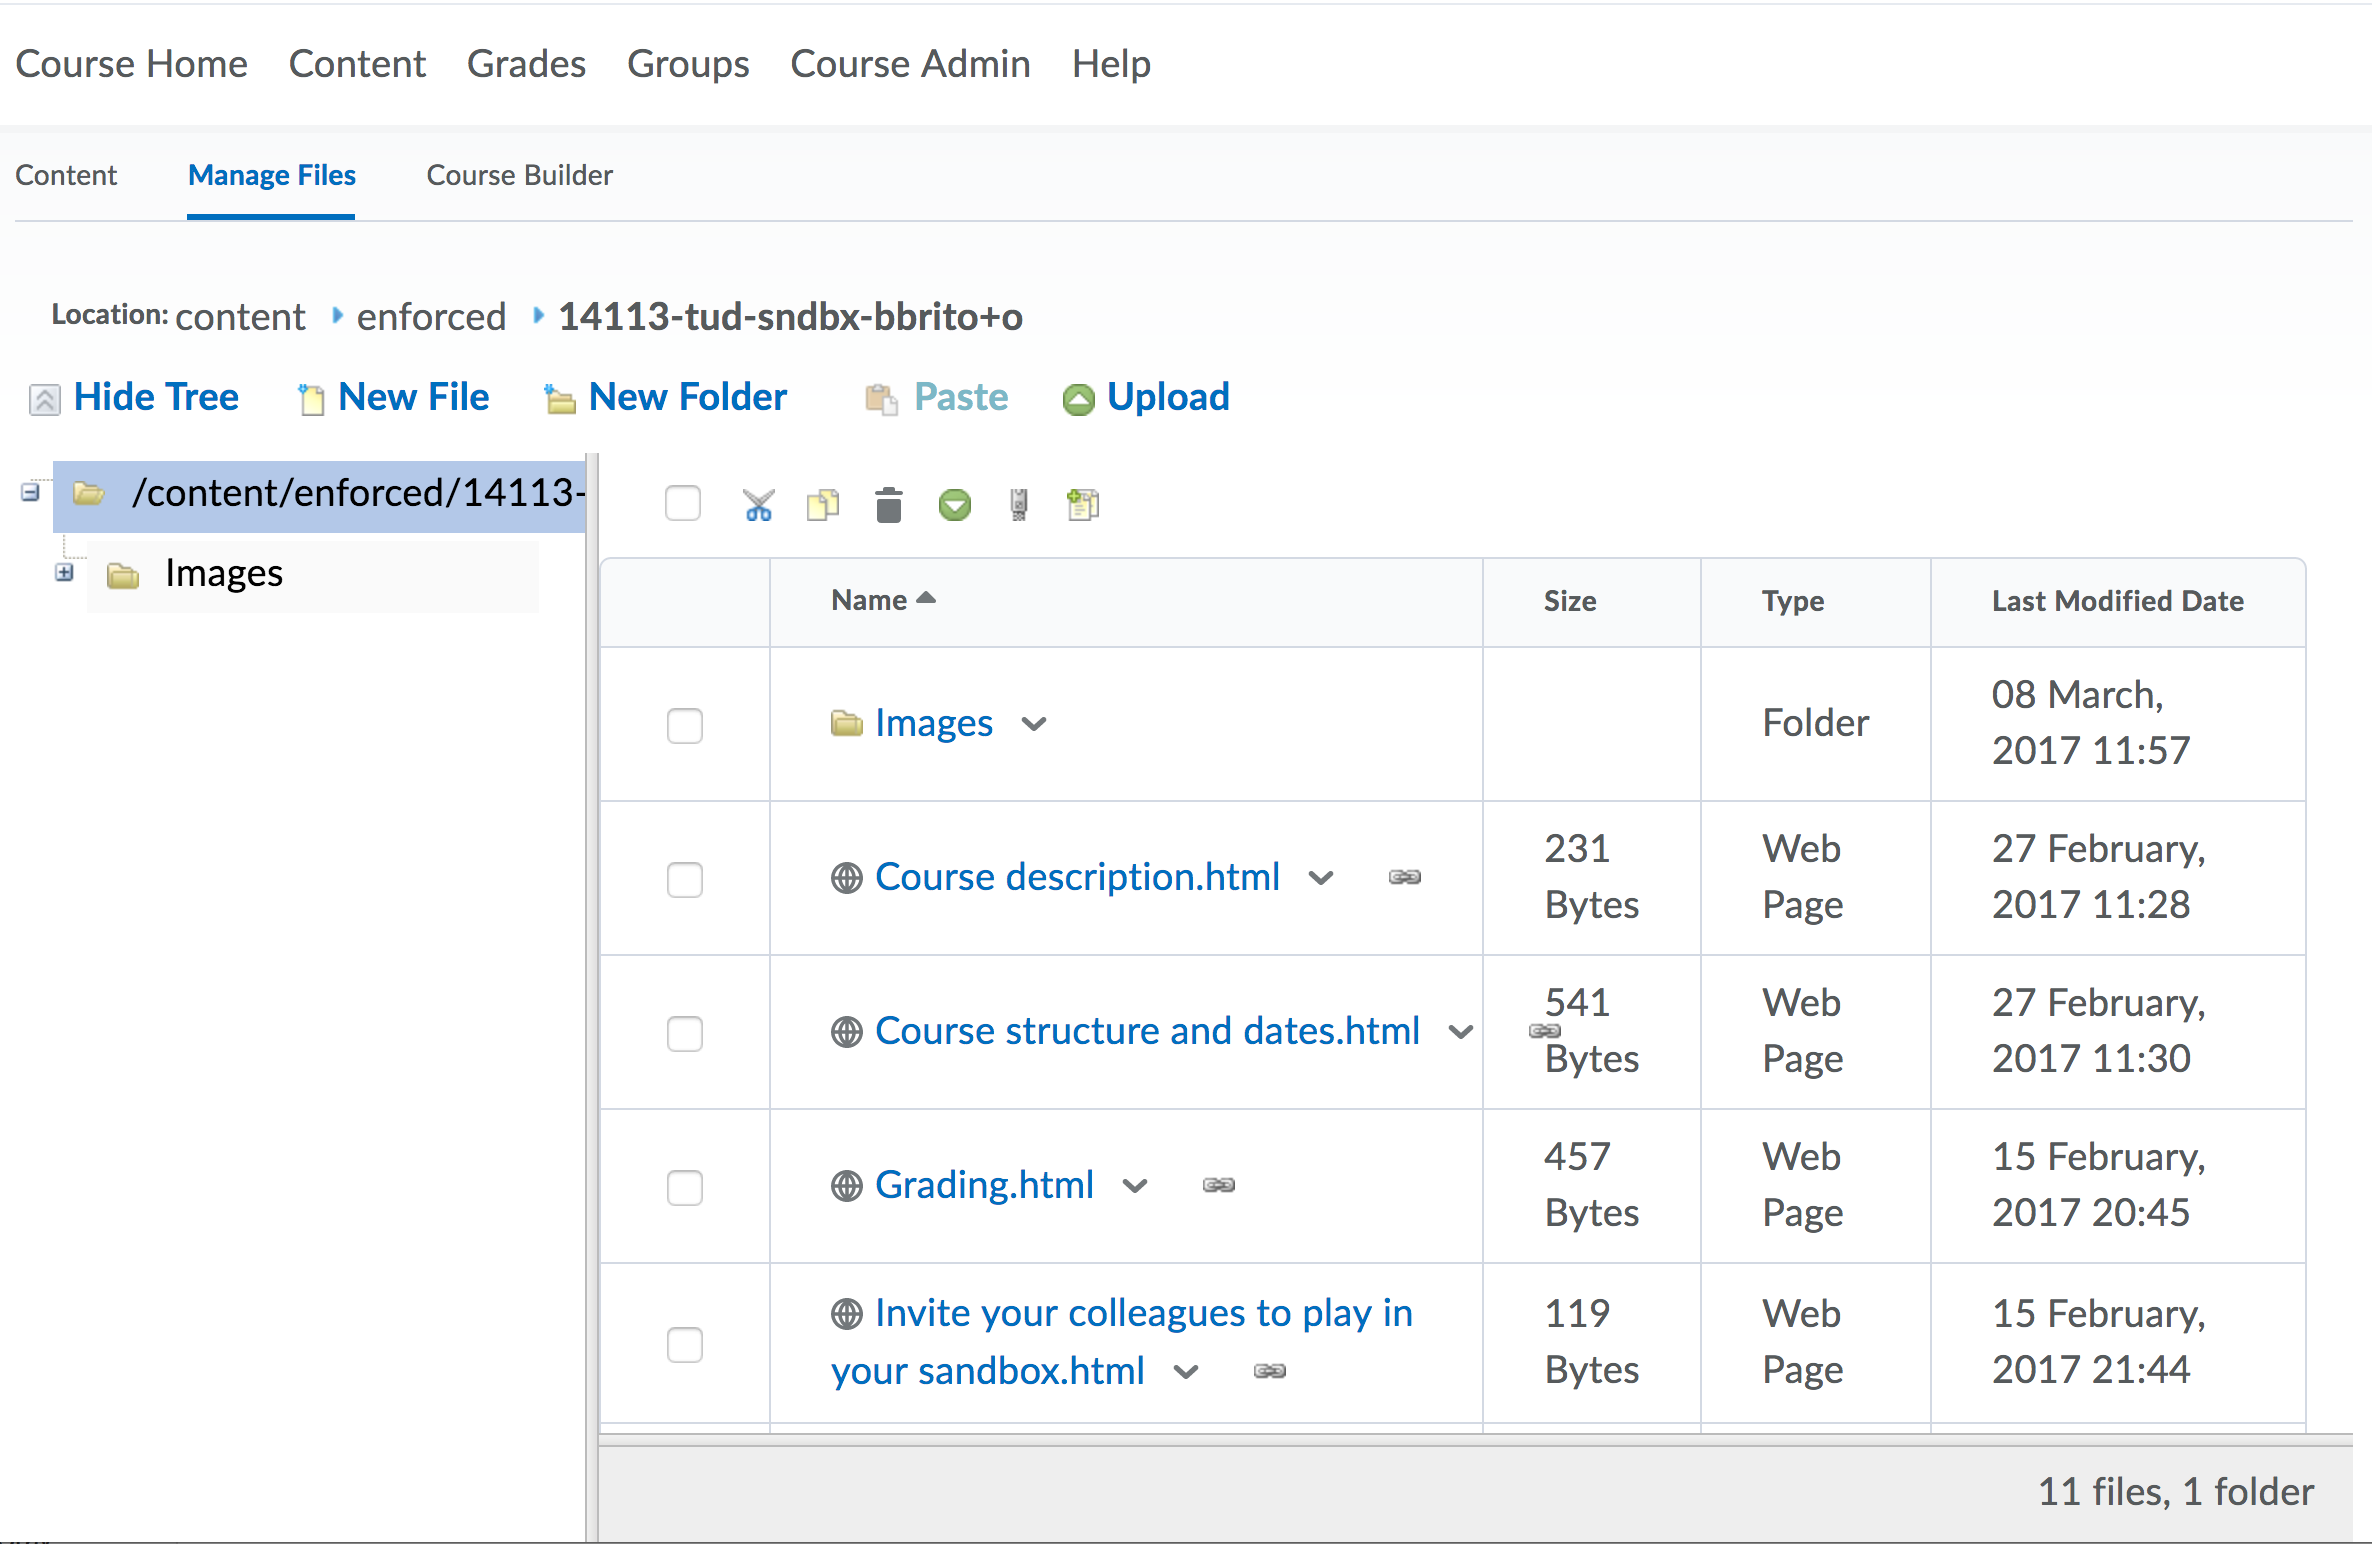
As you can see, Manage Files is a fairly important and useful feature in the Brightspace environment. To access this:
- Click on Course Admin and then Manage Files (under the Site Resources section).
- Here you can click on Upload to upload multiple files, or you can click on New File to create a single new file in the course folder.
You can use this area to manage files, to re-categorize them, move them around. Any links to existing course content are automatically updated, if needed.
How to use this to improve your course
- Explore the different ways that you can easily upload and manage your files.
- Make files available in your course for students to download.
- Share lecture slides with your students.