Uploading content, such as .pdf or .doc files, is not the only way to share information on Brightspace. You can also Create a File, which will be displayed as an HTML page embedded in Brightspace.
Student surveys have shown that students prefer these HTML pages over .pdf, as rendering of .pdf files is not always flawless. Furthermore, HTML files perform better regarding scaling, are searchable in Brightspace, are optimized for various devices, including readibility standards and help you keep the content in your course well formatted.
In order to offer your course content in a uniform manner, we strongly advise the use of File Templates, see the option below (Creating a Page using a File Template). New, more simple versions are available for 2018-2019. Should you wish to use the templates from 2017-2018, please the option see below – Previous template versions.
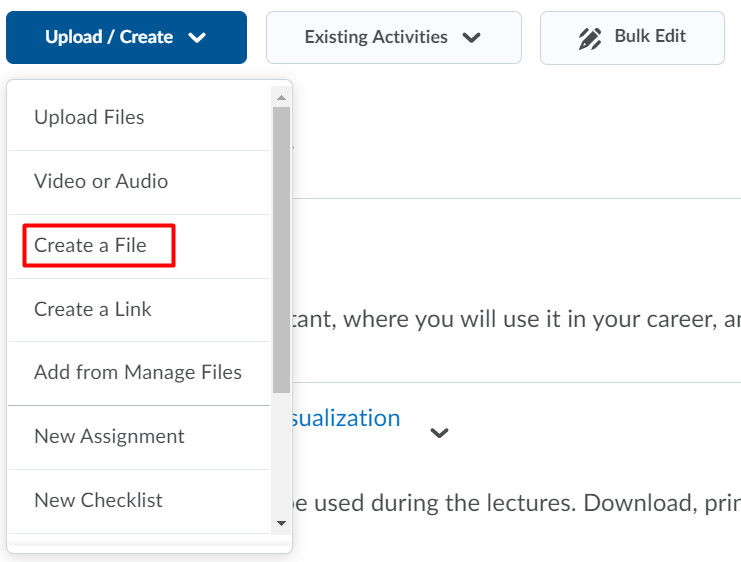
You can easily use templates by:
- Click Upload/Create and then Create a file, as shown below.
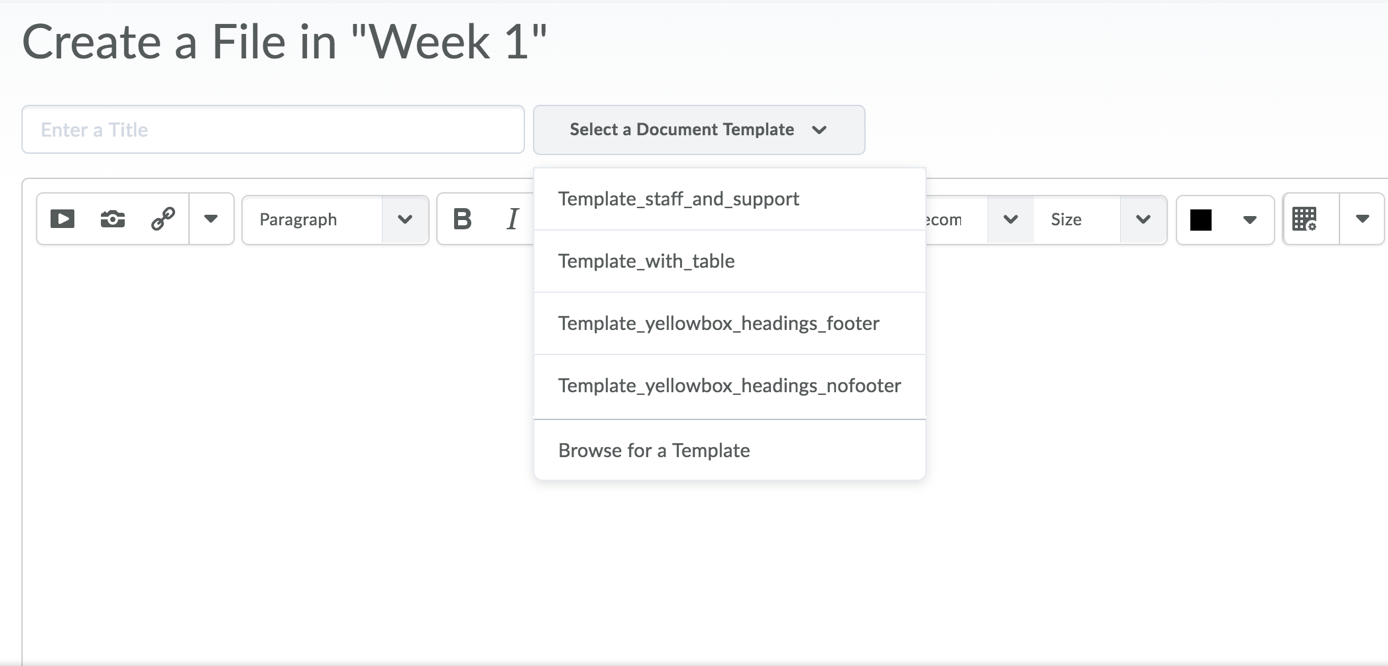
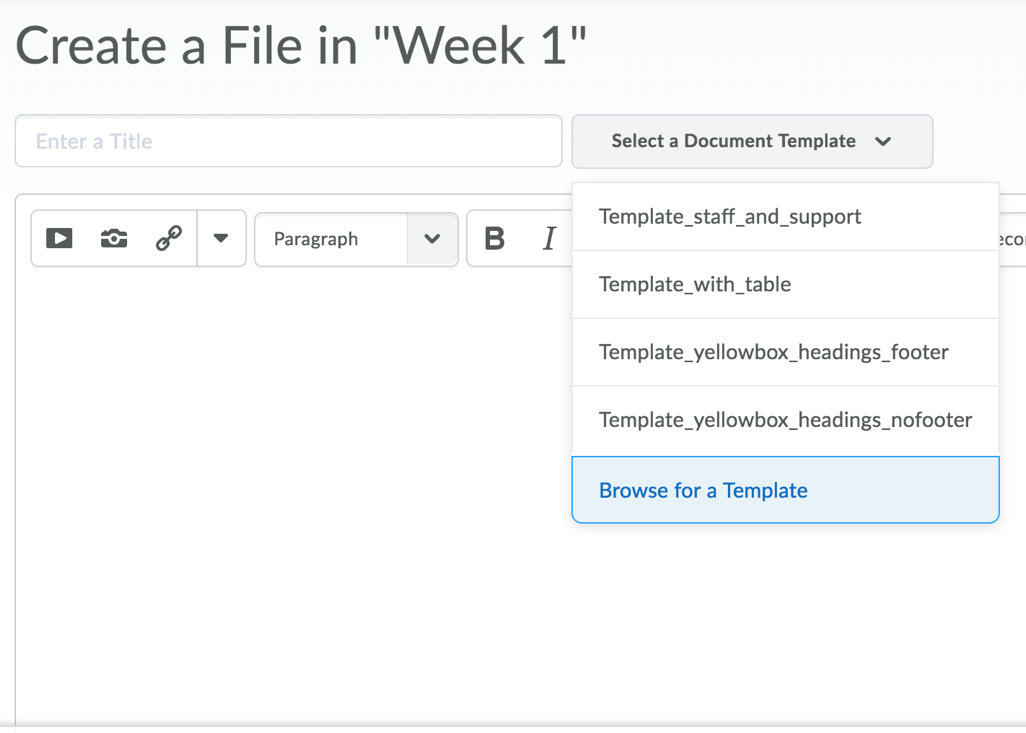
- Click on Select a Document Template and choose the template that suits your needs.
For the academic year 2018-2019 the File Templates were revised and more simple versions were made available. If you wish to use the templates from 2017-2018, here is how:
- Download the desired template by right clicking and choosing Save link as...
- Content-Introduction
- CourseInformation-CourseStructureandDates
- FileExample2CourseInformation-LearningObjectives
- CourseInformation-ResourcesandTools
- CourseInformation-StaffandSupport
- CourseInformation-StaffandSupportIO
- FileExample1
- FileExample2
- Templates (All of the above zip file)
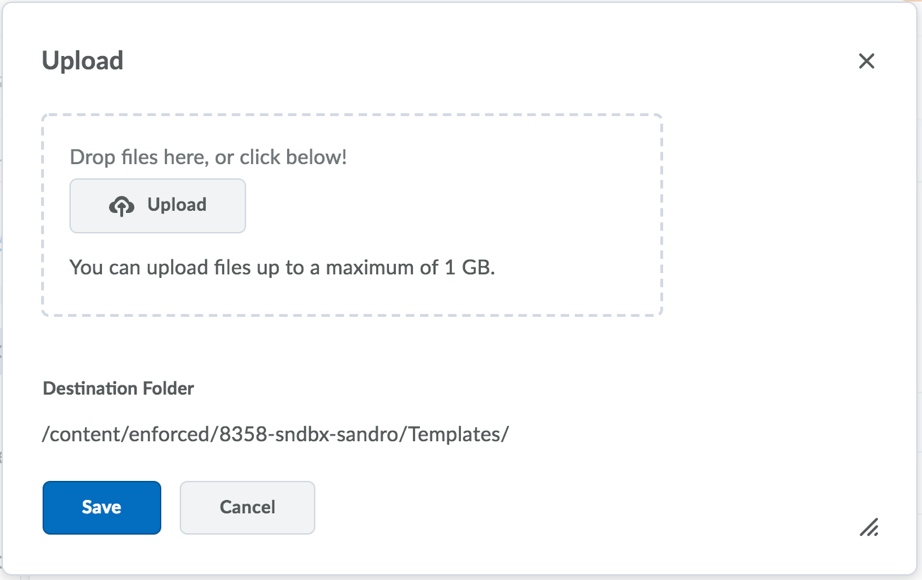
- Upload the template to your course by accessing Course Admin in the navigation bar and then File Manager
- Click Upload and drag and drop the template(s) downloaded previously. We advise first creating a separate folder named ‘Templates’.
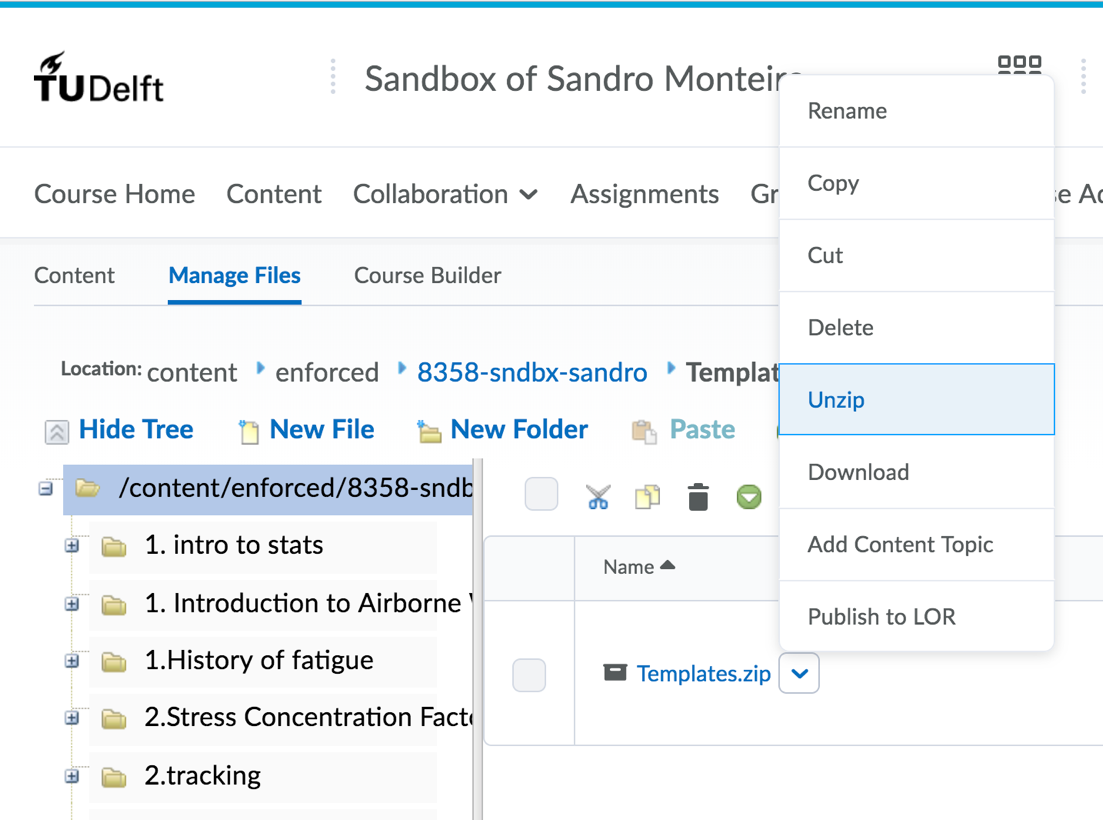
 If you downloaded the zip file containing all of the templates, you can unzip it after you upload it (at the file drop down options):
a. Go to Course Admin and then to Manage Files
b. Upload the zip file downloaded previously and then go to Unzip
- Use the same instructions for selecting File Templates, but instead of choosing one of the predefined File Templates, choose Browse for a Template at the bottom of the list.
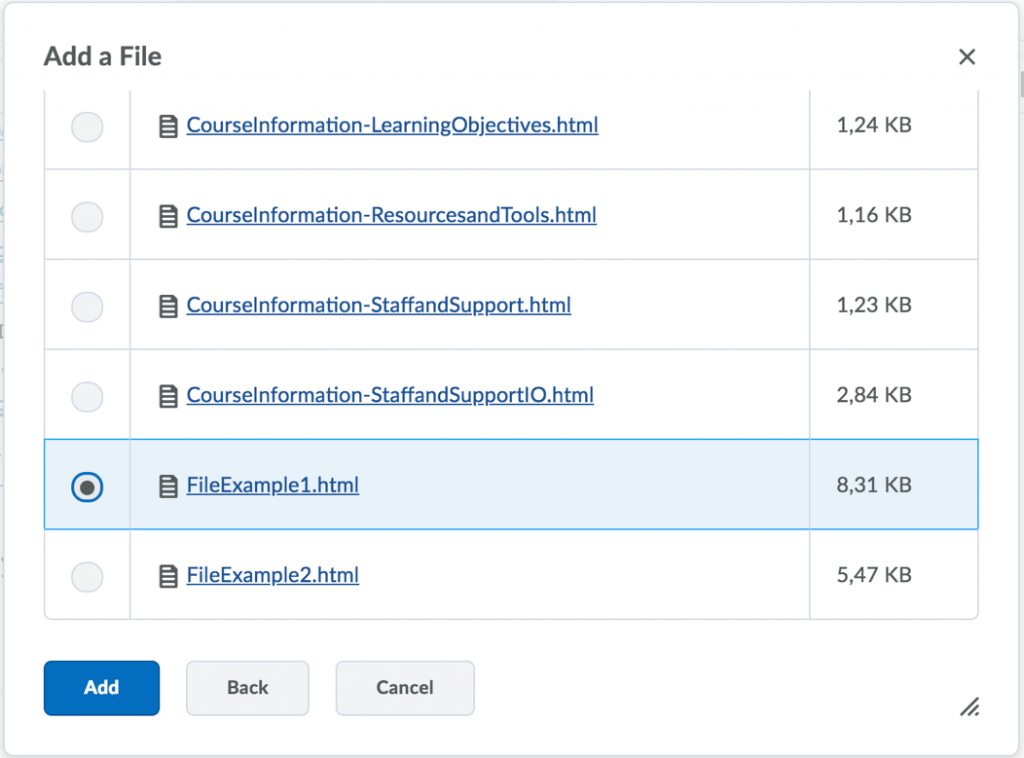
- Add a File by selecting Course Offering Files

- Select the HTML file you wish to Add
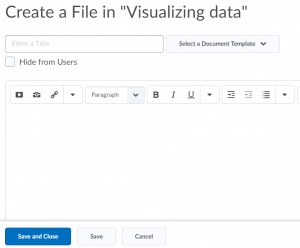
 The file is then loaded and you can adapt it according to your needs.
 - Make sure you click Save and Close or Save in order to commit the changes you have made. If you do not want the changes to be visible for students, you need to check the ‘Hide from Users’ option.