*An instructional video is also available at the end of each section for this topic. Scroll down in each section if you wish to watch the video. *
When making changes to your course website it is possible to view your course as a student to see what the student will see when they view your course. This can be done in two steps:
1. Click on your name in the top right corner.
2. Then click on View as Student.
This takes you back to the homepage of the course. You will then need to click on Content to see the course contents from a student’s view. Notice that all the editing buttons that you have as instructor or TA disappear.
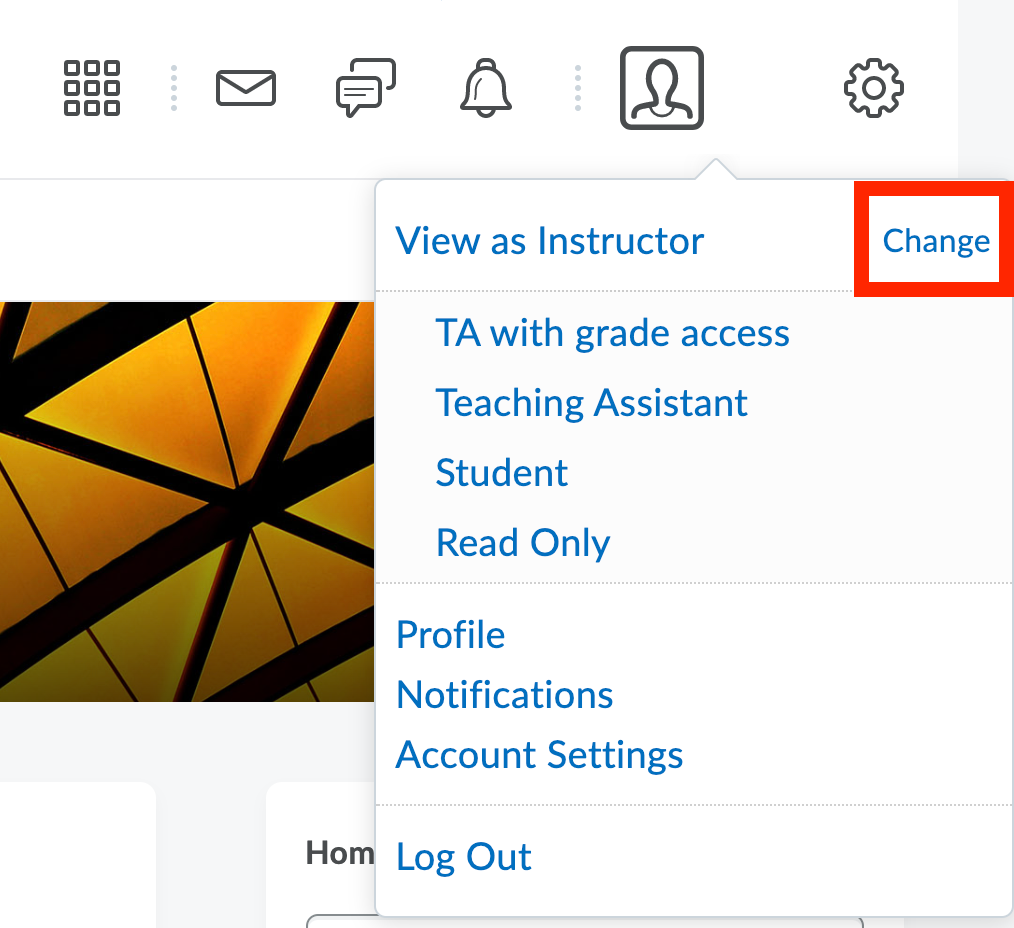
When you are finished viewing as student, you can revert to editing by clicking on your name and then clicking the cross to exit student view. To view the course with a different role, e.g. TA, click Change next to your name as shown in the image and choose the role you are interested in.
You can also look at the Gradebook from the student’s perspective, to ensure that you are giving all the information to help them understand how their grade is calculated.
Hidden view VS Visible view with a date in the future
- Items marked as hidden in your instructor view are not visible in the student view at all. Students do not know that they exist. The “Hidden from Users” setting applies not only to content, but also to modules and submodules. The content within a Hidden module is not displayed to students, either.
- If you set a piece of content to be visible, but change the release date to the future, students will see the name of the content, but they cannot access it yet. This can be used positively: this gives learners a hint or preview of what is to come, without the actual content being revealed.
How to use this to improve your course
- While viewing your course in student mode you can try out various student actions, such as uploading assignments. But these actions are temporary.

